Installing and Configuring DreamFactory
In this chapter you’ll learn how to install and configure DreamFactory. A number of installation solutions are available, including GitHub repository, point-and-click installers, Docker container, and cloud-specific installers. Be sure to carefully read through the set of options before making a decision, because some might be more suitable than others for your particular situation.
Choosing a DreamFactory Version
Regardless of whether you’d like to spin up a DreamFactory instance on your local laptop, within a cloud environment such as AWS or Google Cloud, or Docker, we have a ready-made solution for you!
The DreamFactory GitHub Repository
Cloning DreamFactory’s OSS repository has long been by far the most popular way to access the software. To clone the repository you’ll need to install a Git client on your local machine or a server, at which point you can clone it using the following command:
$ git clone https://github.com/dreamfactorysoftware/dreamfactory/
DreamFactory is built atop the very popular Laravel Framework, which is in turn built atop PHP. This means DreamFactory is almost ubiquitously supported in all hosting environments; you’ll just need to make sure your hosting environment is running PHP 7.2 or greater, a recent version of a web server such as Apache or NGINX, access to one of four databases for storing configuration data (MySQL/MariaDB, PostgreSQL, SQLite, and MS SQL Server are supported), and that you have adequate permissions to install a few requisite PHP extensions. You can learn more about the required software and extensions via our wiki:
https://wiki.dreamfactory.com/DreamFactory/Installation#GitHub
Docker
Our Docker container is increasingly popular, and includes everything you need to run DreamFactory including Ubuntu 16.04, PHP 7.1, and the NGINX web server. It also includes all of the required PHP extensions, meaning you should be able to begin experimenting with the latest DreamFactory version as quickly as you can spin up the container! To learn more about the container, head over to our df-docker repository:
https://github.com/dreamfactorysoftware/df-docker
Installing and Configuring DreamFactory from Source
If you’ve cloned the GitHub repository, you’ll need to carry out a few additional steps before launching your DreamFactory instance. The first step involves ensuring your server requirements have been met. Let’s tackle those first, followed by an overview of software installation.
Configuring Your Server
This guide is under heavy development, and certain parts are incomplete. We suggest reading through the current installation documentation,
available here.
Server configuration is going to vary according to your operating system. To ensure the instructions are as specific and straightforward as possible, we’ve broken them out into subchapters:
If you plan on using PHP in conjunction with one of the following databases, please review the pertinent subchapters presented below:
If you plan on running scheduled tasks, please make sure that crond is installed and running on your OS. You can check with systemctl status crond, start with systemctl start crond, and enable it (so it starts up on boot) with systemctl enable crond. If you do not have it installed, you can do so from your package manager (cronie on RHEL systems and cron on debian systems).
Server Hardware Requirements
DreamFactory is surprisingly performant even under minimally provisioned servers, you’ll want to install DreamFactory on a 64-bit server with at least 4GB RAM. If you’re planning on hosting the system database on the same server as DreamFactory, then we recommend at least 8GB RAM. This server will house not only the operating system and DreamFactory, but also a web server such as Nginx (recommended) or Apache, and PHP-FPM. Keep in mind these are the minimum RAM requirements; many customers can and do run DreamFactory in far larger production environments.
Under heavier loads you’ll want to load balance DreamFactory across multiple servers, and take advantage of a shared caching (Redis or Memcached are typically used) and database layer (which houses the system database).
| Cloud Environment |
Minimum Server |
| AWS |
t2.large |
| Azure |
D2 v3 |
| Oracle Cloud |
VM.Standard.E2.1 |
| Digital Ocean |
Standard 8/160/5 |
| Google Cloud |
n1-standard-2 |
Although DreamFactory can run on Windows Server and IIS, we recommend instead using a popular Linux distribution such as Ubuntu, Debian, or CentOS in order to take advantage of our automated installers targeting those specific operating systems.
Prior to launching your project, we recommend thoroughly testing your APIs under estimated production loads using a tool such as loader.io.
Installing DreamFactory
The first step involves installing the required PHP packages using Composer:
$ composer install --no-dev
The --no-dev option tells Composer to not install the development-specific dependencies. These development dependencies are used by our OSS community and internal developers alike to assist in software development. You can review the list of both required and developmental dependencies by opening the composer.json file found in the project’s root directory.
If you receive an error regarding Your requirements could not be resolved to an installable set of packages, and you don’t require MongoDB, then you can quickly hurdle the issue by additionally supplying the --ignore-platform-reqs option when running Composer.
With the packages installed, you’ll next need to configure your system database. This database will house various configuration settings associated with your instance. DreamFactory supports four databases for this purpose, including Microsoft SQL Server, MySQL, PostgreSQL, and SQLite. Keep in mind you’ll need to first create this database along with an account DreamFactory will use to connect to it.
Example: PostgreSQL
Once you have a PostgreSQL instance setup and the server running, you will need to create a user (“Role”) for DreamFactory to login with, and a database to use. The simplest was to do so is to first switch over to the postgres user that will automatically have been created upon installation of PostgresSQL:
sudo -i -u postgres
Now open up psql and create your new Role and Database for DreamFactory to use. (Note that If you are connecting remotely to your database server you can use psql -h <host> -U <ASuperUser> -p 5432 to directly get into psql):
CREATE ROLE dfadmin LOGIN PASSWORD 'pghwosfg78';
CREATE DATABASE dreamfactory
Note The user must, at the very least, have LOGIN privileges
Finally, its best to double check that PostgreSQL is setup to accept IPv6 connections using md5 (i.e password) login. Go to your pg_hba.conf file and check (or amend as necessary) you have something along the lines of the following:
host all all ::1/128 md5
You’ll configure the system database by running a terminal command and answering a few prompts about your database configuration.
To do so, run the following command from inside your project’s root directory:
$ php artisan df:env
**************************************************
* Configuring DreamFactory...
**************************************************
Created .env file with default configuration.
Created phpunit.xml with default configuration.

 Which database would you like to use for system tables? [sqlite]:
  [0] sqlite
  [1] mysql
  [2] pgsql
  [3] sqlsrv
 > 1

 Enter your mysql Host:
 > 192.168.10.10

 Enter your Database Port [3306]:
 >

 Enter your database name:
 > dreamfactory

 Enter your database username:
 > dreamfactory_user

 Enter your database password:
 >

 Re-enter your database password:
 >

CACHE DRIVER  is not supported. Using default driver file.
Configuration complete!
************************* WARNING! **************************
*
* Please take a moment to review the .env file. You can make any
* changes as necessary there.
*
* Please run "php artisan df:setup" to complete the setup process.
*
*************************************************************
With the system database configured, it’s time to create the system tables and seed data and then create your first system administrator account. This is accomplished by running the df:setup command. Because multiple prompts are involved with this command, I’ll break the command output into a few parts. Immediately after running df:setup, the command will create the database tables and seed data:
$ php artisan df:setup
*********************************************
* Welcome to DreamFactory Setup.
*********************************************
Running Migrations...
Migration table created successfully.
Migration driver used: sqlite
Migrating: 2015_01_27_190908_create_system_tables
Migrated:  2015_01_27_190908_create_system_tables
Migrating: 2015_01_27_190909_create_db_extras_tables
Migrated:  2015_01_27_190909_create_db_extras_tables
...
Migration completed successfully.
*********************************************
*********************************************
Running Seeder...
Seeding: AppSeeder
App resources created: admin, api_docs, file_manager
Seeding: EmailTemplateSeeder
Email Template resources created: User Invite Default, User Registration Default, Password Reset Default
Service resources created: system, api_docs, files, logs, db, email
System service updated.
Service resources created: user
All tables were seeded successfully.
Next you’ll be prompted to create your first system administration account:
Creating the first admin user...

 Enter your first name:
 > Jason

 Enter your last name:
 > Gilmore

 Enter your email address?:
 > jason.gilmore@dreamfactory.com

 Choose a password:
 >

 Re-enter password:
 >

Successfully created first admin user.
Finally, you’ll be prompted to make sure your application’s storage and bootstrap/cache directories are properly configured. This involves making sure the directory ownership and permissions are properly set using the chown and chmod commands:
* Please make sure following directories and all directories under
* them are readable and writable by your web server
*  -> storage/
*  -> bootstrap/cache/
* Example:
*  > sudo chown -R {www user}:{your user group} storage/ bootstrap/cache/
*  > sudo chmod -R 2775 storage/ bootstrap/cache/
The {www user} string is a placeholder for the owner of your web server daemon owner. The {your user group} string is a placeholder for the web server group daemon owner.
Immediately following this prompt you’ll be informed of successful setup:
**********************************************************
******************** Setup Successful! *******************
**********************************************************
* Setup is complete! Your instance is ready. Please launch
* your instance using a browser. You can run "php artisan serve"
* to try out your instance without setting up a web server.
**********************************************************
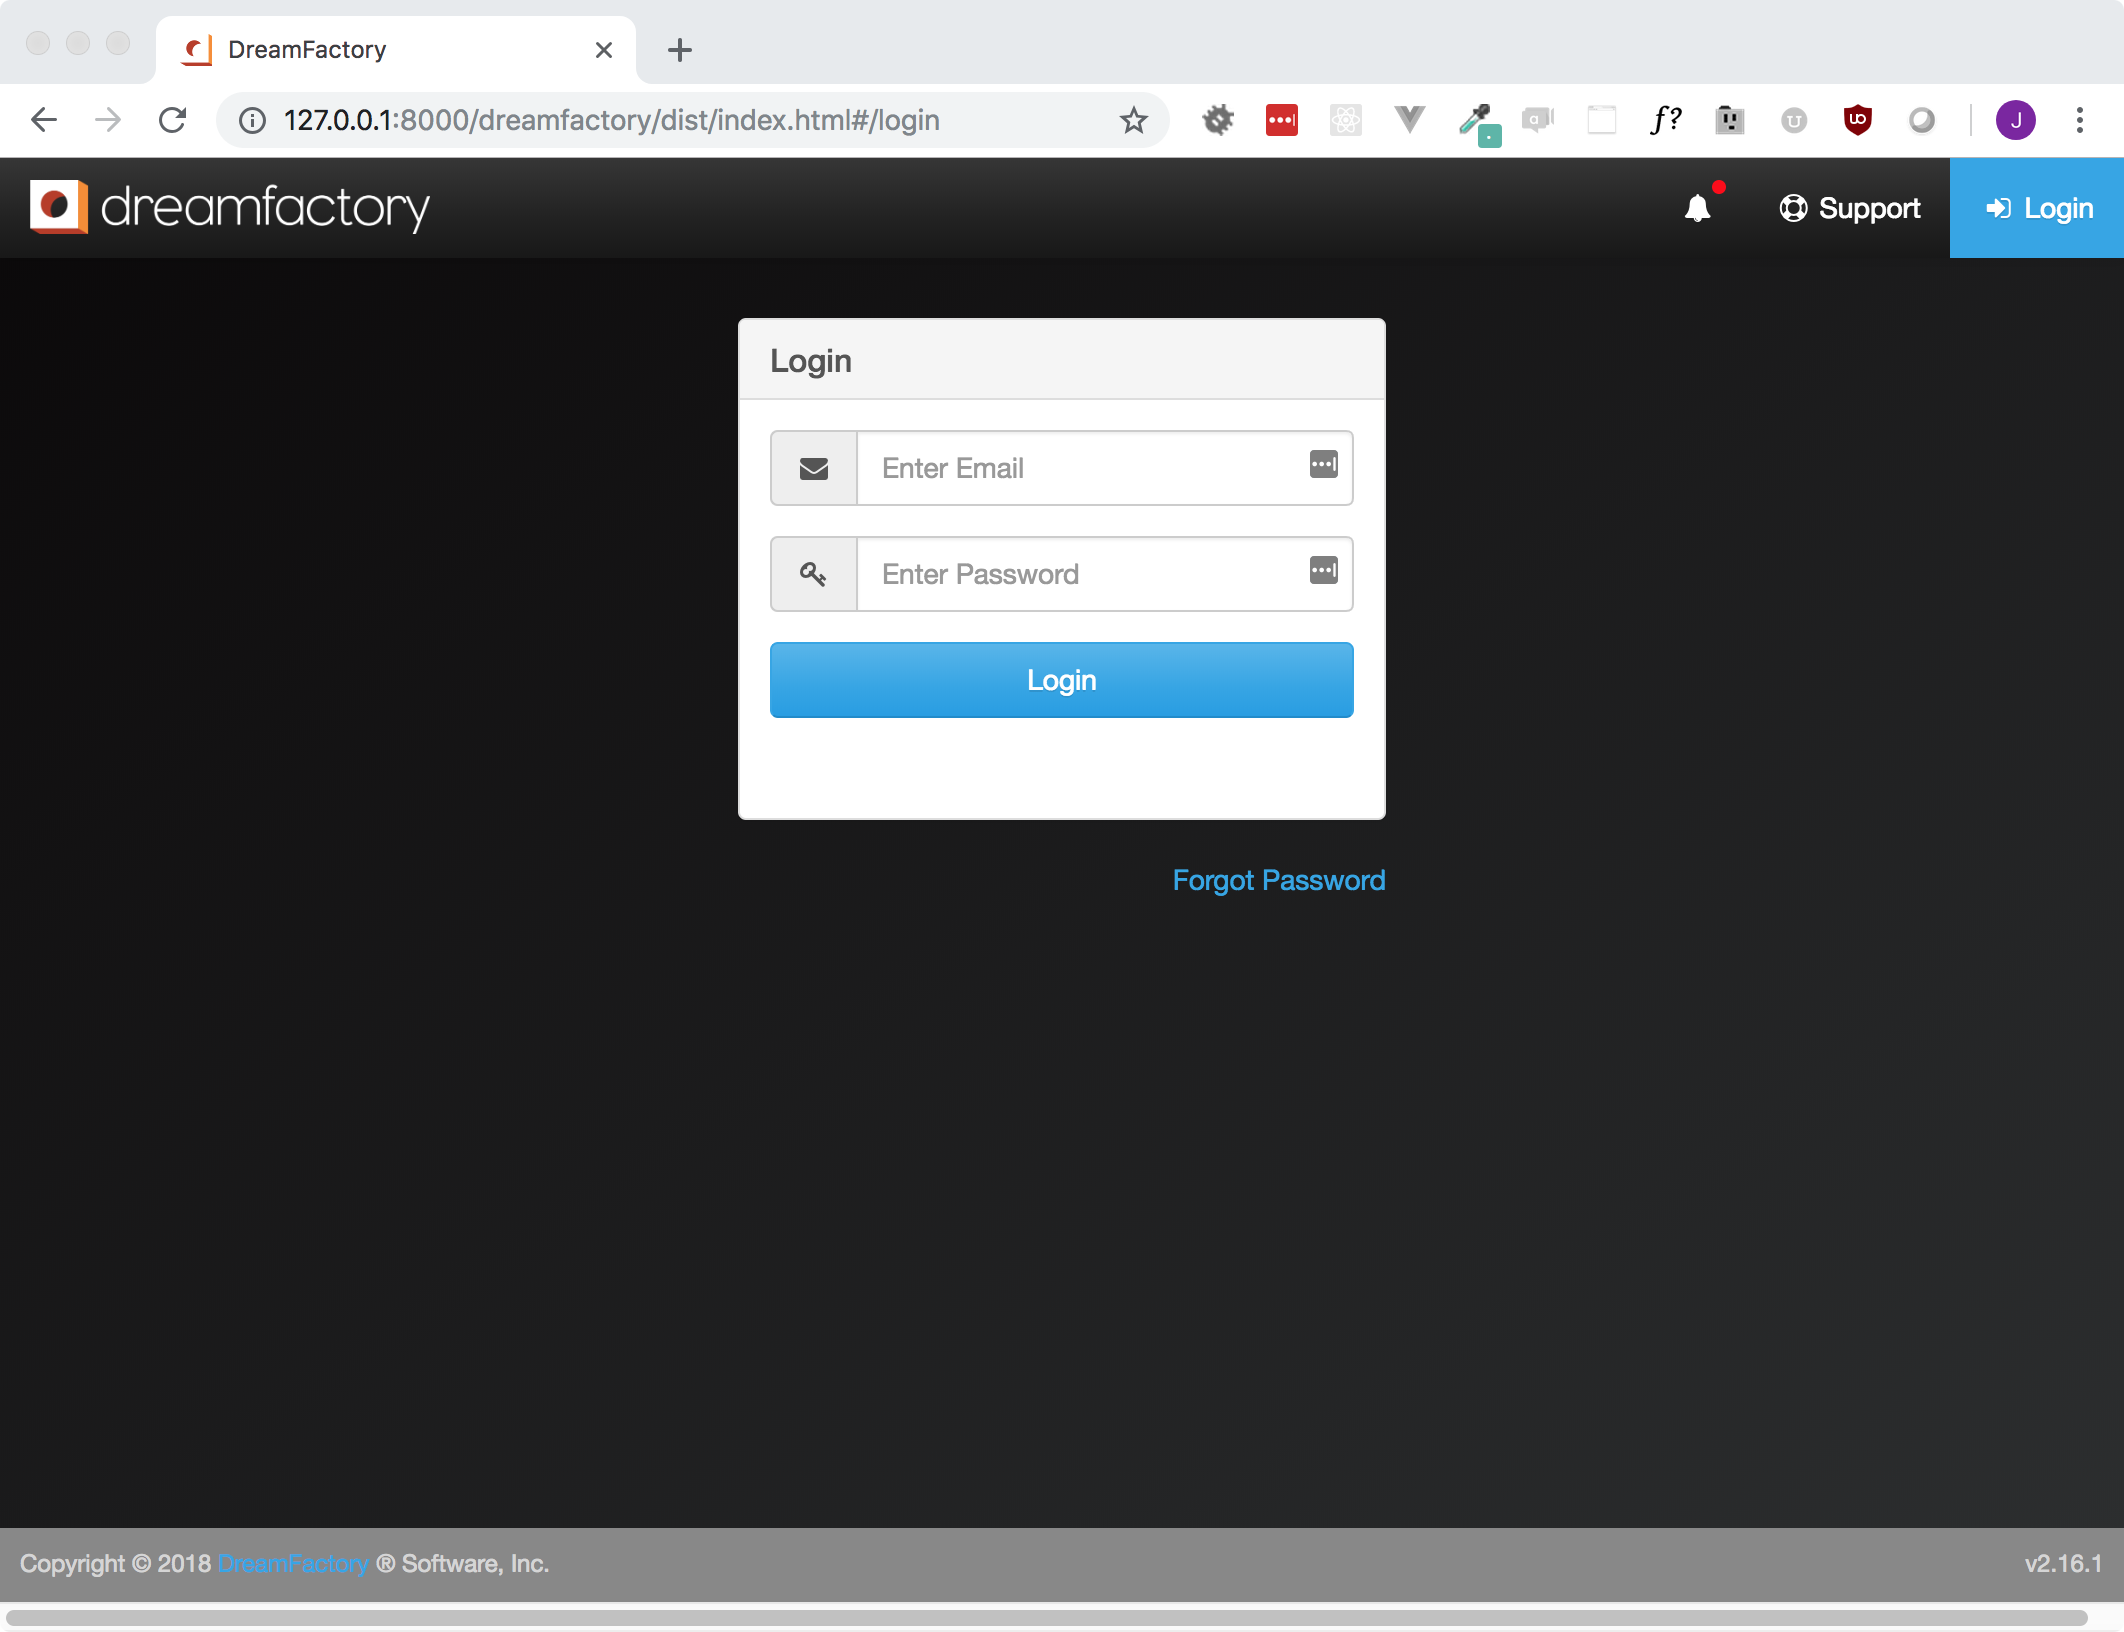
If you’ve installed and configured DreamFactory to run on a web server, then you can open your browser and navigate to the IP address or domain name. Otherwise, if you haven’t yet installed a web server, you can run php artisan serve:
$ php artisan serve
Laravel development server started: <http://127.0.0.1:8000>
This will start a simple PHP server running on 127.0.0.1 port 8000. Open your browser and navigate to http://127.0.0.1:8000 and you should see the following screen:
Introducing the .env File
It is often helpful to have different configuration values based on the environment where the application is running. For example, you may wish to use a different cache driver locally than you do on your production server.
To make this a cinch, Laravel utilizes the DotEnv PHP library by Vance Lucas. In a fresh Laravel installation, the root directory of your application will contain a .env.example file. If you install Laravel via Composer, this file will automatically be renamed to .env. Otherwise, you should rename the file manually. For more information, please see the official Laravel documentation
Enabling Debugging and Logging
By default, DreamFactory does not enable debugging due to performance issues. However, it can easily be enabled. In the example .env file below you can see where these options live.
When working to get your environment up and running, DreamFactory recommends turning debugging on, as well as increasing the sensitivity of the logging environment. In order to turn the application debugging on, please uncomment and change the following value:
To modify your logging values you will need to uncomment and modify the following snippets of code:
Enabling Email Registration
When creating new users and admins it is not ideal nor secure to manually set a password for each one. You can instead enable email registration which will allow you to instead send e-mail invitations by checking the Send email invite option. This will send an email invite to the new user containing a link to your instance and allow them to set a password.
To enable e-mail support, you will need to add the below lines to your .env file and then you can send new users registration notifications!
MAIL_DRIVER=smtp
MAIL_HOST=smtp.gmail.com
MAIL_PORT=587
MAIL_USERNAME=YOUR_EMAIL@gmail.com
MAIL_PASSWORD=YOUR_PASSWORD
Keep in mind smtp is but one of several available delivery options.
Increasing Your Session Lifetime
For security reasons DreamFactory sessions are limited to 60 minutes. You can however change the lifetime to any desired duration by opening your .env file and finding the following variable:
#DF_JWT_TTL=60
Change DF_JWT_TTL to any duration you please, defined in minutes. For instance, the following settings will persist your session for a week:
DF_JWT_TTL=10080
Updating Your DreamFactory Docker Environment
Our DreamFactory environment is still a work-in-progress, however many users are actively using it thanks to Docker’s streamlined configuration and deployment options. Occasionally you’ll want to update to a newer version of DreamFactory so we’ve assembled the following instructions as a guide.
You are presumably reading this section with the intention of upgrading a DreamFactory production environment. As with any software, things can and do go wrong with upgrading production environments, and therefore you are urged to possess a readily accessible file and system database backup and recovery plan before attempting an upgrade. You have been warned!
Begin by opening a terminal and entering your DreamFactory instance’s root directory. Then execute this command:
$ docker-compose exec web cat .env | grep APP_KEY
APP_KEY=base64:U/En8zI8WKrZ/F7CA9KncWjGTIhbvpGD5wN3eLoDZuQ=
...
A couple of lines of output will be returned, however you should only copy the line beginning with APP_KEY into a text file. Keep in mind at a minimum you’ll need to copy down the APP_KEY value. If you’ve overridden other defaults, such as the type, location, and credentials associated with the system database, you’ll need to copy those too. It is very important you perform this step otherwise you’ll run into all sorts of upgrade-related issues.
Next, run the following command:
$ git tag --list
2.1
2.14.1
2.2
2.2.1
...
This displays all of the tagged versions. Begin by stopping the running DreamFactory container without deleting it. Keep in mind that when you run this command, your DreamFactory instance will go offline until the upgrade process is completed:
$ docker-compose stop
Stopping df-docker_web_1   ... done
Stopping df-docker_mysql_1 ... done
Stopping df-docker_redis_1 ... done
For the purposes of this example we’ll presume you’re running 2.12 and want to upgrade to 2.14.1. To do so you’ll first want to checkout the 2.14.1 tag:
$ git checkout tags/2.14.1
Next, you’ll need to add that APP_KEY to the docker-compose.yml file. Open docker-compose.yml in your code editor, scroll down to the web service, and add the APP_KEY property and associated value alongside the other environment variables:
...
DB_DATABASE: dreamfactory
APP_KEY: 'base64:U\/En8zI8WKrZ\/F7CA9KncWjGTIhbvpGD5wN3eLoDZuQ='
CACHE_DRIVER: redis
...
It is crucial that you encapsulate the APP_KEY value within single quotes, and additionally escape with a backslash any forward slashes appearing in your key! As an example, compare the APP_KEY entry found above with the output displayed earlier.
Save these changes, and then rebuild your container using the following command:
$ docker-compose up -d --build
Once complete, you can run the following command to confirm the containers are up and running:
$ docker-compose ps
      Name                     Command               State          Ports
--------------------------------------------------------------------------------
df-docker_mysql_1   docker-entrypoint.sh mysqld      Up      3306/tcp, 33060/tcp
df-docker_redis_1   docker-entrypoint.sh redis ...   Up      6379/tcp
df-docker_web_1     /docker-entrypoint.sh            Up      0.0.0.0:80->80/tcp
If something has gone wrong, and one of the containers indicates it has exited, you can view the logs for that container:
$ docker-compose logs web
Presuming the containers are up and running, you’ll next want to determine whether the DreamFactory system database schema has changed. To do so run this command:
$ docker-compose exec web php artisan migrate:status
If you see Y in the tabular output’s Ran? column, then the schema has not changed. If you see N at any point, then you’ll need to run the following command to update your system database schema:
$ docker-compose exec web php artisan migrate
Finally, you’ll want to clear your application and configuration caches by executing the following commands:
$ docker-compose exec web php artisan config:clear
Configuration cache cleared!

$ docker-compose exec web php artisan cache:clear
Cache cleared successfully.
With that done, open your DreamFactory instance in the browser, and confirm the environment is operational.
Installing and Configuring DreamFactory on CentOS
First pull in the CentOS Docker image.
$ docker pull centos
Then I start the image in a detached state.
$ docker run -itd {Container_ID}
Once the image is running we can enter it and begin installing DreamFactory.
$ docker exec -it {Container_ID} /bin/bash
Using the DreamFactory Install Scripts
Instead of spending time copying and pasting a lengthy list of commands we are going to use our installation script that can be found here.
To start we will have to bring the script into our container by using wget.
wget -O cent.sh {RAW_GITHUB_SCRIPT_URL}
Now that we have the script on our server, let’s make it executable.
chmod +x cent.sh
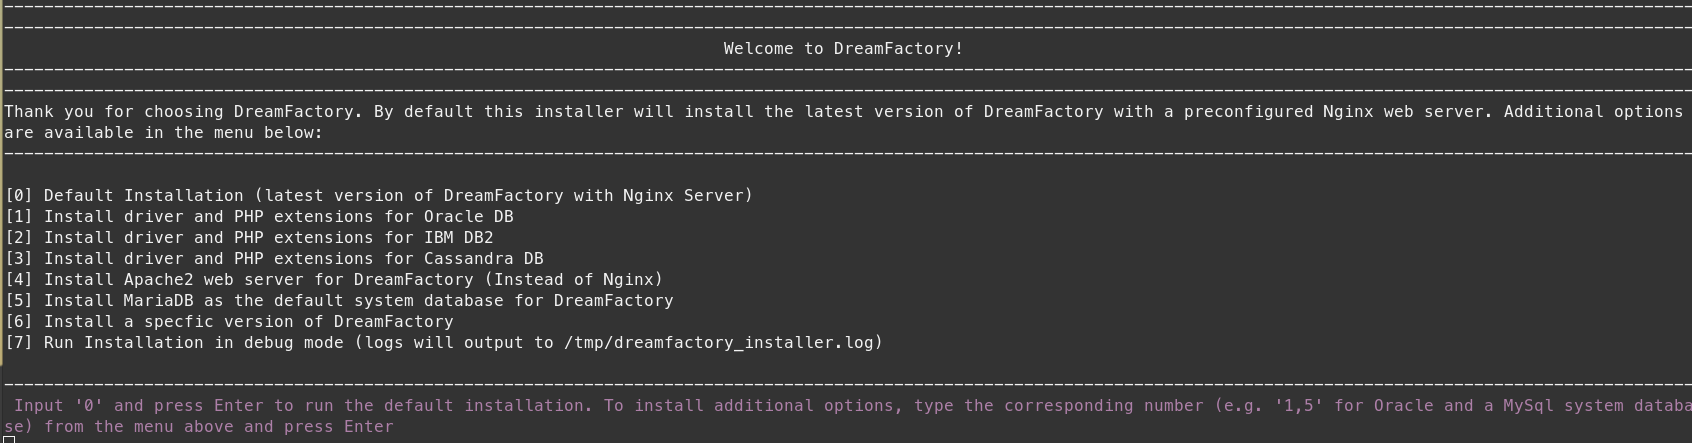
We can now run the script, but first let’s take a look at additional configuration flags. You may pass several options into the script to alter its behavior. If you do not use these options, the script will install the Nginx web server, DreamFactory, and the required system and PHP extensions, but will not install a database server. To see a full list of installation options check it our here, otherwise we will be using the --with-mysql flag to be able to use MySQL as our system database.
Now we can run the script!
sudo ./cent.sh --with-mysql
You should now see the script running like so.
Upon completion you can now go to your browser and access your instance!
Choosing an HTTP Client
Whether your API consumer is an iPhone or Android application, a SPA (Single Page Application), or another server altogether, that consumer is often referred to as the client. The client issues HTTP requests to the REST API, parsing the responses and reacting accordingly. Although in most cases your team will use libraries such as Alamofire or Axios to manage these requests, you’ll often want to interact with the APIs in a much more fluid manner during the investigatory and learning phase. The API Docs feature serves this need well, however the API Docs interface lacks the ability to bookmark and otherwise persist queries, manage parameters programmatically using variables, and other features useful for maintaining a set of easily accessible configurations.
Fortunately, there are a number of HTTP clients which fill this void very well. Two of the most popular are Insomnia and Postman, which are available on OSX and multiple operating systems, respectively. In this section we’ll introduce you to both HTTP clients, and as an added bonus talk about the ubiquitous cURL client which is quite possibly the most popular piece of software you’ve never heard of.
Insomnia
Insomnia is a cross-platform REST client, built on top of Electron. Insomnia is realtively new on the scene compared to cURL and Postman but offers a bevy of features that certainly make it competitive. They have a very slick UI, and a ton of features, including a team option.

Postman
Postman is a tried and true GUI interface with great docs to help you set up your testing environment. They have plans for everyone, from free solo users to large, enterprise teams. Postman also has a great feature called API Network, which has sample API calls from all sorts of sources. It is definitely worth a look.
cURL
cURL’s lack of a polished interface may lead you to believe it’s inferior to Insomnia and Postman. Not so! cURL is an incomparably capable bit of software. cURL is a command line tool and library for transferring data with URL syntax, supporting HTTP, HTTPS, FTP, FTPS, GOPHER, TFTP, SCP, SFTP, SMB, TELNET, DICT, LDAP, LDAPS, FILE, IMAP, SMTP, POP3, RTSP and RTMP.
Running DreamFactory in a High Availability, Load Balanced Environment
Most high API volume request users are running DreamFactory in a highly-available, load balanced environment. The following diagram depicts this approach:
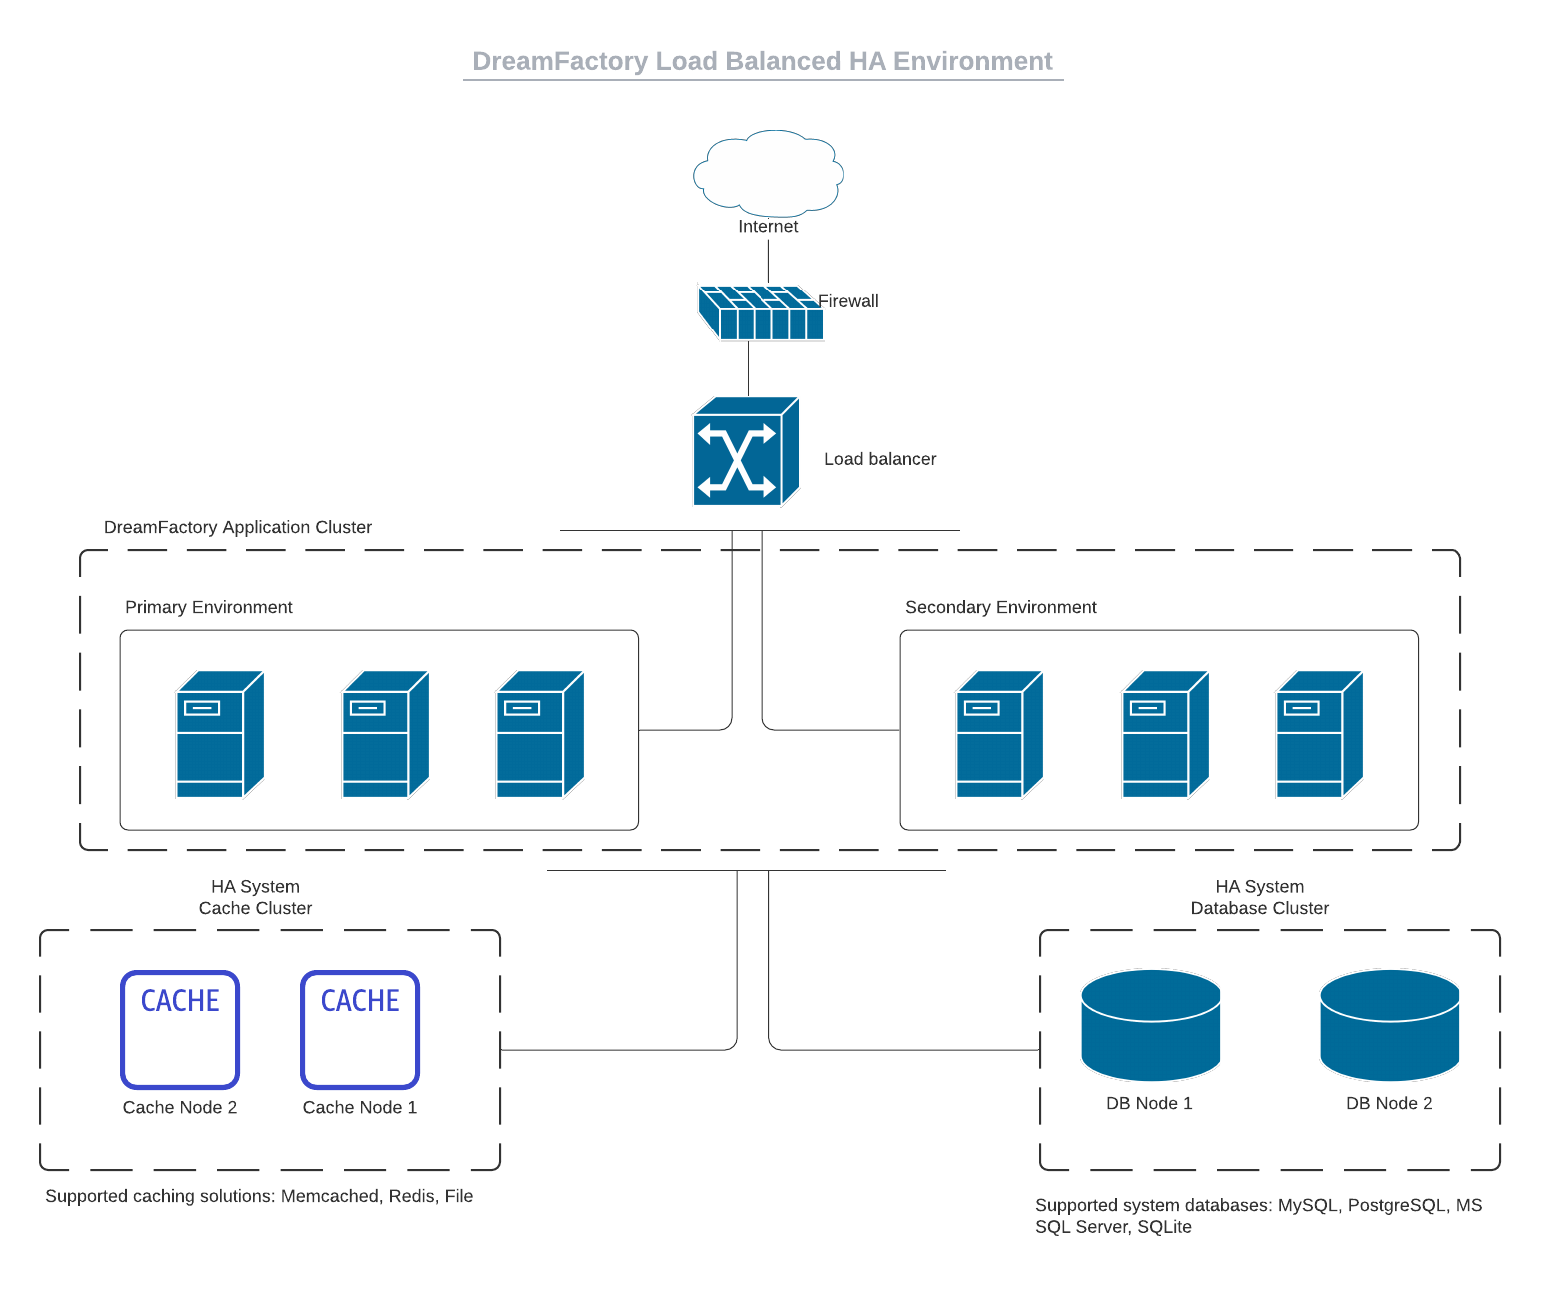
If you’re not interested in running the DreamFactory platform itself in an HA cluster then disregard the “Secondary Environment” found in the “DreamFactory Application Cluster” tier however the remainder of the diagram would still apply in a purely load balanced environment. In either case, the load balanced DreamFactory instances would be backed by a caching and system database tier. For caching DreamFactory supports Memcached and Redis. On the system database side, DreamFactory supports MySQL, PostgreSQL, and Microsoft SQL Server.
Troubleshooting Oracle Connections
DreamFactory uses PHP’s OCI8 library to connect to and interact with databases. Therefore successful installation of the client driver and SDK is a crucial part of the process. Sometimes it is useful to attempt a connection outside of DreamFactory in order to further isolate the problem. One way to do so is by placing the following PHP script on the same server where DreamFactory is installed:
<?php
    $conn=oci_connect("USERNAME","PASSWORD","HOST/DATABASE");
	if (!$conn) {
        $e = oci_error();
        echo 'Could not connect to :';
        echo $e['message'];

    } else {
        echo 'Successfully connected to ';
    }

oci_close($conn);
?>
Replace the USERNAME, PASSWORD, and HOST/DATABASE placeholders with your credentials, name the script .php or similar, and place it in the public directory of your DreamFactory installation. Then open a browser and navigate to https://YOUR_DOMAIN/.php. If the connection is successful you’ll see a corresponding message; otherwise you should see some additional details pertaining to the nature of the error.
Configuring Firebird for DreamFactory
These instructions are for installing the Firebird driver from its source code.
Install the Firebird driver
cd /tmp
git clone https://github.com/php/pecl-database-interbase.git
cd pecl-database-interbase/
apt-get install firebird-dev autoconf build-essential
phpize --clean
phpize
./configure
make
make install
Once downloaded, you will want to enable the driver in your php.ini file. After that, the extension will appear in the list of enabled extensions.
php -m
[PHP Modules]
Troubleshooting
If you receive a 500 error with the message of The Response content must be a string or object, make sure your database is configured for UTF8.
Configuring Microsoft SQL Server for DreamFactory
Configuring Microsoft SQL Server for use with DreamFactory is a two-step process:
- Configure your SQL Server instance to accept ODBC connections.
- Configure your DreamFactory server to allow PHP to talk to SQL Server.
This is a pretty straightforward process, with the former’s instructions varying slightly according to SQL Server version. So to make things really easy, we’ve broken this chapter up accordingly.
Step #1. Configuring Your Microsoft SQL Server
Install the Microsoft ODBC Driver for SQL Server
-
Microsoft SQL Server 2017
-
Microsoft SQL Server 2013
-
Windows 7, Windows 8, Windows Server 2008 R2, Windows Server 2012, Windows Vista Service Pack 2
https://www.microsoft.com/en-us/download/details.aspx?id=36434
-
Windows 10 , Windows 7, Windows 8
-
Windows Server 2008, Windows Server 2012, Windows Server 2016
-
Microsoft ODBC Driver for SQL Server
First, you’ll want to download the ODBC driver if it’s not already installed. You can download the SQL Server 2011 driver from here.
Microsoft SQL Server 2011
Microsoft ODBC Driver for SQL Server
First, you’ll want to download the ODBC driver if it’s not already installed. You can download the SQL Server 2011 driver from here.
Installing DreamFactory on Windows Server with IIS10
Note: These installation instructions assume a “Clean Install” for IIS. There may be sections which have already been accomplished or installed. If so, skip the sections which no longer apply to your situation. These instructions are concerned only with the installation of DreamFactory. Please consult your Windows Administrator for hardening the web server and other security controls which are outside the scope of these instructions.
Install PHP for IIS
Before beginning the installation download the Web Platform Installer for IIS here.
- In the Web Platform Installer, navigate to the Products tab and choose Frameworks from the sidebar. Select the appropriate PHP version. In our example, we’re using PHP 7.4.1 (x64).
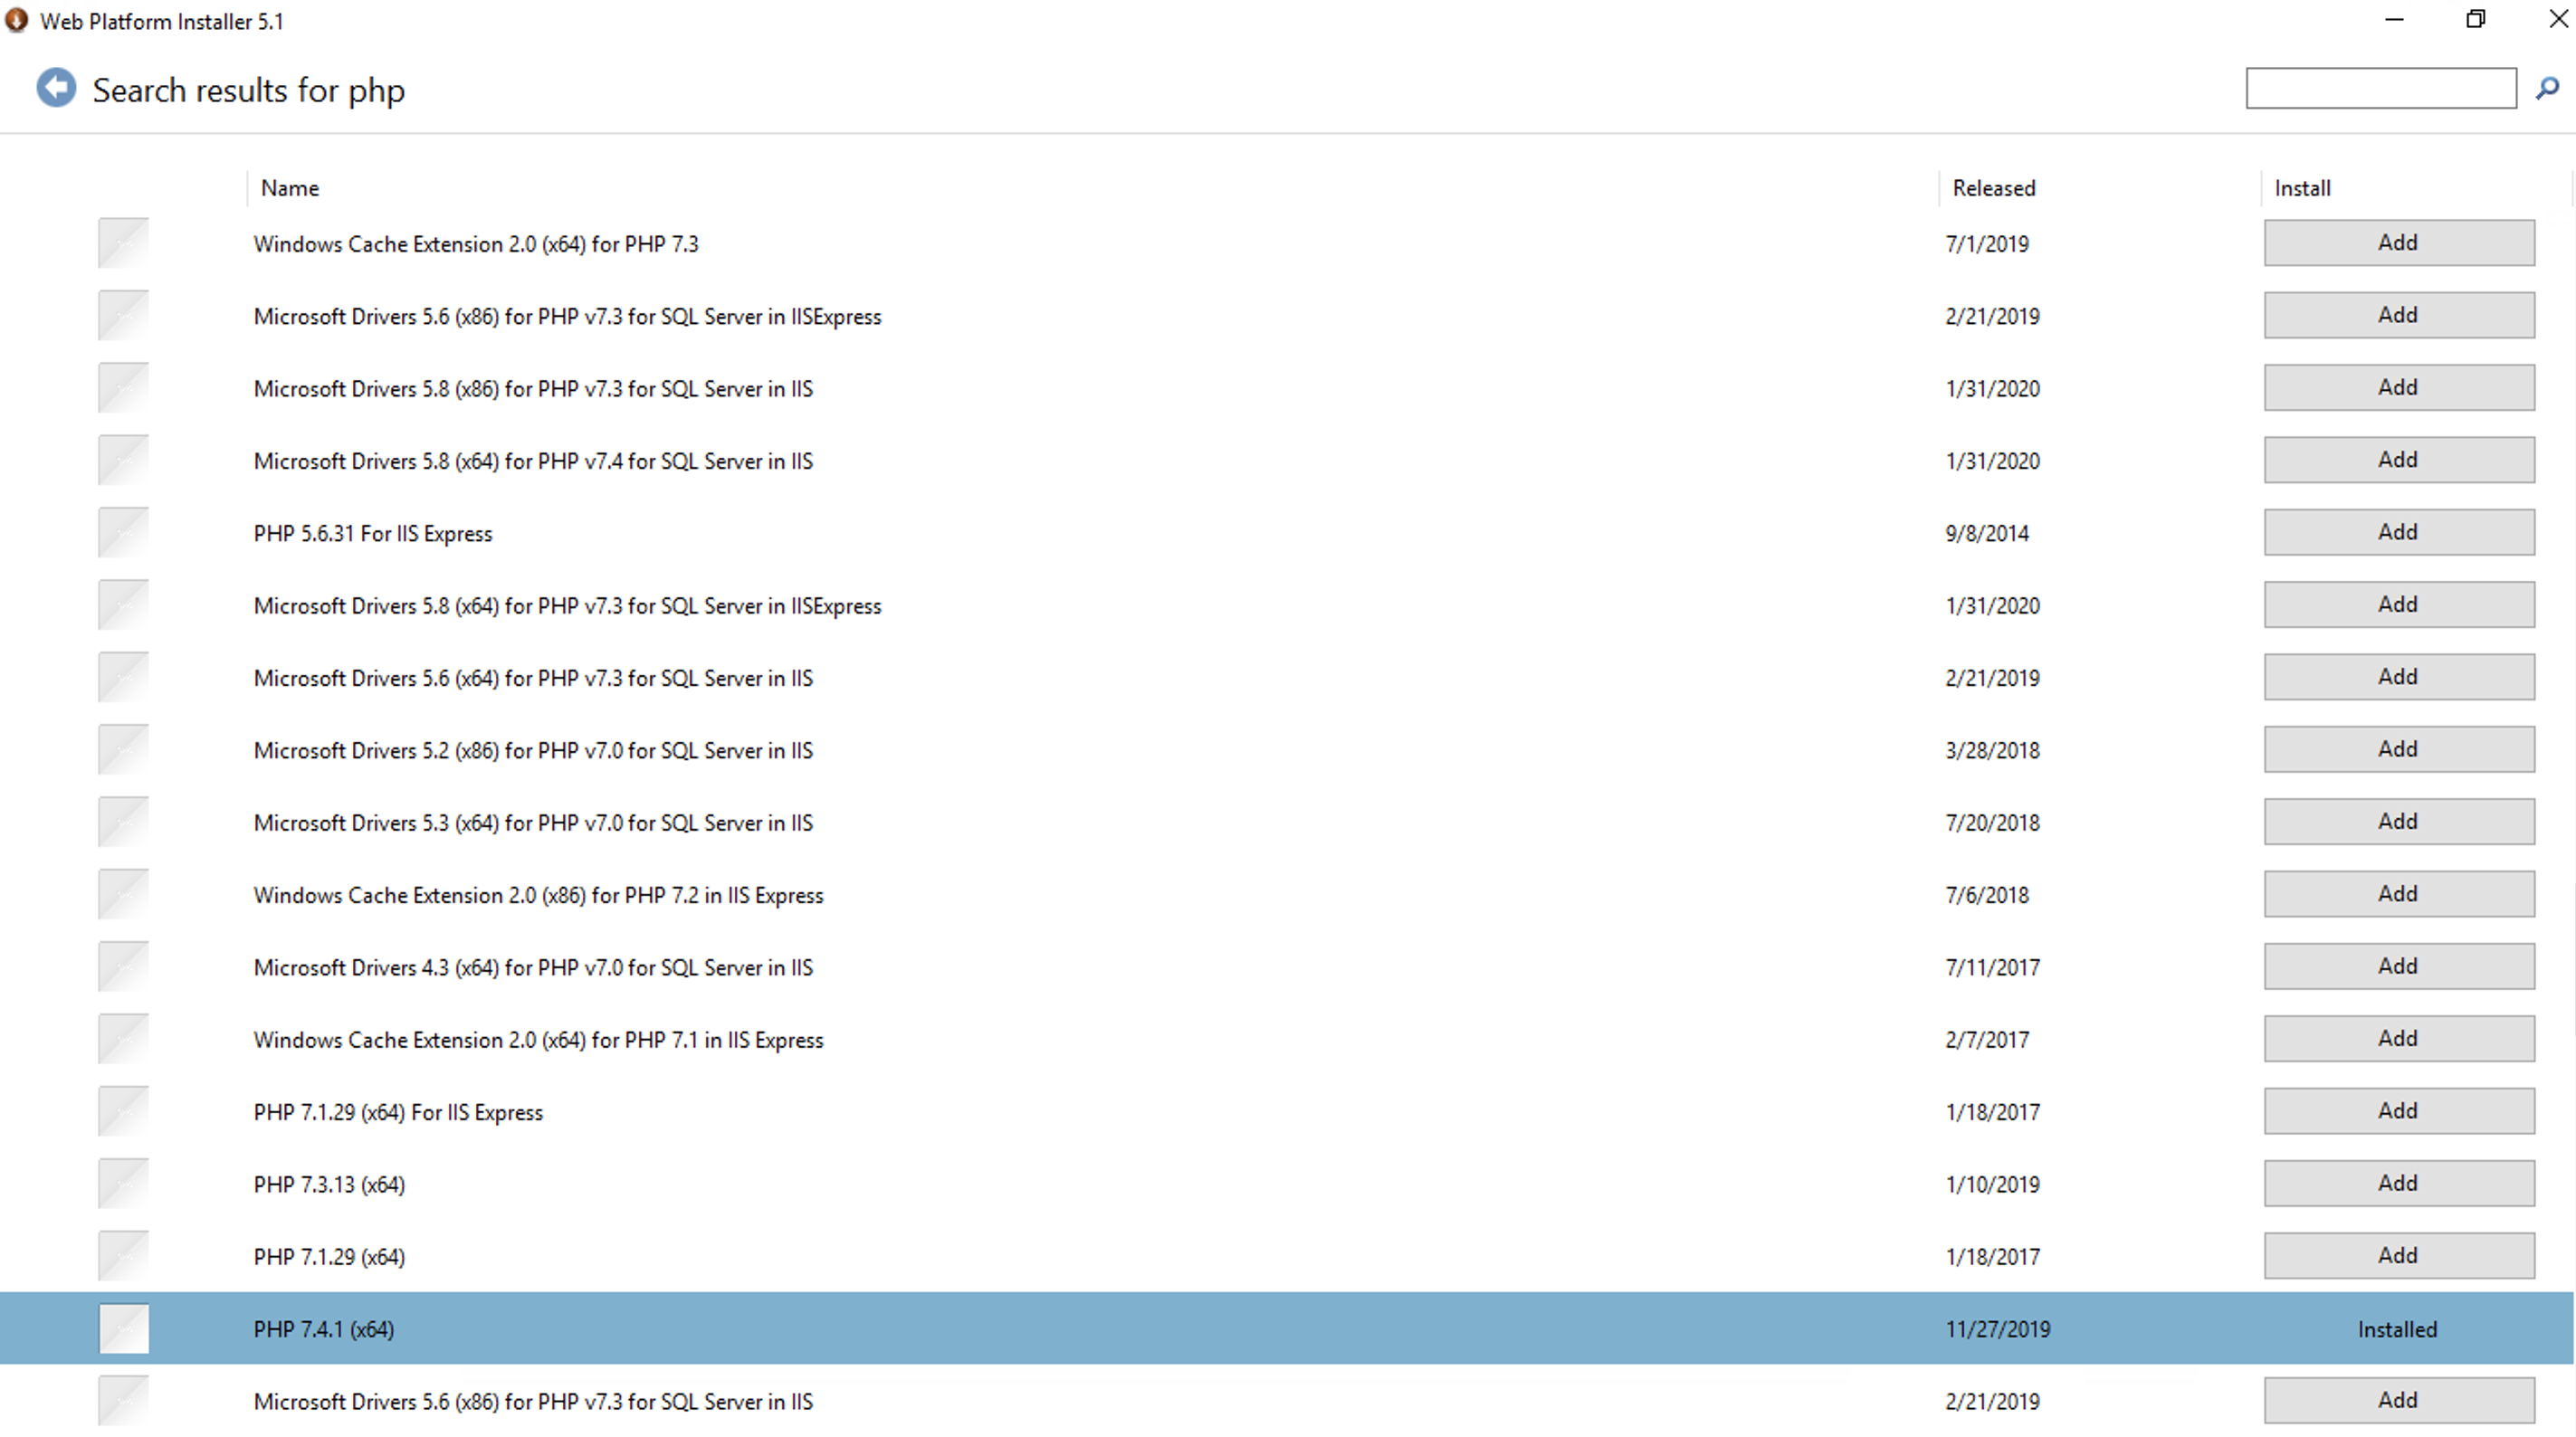
- Click Add, then Install at the bottom. Follow the on screen prompts to accept the EULA to install PHP for IIS.
Setup PHP Module Mapping in IIS 10 (If Needed)
Once PHP has been successfully installed, it must be set up in IIS10.
- Open the IIS Services Manager and from the sidebar, click the server name.
- Double-click Handler Mappings PHP needs to be associated with the FastCGI handler in your PHP directory.
Note: If PHP was installed using the Web Platform Installer the handler mappings should have the FastCGI associations already. Check that the associations are correct and correspond to your local server.In the list of handler mappings the name of the mapping defaults to PHP_via_FastCGI,this is the mapping you will need to doublecheck. Click OK.
If the default handler mapping for PHP FastCGI isn’t listed you will need to add it now:
- In the features pane in your IIS manager, double click on the Handler Mappings feature.
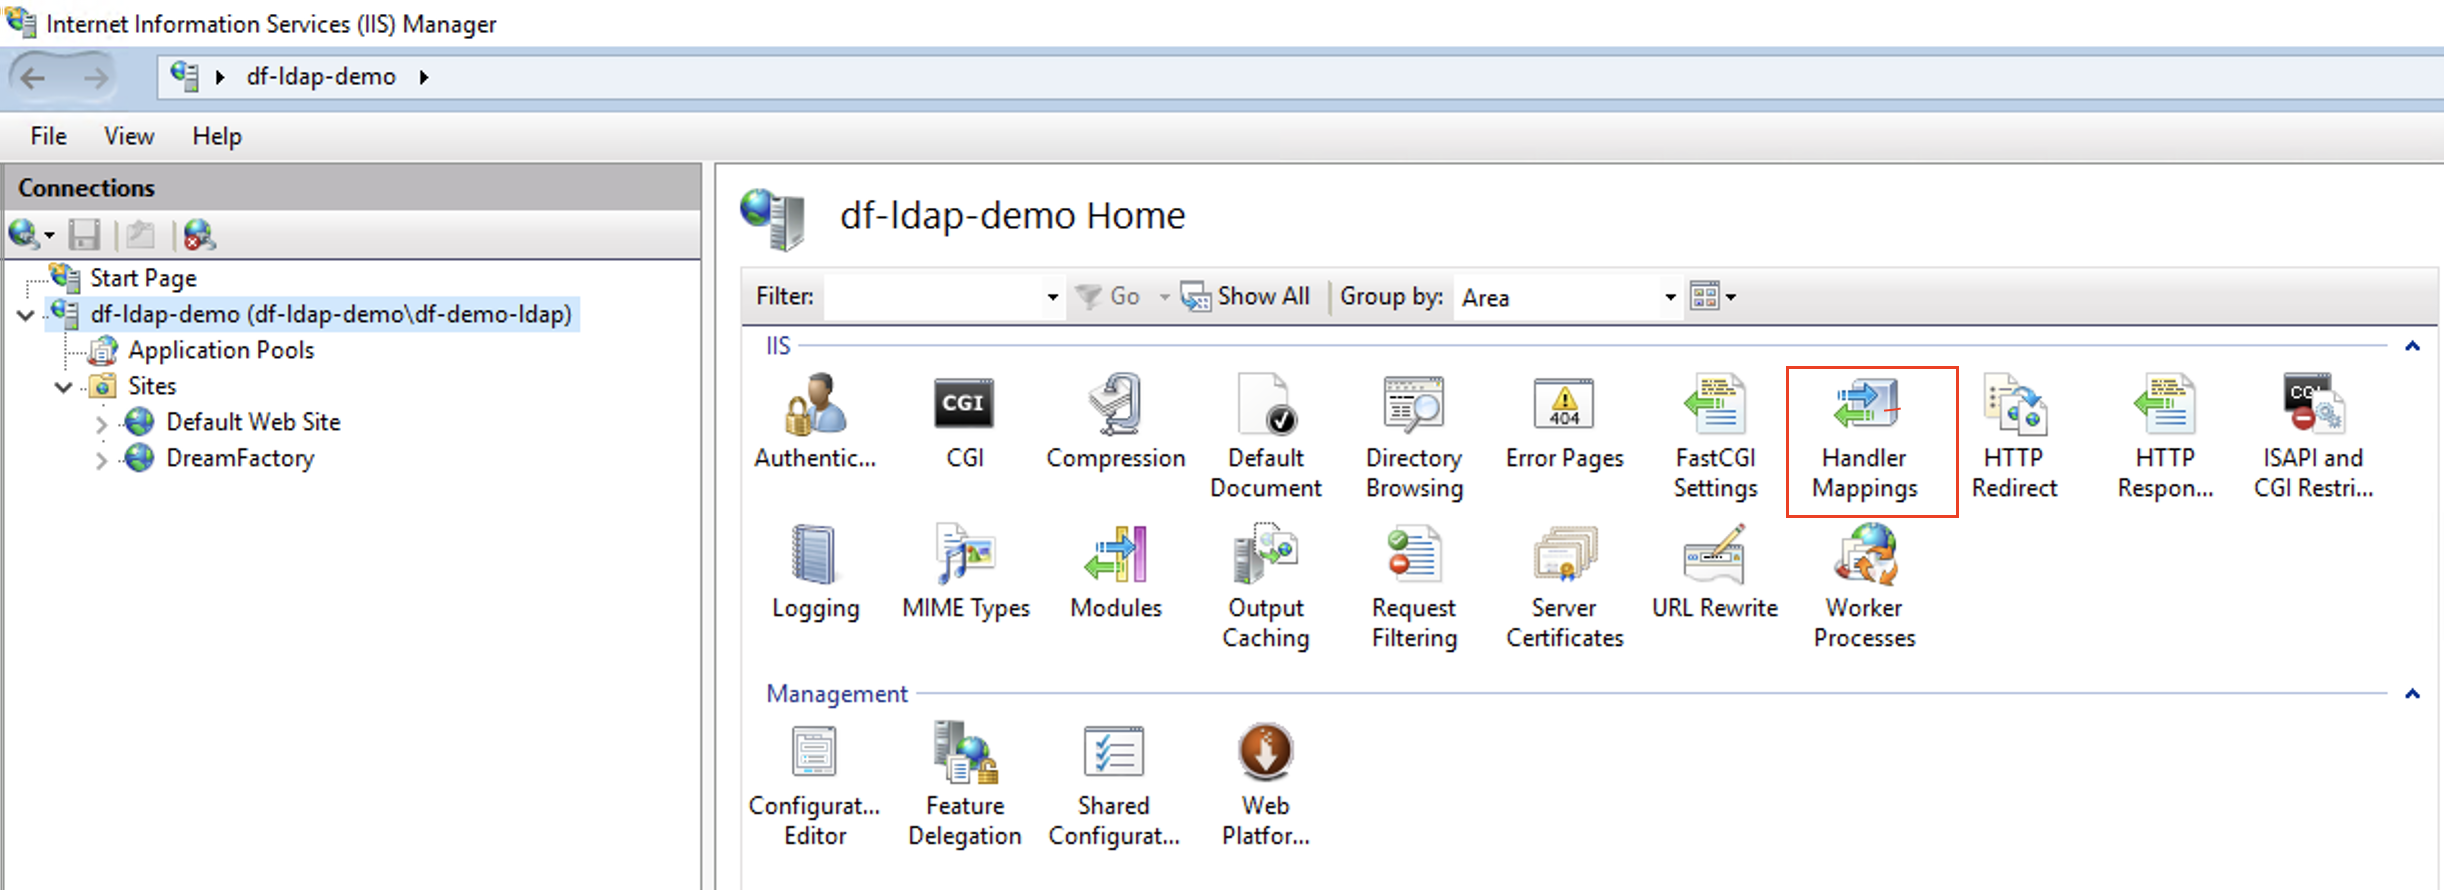
Once open, click Add Module Mapping on the right hand side. Enter the following information with the path to the php-cgi executable local to the server:
| Variables |
Values |
| Request Path |
*.php |
| Module |
FastCgiModule |
| Executable |
“C:\Program Files\PHP\v7.4\php-cgi.exe” |
| Name |
PHPviaFastCGI |
- Click OK, then click Yes to confirm.
- Using Internet Information Services (IIS) Manager click on the server you are working with and click Restart from the actions pane.
Test PHP for IIS
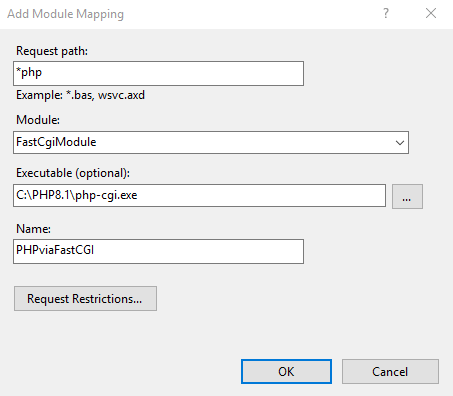
To test PHP, we are going to create a php info file within the web root directory. Typically, this directory is located in:
C:\inetpub\wwwroot
-
In the webroot directory, create an empty PHP file. At the top of file the type the following:
<?php phpinfo();
-
Save the file as info.php. Ensure the filename and extension are info.php, not info.php.txt. This would be not shown if Hide Extensions for known file types is enabled from Folder Options. Make sure this is unchecked, if need be from Folder Options:
-
From a browser, navigate to the phpinfo file you just created. Typically, on a fresh server install it will be http://localhost/info.php in your web browser.
-
If you receive a 404.0 error, typically the problem is either that the extension is not .php or that file permissions are set incorrectly. If you receive a 403.3 error with the following message, MIME types must be set up correctly for PHP, please ensure that you followed the IIS PHP setup section above. If you are seeing a blank page, you may need to enable errors for debugging purposes in your php.ini file. Alternately, you can view the output of the php error.log for more info.
-
If the install was successful, you should see a PHP Info page in your browser. Keep this file in place until you finish the rest of the configuration, then delete it afterwards, as this file contains system-specific information.
Once you have PHP set up and working with IIS, you are ready to install DreamFactory and add it as a site in IIS 10.
Install DreamFactory on IIS 10
You will need to follow the Required Software and Extensions section to ensure you have Git, Composer, and optionally the MongoDB Driver, if needed. After completing that, the following describes how to install Dreamfactory on IIS 10.
Note: We will be using SQL Server as an external service database for DreamFactory. If you haven’t already, you will need to purchase a DreamFactory subscription before installing, so the appropriate dependencies can be added to your installation. Please contact Support for additional information. If you decide to not upgrade, you can still install this by skipping the df:env command and go straight to the df:setup command. This will create an SQLite database as your system database (which is the default in all of our GitHub installs).
-
Next, open a command prompt, Power Shell, or Windows Git Client
-
From the prompt, navigate to the directory you want to install DreamFactory. Typically, this will be:
C:\inetpub\wwwroot\
However you can choose any location you want. We will add this as a site later in IIS. In this example, we’re choosing:
C:\inetpub\wwwroot\dreamfactory
Perform a Git clone into this directory for DreamFactory:
git clone https://github.com/dreamfactorysoftware/dreamfactory
This will pull down the master branch of DreamFactory into a directory called ./dreamfactory.
Navigate to the dreamfactory directory and install dependencies using composer. For production environment, use --no-dev, otherwise discard that option for a development environment. If you are not running or plan to run MongoDB, add —ignore-platform-reqs:
composer update --ignore-platform-reqs --no-dev
Otherwise run the following command to install the dependencies:
composer install --no-dev
Run DreamFactory setup command-line wizard. This will set up your configuration and prompt you for things like database settings, first admin user account, etc. It will also allow you to change environment settings midway and then run it again to complete the setup.
- As with our other installs, the first command lets you choose and configure your system database (SQLite, MySQL, PostgreSQL, or MSSQL). You can also change the environmental settings here.:
php artisan df:env
- The second command enables you to finish the configuration, adding your first admin account, etc.
php artisan df:setup
Follow the on-screen prompts to complete the setup.
Add DreamFactory Site to IIS Manager
-
Open IIS Manager
-
From the Actions column, select Add Web Site
-
Enter in all pertinent information in the dialog. In the Physical Path field, enter the path to your DreamFactory installation’s public folder.
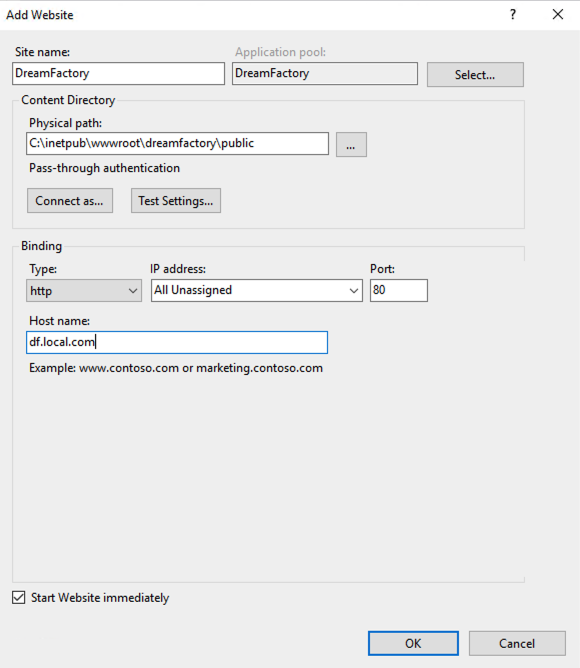
- Enter your Host name as well for your instance.
- Click OK to start the service.
Note: Make sure that your DreamFactory site is the default site. By default, there will be a site above your DreamFactory site call “Default Web Site”. If you are not able to access DreamFactory on the set URL, try deleting the “Default Web Site”
Add URL Rewrite Rules to IIS
You will need to add rewrite rules to IIS 7 manually. To accomplish this follow the below steps:
- Click on the DreamFactory site and then choose URL Rewrite.
- From the Actions column, choose Import Rules.
- Navigate to the
.htaccess file in the /public directory of your DreamFactory installation in the Configuration File input, then click Import. The .htaccess file will automatically be converted to XML for you.
- In Tree View, find any rules that have a red X icon. Click on that rule and it will be highlighted in the Rewrite Rules dialog box.
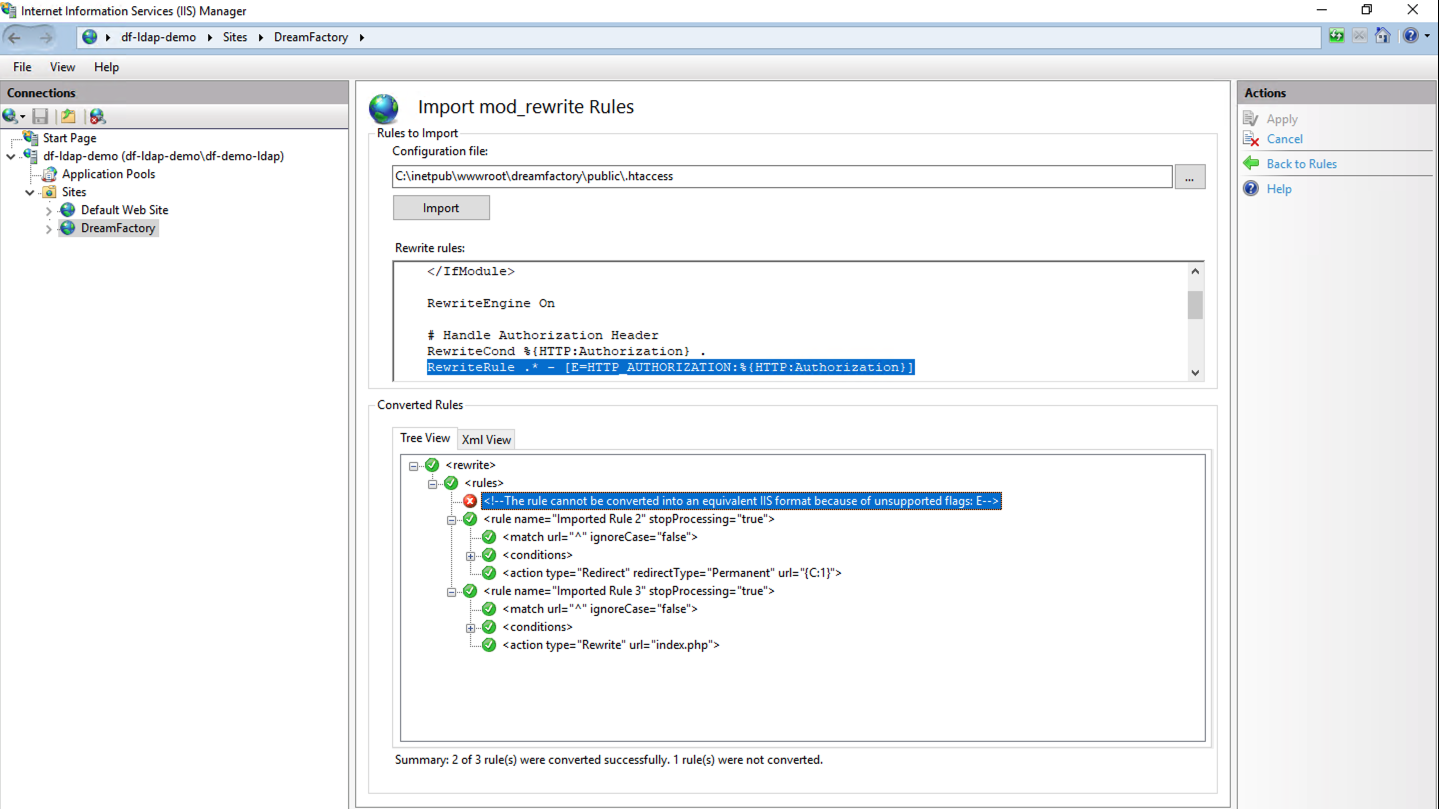
- Remove that rule in the Rewrite Rules dialog box and repeat this for any additional rules until you see all green checkboxes.
- Click Apply in the Actions column.
Add your IIS host to the hosts file
Once that is done, the last step is to add your host ( DreamFactory site in IIS) to your hosts file. The hosts file should be located here -
C:\Windows\System32\drivers\etc
Once you have located the file, edit it to add the entry to add the IP address and the hostname of your DreamFactory IIS setup - example
10.10.10.10. df.local.com
Ensure DreamFactory Cache and Log Directories are Writable
You will need to set permissions on the following directories to ensure they are writable within the DreamFactory installation folder. These are:
- storage/framework/cache/
- storage/framework/views/
- storage/logs/
Please ensure that the Users group has full control of these directories to enable creation of log files, cache files, etc. Optionally, if you are using the included sqlite database for testing, please ensure the storage/databases/ directory also has write and modify permissions as well. Restart your web server and navigate to your DreamFactory installation. If you are testing in the local environment, you can add a FQDN in your hosts file to allow navigating to the Dreamfactory site locally.
Configuring Apache on Windows with DreamFactory
Although DreamFactory’s handy linux installers include configurations for both nginx and Apache out of the box, for Windows (if you want to use Apache rather than IIS as explained above) we will need to do some configuration. Below is a basic guide to installing Apache on Windows. You should contact your Windows Administrator for security controls and specific configurations your organization may require.
Reminder!
Remember to run things (e.g. the command prompt) as an administrator when working with Windows.
Installing Apache
Installing Apache on Windows is a relatively painless task. A Win64 binary is available from Apache Lounge and after download can be extracted to c:\. (Actually you can put it where you like, you just need to change the pathing in the httpd.conf file). After you have extracted the file, download the Visual C++ Redistributable VC_redist.x64.exe, which is also available on the Apache Lounge website, and run the program.
Now, to test, open up a command prompt, go to c:\Apache24\bin and run the httpd command. If you go to localhost you should see “It Works!” in the browser window.
We must use the thread safe version of php in order for it to work with Apache. This can be downloaded from the PHP Website and for the sake of simplicity should be extracted to c:\php.
The PHP .ini file, as a minimum, should have the following extensions uncommented:
curl
ffi
ftp
gd2
gettext
ldap
mbstring
exif
mysqli
odbc
openssl
pdo_firebird
pdo_mysql
pdo_oci
pdo_odbc
pdo_pgsql
pdo_sqlite
pgsql
shmop
soap
sockets
sodium
sqlite3
tidy
xmlrpc
PHP should then be added to to your path -> Search for “environment” in the Windows search box and then click “Edit the system environment variables”, go to the advanced tab, and click “Environment Variables”. Under System variables select “Path” and then “Edit” and then “New”. Add c:\php and save. The path should be at the bottom of the list.
Now we will tell Apache about PHP. Go to c:\Apache24/conf and open the httpd/conf configuration file. At the very bottom add the following:
#PHP 74 Module
PHPIniDir "C:/php"
LoadModule php7_module "C:/php/php7apache2_4.dll"
AddType application/x-httpd-php .php
and then uncomment the following modules in the LoadModule section:
deflate_module
filter_module
access_compat_module
rewrite_module
We can test everything is working by creating a info.php file at Apache24/htdocs with the following line:
<?php phpinfo() ?>
Restart httpd and go to localhost/htdocs and you should see the php information screen.
Finally, we need to get DreamFactory and Apache talking to each other. For this example, it assumed that DreamFactory has been installed to c:/dreamfactory.
First, go back to our httpd.conf file for Apache, and find the line DocumentRoot "${SRVRoot/htdocs}". Here we will change the DocumentRoot, the Directory, and the configuration.
Replace everything from ‘DocumentRoot’ to ‘’ with the following:
DocumentRoot “c:/dreamfactory/public”
	<Directory “c:/dreamfactory/public”>
	AddOutputFilterByType DEFLATE text/plain text/css application/json application/javascript text/xml application/xml application/xml+rss text/javascript
	Options -Indexes +FollowSymLinks -MultiViews
	AllowOverride All
	AllowOverride None
	Require all granted
	RewriteEngine on
	RewriteBase /
	RewriteCond %{REQUEST_FILENAME} !-f
	RewriteCond %{REQUEST_FILENAME} !-d
	RewriteRule ^.*$ /index.php [L]

	<LimitExcept GET HEAD PUT DELETE PATCH POST>
		Allow from all
	</LimitExcept>
</Directory>
Save and run httpd -t from the command prompt (from c:\Apache24\bin) and you should not get any syntax errors. Start the server with httpd and go to localhost/dreamfactory/dist and you will be greeted by the login screen.
Setting up https on Apache
We can setup https on Apache using Virtual Hosts. For this example we will have dreamfactory run over http on port 80, and over port 443 at https://<yourservername>.
Go to your Apache httpd.conf file and first uncomment the module ssl_module in the LoadModule section.
Now, we will use our previous configuration, and assign it to a virtual host over port 80. Take the previous configuration and wrap it in a <VirtualHost *:443> ... </VirtualHost> tag and also provide a servername. It should end up looking like this:
Listen 80
<VirtualHost *:80>
	DocumentRoot “c:/dreamfactory/public”
	ServerName <yourservername>
	<Directory “c:/dreamfactory/public”>
		AddOutputFilterByType DEFLATE text/plain text/css application/json application/javascript text/xml application/xml application/xml+rss text/javascript
		Options -Indexes +FollowSymLinks -MultiViews
		AllowOverride All
		AllowOverride None
		Require all granted
		RewriteEngine on
		RewriteBase /
		RewriteCond %{REQUEST_FILENAME} !-f
		RewriteCond %{REQUEST_FILENAME} !-d
		RewriteRule ^.*$ /index.php [L]

		<LimitExcept GET HEAD PUT DELETE PATCH POST>
			Allow from all
		</LimitExcept>
	</Directory>
</VirtualHost>
Now, copy everything and paste it below, changing the virtual host to 443, and adding the SSL configurations, so it ends up looking like the below:
Listen 443
<VirtualHost *:443>
	DocumentRoot “c:/dreamfactory/public”
	ServerName <yourservername>
	SSLEngine on
	SSLCertificateFile "<path to your certificate>"
	SSLCertificateKeyFile "<path to your key>"
	<Directory “c:/dreamfactory/public”>
		AddOutputFilterByType DEFLATE text/plain text/css application/json application/javascript text/xml application/xml application/xml+rss text/javascript
		Options -Indexes +FollowSymLinks -MultiViews
		AllowOverride All
		AllowOverride None
		Require all granted
		RewriteEngine on
		RewriteBase /
		RewriteCond %{REQUEST_FILENAME} !-f
		RewriteCond %{REQUEST_FILENAME} !-d
		RewriteRule ^.*$ /index.php [L]

		<LimitExcept GET HEAD PUT DELETE PATCH POST>
			Allow from all
		</LimitExcept>
	</Directory>
</VirtualHost>
Restart the Apache server and you should now have two sites, one over localhost, and one over https://localhost
TIP
If you want to redirect anything coming in over http to https, then you can simply edit the port 80 virtual host to the following:
Listen 80
<VirtualHost *:80>
	ServerName <yourservername>
	Redirect / https://<yourservername>/
</VirtualHost>
Configuring SAP SQL Anywhere
SAP SQL Anywhere is the namesake commercial database solution offered by software giant SAP SE. If your organization relies upon SQL Anywhere, you’ll be pleased to know DreamFactory’s Silver and Gold editions include support for this powerful database! In this chapter we’ll walk you through the server configuration steps necessary to ensure your DreamFactory instance can interact with your SQL Anywhere database.
Installing the PDO and PDO_DBLIB Extensions
DreamFactory interacts with SQL Anywhere via the PHP Data Objects (PDO) extension. It works in conjunction with a database-specific PDO driver to interface with a wide variety of databases. Fortunately, the PDO extension and associated drivers are very easy to install. You can confirm whether PDO is already installed by running this command:
$ php -m
...
PDO
...
If PDO doesn’t appear in the list of installed extensions, just search your package manager to identify the PDO package. For instance on CentOS you would search for the PDO package like so:
$ sudo yum search pdo
...
php71-php-pdo.x86_64
php72-php-pdo.x86_64
php73-php-pdo.x86_64
With the desired PHP version identified you can then install it:
$ yum install php72-php-pdo.x86_64
Next you’ll want to install the SQL Anywhere driver. Confusingly enough, this driver is often identified as “Sybase” because SAP SQL Anywhere was known as Sybase SQL Anywhere prior to SAP’s 2010 Sybase acquisition, and the PHP community hasn’t gotten around to updating the extension’s name. On Debian/Ubuntu you can install the driver using this command:
$ sudo apt install php7.2-sybase
On CentOS this driver is identified “pdo-dblib”, because “dblib” is the name given to the library used to transfer data between the client and a database that supports a protocol known as tabular data stream (TDS - more about this in a bit). However as a convenience you can search the package manager for the term “sybase” and the desired drivers will be returned:
$ sudo yum search sybase
...
php70-php-pdo-dblib.x86_64
php71-php-pdo-dblib.x86_64
php72-php-pdo-dblib.x86_64
php73-php-pdo-dblib.x86_64
Now that you know the name you can install the desired version:
$ sudo yum install php72-php-pdo-dblib.x86_64
Once complete, run php -m again and confirm both PDO and the pdo_dblib extensions are installed:
$ php -m
...
PDO
pdo_dblib
...
With this step complete, let’s move on to installing and configuring FreeTDS.
Installing and Configuring FreeTDS
FreeTDS is an open source implementation of a protocol known as Tabular Data Stream (TDS). This protocol is used by both SQL Anywhere and Microsoft SQL Server as a means for passing data between the databases and their respective clients. Therefore your DreamFactory server requires a TDS library which allows it to talk to these databases, and FreeTDS suits that need nicely.
Open the /etc/freetds/freetds.conf
That said, DreamFactory will not work with the SAP-produced drivers. DreamFactory’s SAP SQL Anywhere support
https://cubist.cs.washington.edu/doc/FreeTDS/userguide/x631.htm https://www.freetds.org/userguide/ChoosingTdsProtocol.html https://www.freetds.org/userguide/freetdsconf.html https://docs.microsoft.com/en-us/sql/linux/sql-server-linux-setup-tools?view=sql-server-2017
see /etc/profile: export SQLANY17=/opt/sqlanywhere17 (https://forums.suse.com/archive/index.php/t-2562.html)
Troubleshooting Your Configuration
One easy way to confirm the drivers are correctly installed and that your SQL Anywhere database can be reached is by running the following command inside your Linux shell. The SA_HOST, SA_PORT, SA_DB, SA_U, and SA_PWD are placeholders for your SQL Anywhere host IP or domain name, port, database name, username, and password, respectively:
TDSDUMP="tds.log" \
php -r "new PDO('dblib:host=SA_HOST:SA_PORT;dbname=SA_DB','SA_U','SA_PWD');"
Invoking PHP using the -r option will cause the command that follows to be executed using the PHP interpreter. We prefix the php call with creation of the the TDSDUMP environment variable. When this variable is set, it will result in all traffic sent to FreeTDS to be logged to the assigned file, which in this case is tds.log. Once this command completes, the tds.log file will be found in your current directory and will contain quite a bit of information about the communication workflow associated with attempting to connect to SQL Anywhere via PHP’s PDO extension.
Using the SAP PHP Extension
A few years ago SAP released their own native SQL Anywhere PHP extension, with little background information regarding why this extension should be used in preference of PHP’s PDO-based approach. To be clear, DreamFactory does not support the SAP PHP modules; instead we rely upon PHP’s longstanding support for SQL Anywhere via the PDO and PDO_DBLIB extensions.
That said, we recognize you might wish to use PHP to interact with a SQL Anywhere database outside of the DreamFactory-generated APIs and so because documentation on this matter is so woefully lacking we thought it might be useful to include some guidance on the matter for the benefit of all PHP users. To configure and test this module within your custom PHP application (not DreamFactory), follow these instructions:
- Navigate to the following URL and download the PHP module matching your installed PHP version:
https://wiki.scn.sap.com/wiki/display/SQLANY/The+SAP+SQL+Anywhere+PHP+Module
You can easily determine the PHP version installed on your server using the following command:
$ php -v
PHP 7.1.22-1+0~20181001133629.6+jessie~1.gbp113f3b (cli)
...
- Move the module zip file to your server
The following command will unzip the file and place its contents in a directory named sqlanywhere-driver found in your system’s /tmp directory:
$ unzip SQLAnywhere-php-7.1_Linux.zip -d /tmp/sqlanywhere-driver
If your Linux server is a fresh instance, you may need to install the unzip package first. For instance on Ubuntu/Debian you’d do so running this command:
$ sudo apt install unzip
- Move the module to the PHP extension directory
Next you’ll move the php7.1.0_sqlanywhere.so module to the PHP extension directory. You can learn the extension directory’s path via this command:
$ php -i | grep extension_dir
extension_dir => /usr/lib/php/20160303 => /usr/lib/php/2016030
There are several versions of this module. You’ll find 32-bit versions in the /tmp/sqlanywhere-driver/bin32 directory, and 64-bit versions in the /tmp/sqlanywhere-driver/bin64 directory. Further, each of these respective directories contains a thread safe and non-thread module. If you’re using PHP’s CGI version or Apache 1.X, you’ll use the non-threaded module. If you’re using Apache 2.X or NGINX, you’ll use the threaded version, which is denoted by the _r filename postfix.
https://infocenter.sybase.com/help/index.jsp?topic=/com.sybase.help.sqlanywhere.12.0.1/dbprogramming/php-s-6029035.html
- Update the php.ini file and restart the web server
Finally, you’ll need to update the php.ini file to ensure PHP recognizes the new modules. You can learn the location of this file using the following command:
$ php --ini
...
Loaded Configuration File: /etc/php/7.1/cli/php.ini
...
Based on this output, the php.ini file is located in /etc/php/7.1/cli/. Keep in mind however that this php.ini file is only used in conjunction with PHP when running via the command line interface (the terminal). You’ll also want to modify the php.ini file used when PHP interacts with the web server. It’s location isn’t obvious when running php --ini, however if you navigate to the cli directory’s parent you’ll find the directory housing the web server-specific php.ini file:
$ cd /etc/php/7.1/
$ ls
apache2  cli  fpm  mods-available
$ ls apache2/
conf.d php.ini
Therefore you’ll want to update both php.ini files to ensure the SQL Anywhere modules are recognized in both environments. To do so, you’ll open up each file in a text editor and add one line:
extension=php-7.1.0_sqlanywhere_r.so
If you’re in the minority of users and require the non-threaded version, you’ll instead reference the non-threaded version:
extension=php-7.1.0_sqlanywhere.so
Keep in mind this reference must match the name of the file you copied into the PHP extensions directory!
Once done, save the changes and restart your web server. Confirm PHP’s CLI environment recognizes the module by running this command:
$ php -m | grep sqlanywhere
sqlanywhere
Next, confirm PHP’s web environment recognizes the module by creating a file named phpinfo.php in your web document root directory and adding the following
Useful System Administration Notes
Creating a New Sudo User
It’s bad practice to run system commands as the root user unless absolutely necessary. You should instead create a Sudo user that can execute commands on behalf of another user, by default the root user. To do so, you’ll first create a new user (skip this step if you instead want to add sudo capabilities to an existing user:
$ adduser wjgilmore
Adding user `wjgilmore' ...
Adding new group `wjgilmore' (1000) ...
Adding new user `wjgilmore' (1000) with group `wjgilmore' ...
Creating home directory `/home/wjgilmore' ...
Copying files from `/etc/skel' ...
Enter new UNIX password:
Retype new UNIX password:
passwd: password updated successfully
Changing the user information for wjgilmore
Enter the new value, or press ENTER for the default
	Full Name []:
	Room Number []:
	Work Phone []:
	Home Phone []:
	Other []:
Is the information correct? [Y/n] Y
Next, you’ll add the user to the sudo group:
$ usermod -aG sudo wjgilmore
Once done, you can execute elevated commands by prefixing the command with sudo:
$ sudo ./build_system.sh
See these resources for more information:
Upgrading Your DreamFactory Instance
DreamFactory very much falls into the “set it and forget it” software category, often serving APIs in the background for months if not years without further human intervention. Nevertheless, we encourage users to regularly upgrade to take advantage of new features, not to mention enhanced performance and stability. Also, DreamFactory relies upon a great many dependencies such as PHP which are occasionally associated with security vulnerabilities. Accordingly, you’ll want to take care to ensure the operating system and dependecies are patched.
Fortunately, upgrading DreamFactory to the latest version is a pretty straightforward process. In this section we’ll walk you through the process.
Step #1. Back Up Your Current DreamFactory Configuration Settings
A file named .env resides in your current DreamFactory instance’s root directory. This file contains many key system settings, including database credentials, caching preferences, and other key configurations. To backup your .env file, navigate to the DreamFactory root directory and copy the file to another directory:
$ cd /opt/dreamfactory
$ cp .env ~/.env
Next, use SFTP or another available file transfer mechanism to move the .env copy to another location outside of the server. Please be sure to take this additional precaution to avoid losing any unforeseen issues which may result in file loss.
Step #2. Back Up Your DreamFactory System Database
Next we’ll create a backup copy of the production DreamFactory system database. Four system databases are supported, including MySQL, PostgreSQL, MS SQL Server, and SQLite. We will demonstrate backing up a MySQL database here, however rest assured similarly easy backup mechanisms exist for the other vendors. Just keep in mind you’ll want to backup both the data and data structures. To backup a MySQL database, you’ll use the mysqldump command:
$ mysqldump -u df_admin -p --databases dreamfactory --no-create-db > ~/dump.sql
Enter password:
You can use the MySQL credentials found in your .env file to perform the backup. If your database name is not dreamfactory then update the value passed to --databases accordingly. The --no-create-db flag tells the mysqldump command to not generate a create database command in the dump file. Finally, the redirection operator > is used to redirect the dump output elsewhere, which in this case is a file named dump.sql that resides in the executing user’s home directory. Note this file doesn’t need to exist before executing the mysqldump command.
Once complete, be sure to copy the dump.sql file to a safe place just as was done with the .env file.
Step #3. Prepare a New Host Serve and Run Installer
Earlier in this chapter we referred to the automated installers that are included with the platform (learn more here]. We recommend downloading one of these installers from the DreamFactory repository and running them in the manner previously described. Four operating systems are currently supported, including CentOS, Debian, Fedora, and Ubuntu. Ideally the operating system will be newly installed, ensuring the server is free of baggage.
At the installer’s conclusion you’ll be prompted to create the first administration account. Go ahead and create one, however we’ll soon be importing your existing administrator(s) from the production DreamFactory instance so ultimately the new account won’t hold any importance.
Step #4. Disable MySQL’s Strict Mode Setting
If your production DreamFactory instance uses MySQL for the system database, then you may need to disable something known as strict mode in the new MySQL database. This is because MySQL 5.7 changed how MySQL behaves in certain instances, such as whether 0000-00-00 can be treated as a valid date. Therefore if your production MySQL version is 5.6 or earlier, then you’ll almost certainly need to disable strict mode. Fortunately, this is easily done by navigating to your new DreamFactory instance’s root directory and opening config/database.php using a text editor like Nano or Vim. Scroll down to the mysql array and add this key/value pair:
'strict' => false
Step #5. Import the System Database Backup
Next we’ll import the MySQL database backup from your current production environment into the newly installed DreamFactory environment. Before doing so, we’ll first need to delete the contents (schema and data) of the new system database. To do so, navigate to your new DreamFactory installation’s root directory and run these commands:
$ php artisan migrate:fresh
$ php artisan migrate:reset
Next, import the backup into the new database. Recall that this backup is found in the dump.sql file. Transfer the file to your new DreamFactory instance, and run this command:
$ mysql -u db_user -p dreamfactory_db < dump.sql
Enter password:
You’ll need to substitute db_user and dreamfactory_db with the database username and password you supplied to the installer. Next, we’ll run the migrations command to ensure the system database contains all of the latest table structures and seed data:
$ php artisan migrate --seed
Finally, clear the cache:
$ php artisan cache:clear
$ php artisan config:clear
Congratulations, you’ve successfully upgraded your DreamFactory instance! Navigate to the designated domain, and login using administrative credentials associated with your old instance.
Conclusion
With DreamFactory installed and configured, it’s time to build your first API! In the next chapter we’ll do exactly that, walking through the steps necessary to generate a database-based API.