> ## Documentation Index
> Fetch the complete documentation index at: https://www.integrate.io/docs/llms.txt
> Use this file to discover all available pages before exploring further.
# ETL: Connecting to Amazon S3
> Connect Amazon S3 to Integrate.io ETL for reading and writing data. Configure IAM credentials, bucket policies, and S3 connection settings.
To enable Integrate.io ETL [access to your S3 data](/docs/etl/allowing-integrateio-etl-access-to-data-on-amazon-s3/), you need to perform the following steps:
In AWS's IAM (Identity and Access Management) module, create a user account for working with Integrate.io ETL.
In IAM, save the user account's security credentials for later use when defining a connection in Integrate.io ETL.
In IAM, attach a user policy (provided by Integrate.io ETL) to the newly-created user account.
In Integrate.io ETL, create a connection using the IAM security credentials you saved previously.
Each of these steps are detailed below. **Note:** To enable Integrate.io ETL to operate with S3:
* never use an underscore in an S3 bucket name.
* never end an S3 bucket name with a dash.
### To create a user account in IAM
Log into the AWS Management Console.
Click Identity & Access Management (also known as IAM).
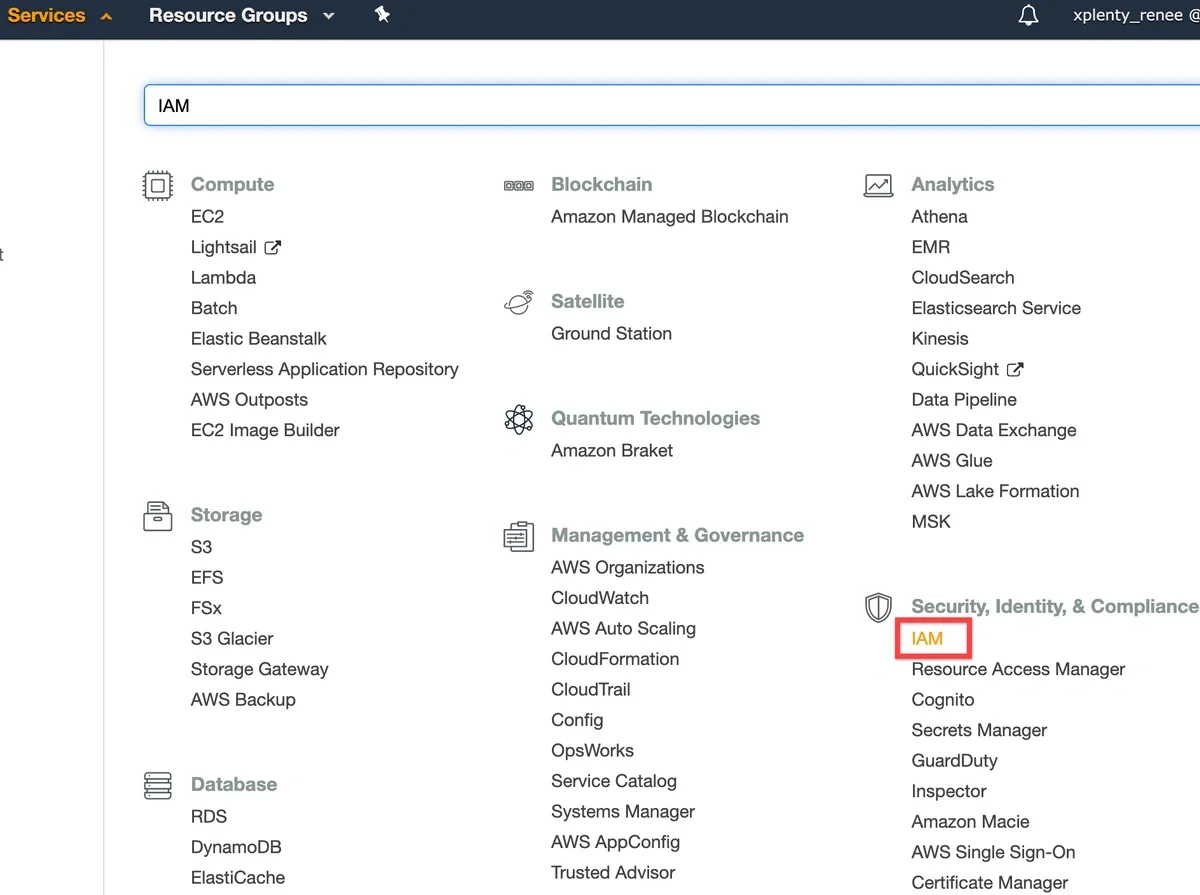 On the left navigation bar, click **Users**.
Click **Add User**.
On the left navigation bar, click **Users**.
Click **Add User**.
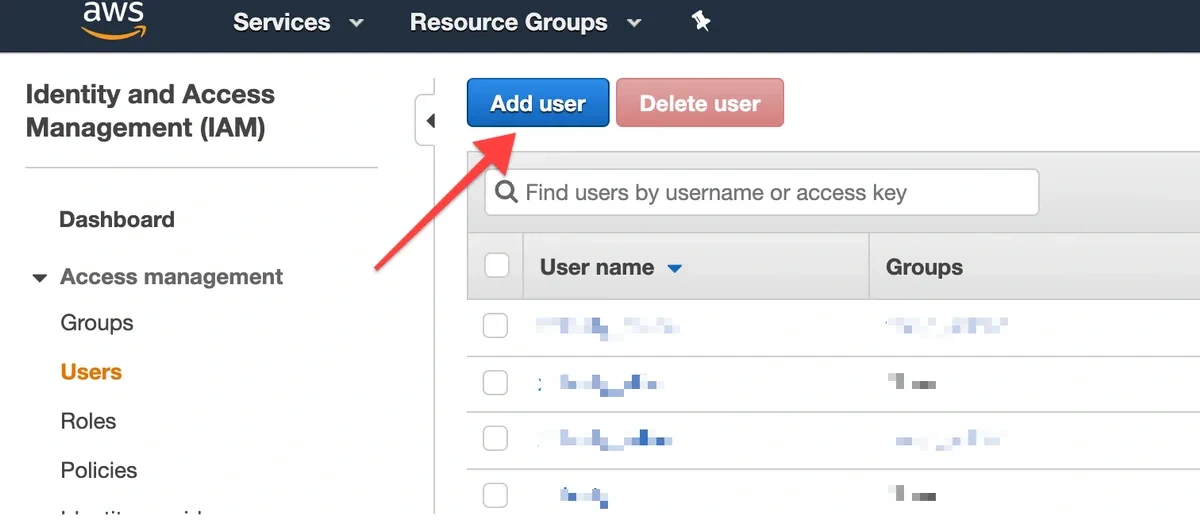 Enter a user name, such as Integrate.io ETL, and make sure the check box **Programmatic access** is selected. Click **Next: Permissions** to proceed.
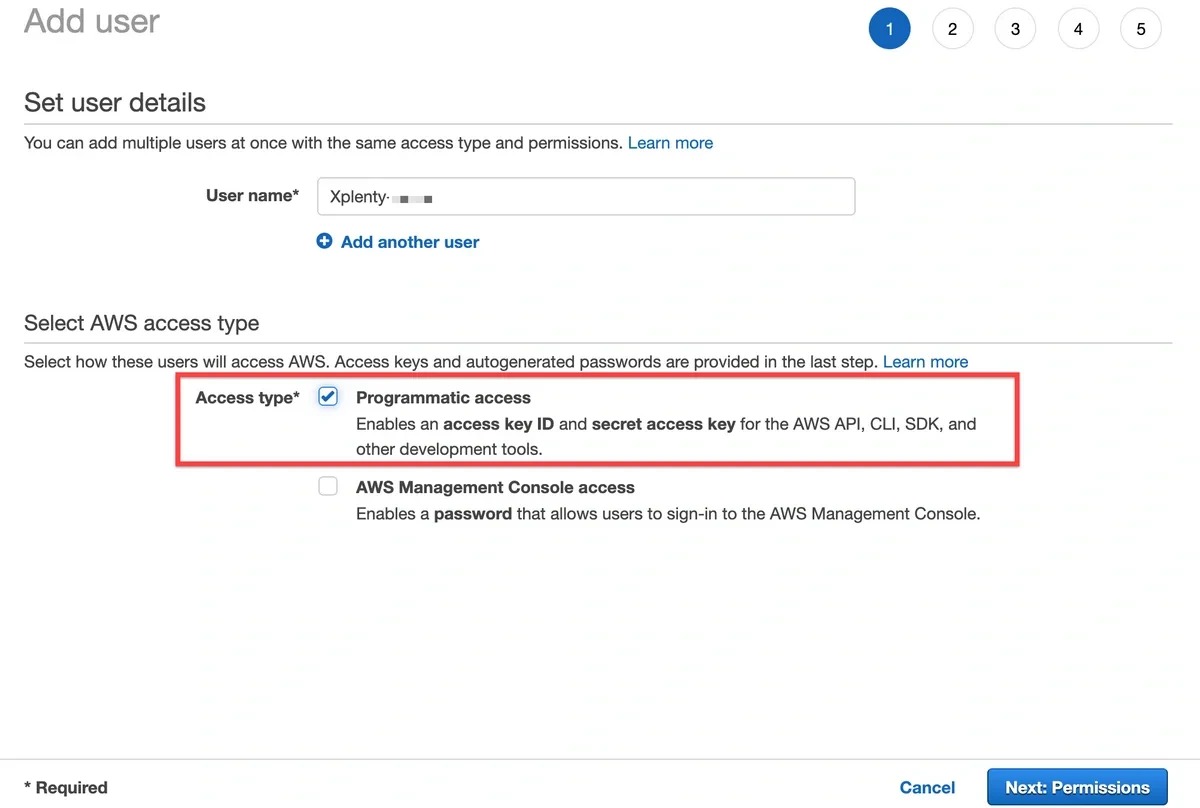 Click **Create User**. A user account with security credentials is created.
 ### To save user security credentials
Click **Download .csv** and save the credentials.csv file for later when you will need to configure Integrate.io ETL to work with S3.
### To save user security credentials
Click **Download .csv** and save the credentials.csv file for later when you will need to configure Integrate.io ETL to work with S3.
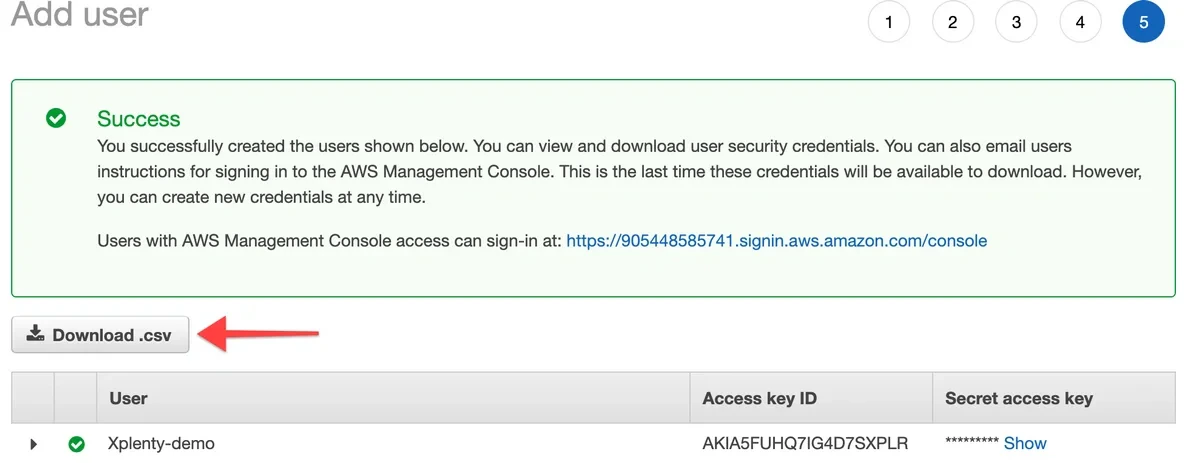 Click **Close** to close the window.
### Creating new security credentials for a user
**Note:**
Perform this step if in the procedure to save user security credentials above, any of the user account security credential keys contain a slash, or if you cannot find the credentials.csv file you saved.
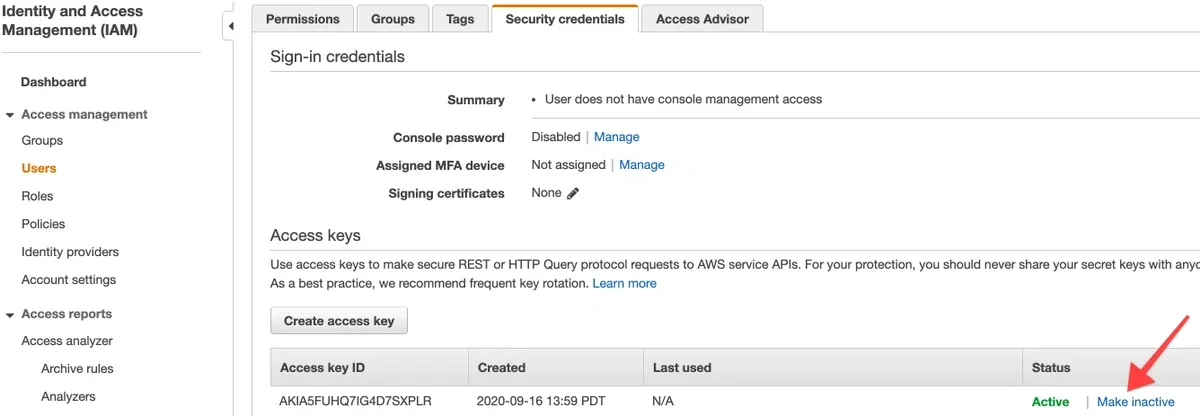
In the list of users, click the user you created for working with Integrate.io ETL, then scroll down to **Security credentials**, and then click **Make inactive**.
Click **Close** to close the window.
### Creating new security credentials for a user
**Note:**
Perform this step if in the procedure to save user security credentials above, any of the user account security credential keys contain a slash, or if you cannot find the credentials.csv file you saved.
In the list of users, click the user you created for working with Integrate.io ETL, then scroll down to **Security credentials**, and then click **Make inactive**.
 Click **Create access key**.
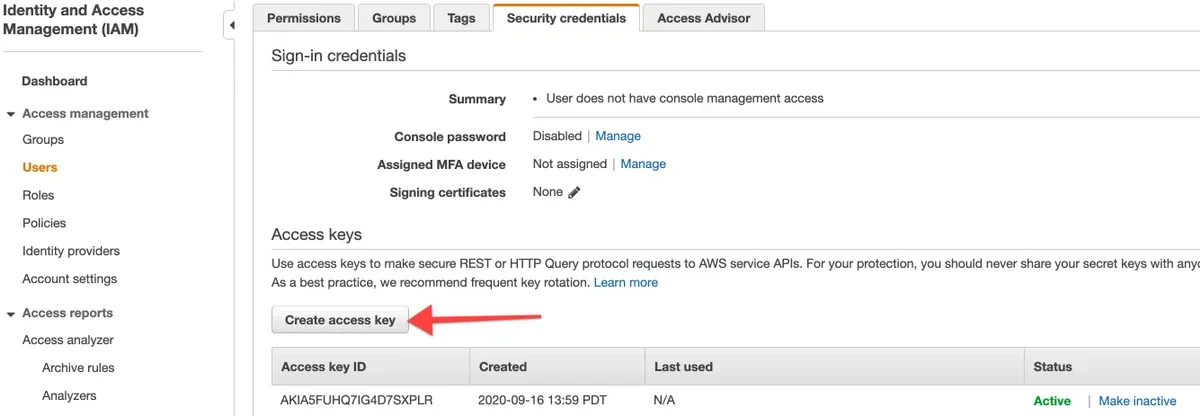 Continue from Step 1 in to download and save user security credentials above.
### To attach an Integrate.io ETL user policy to the IAM user account
In the list of users, click the user you created for working with Integrate.io ETL, then scroll down to **Add permissions**.
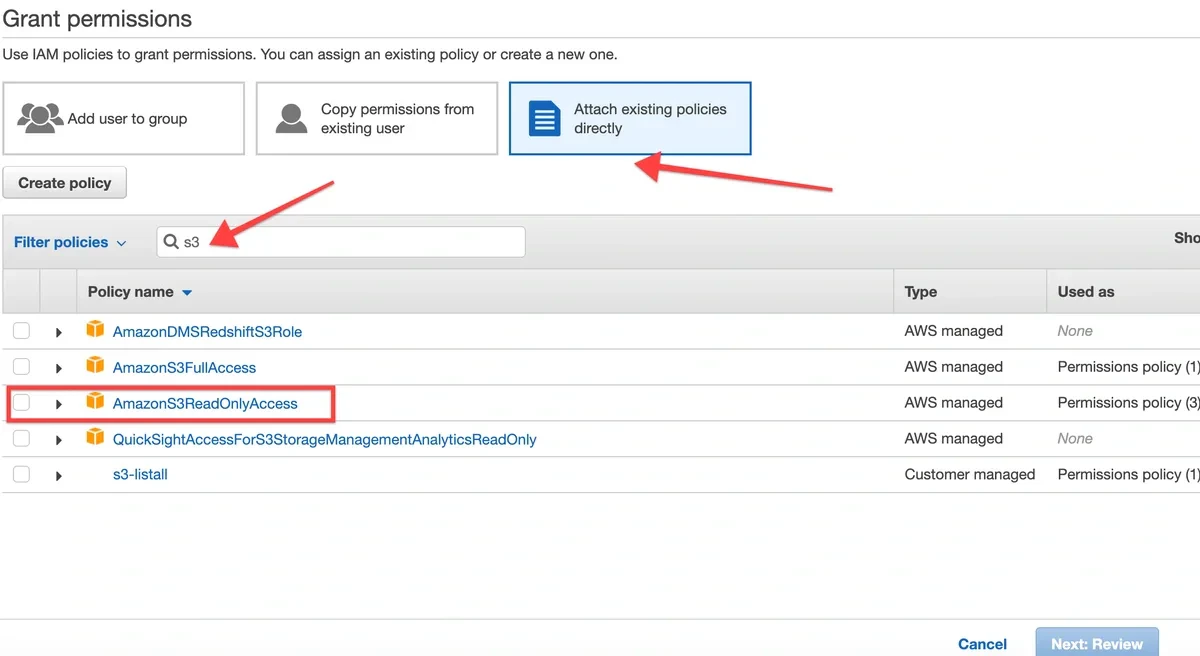
Click **Attach existing policies directly**.
In the search box, search 's3 ...'.
For **read-only** buckets, check **AmazonS3ReadOnlyAccess**.
Continue from Step 1 in to download and save user security credentials above.
### To attach an Integrate.io ETL user policy to the IAM user account
In the list of users, click the user you created for working with Integrate.io ETL, then scroll down to **Add permissions**.
Click **Attach existing policies directly**.
In the search box, search 's3 ...'.
For **read-only** buckets, check **AmazonS3ReadOnlyAccess**.
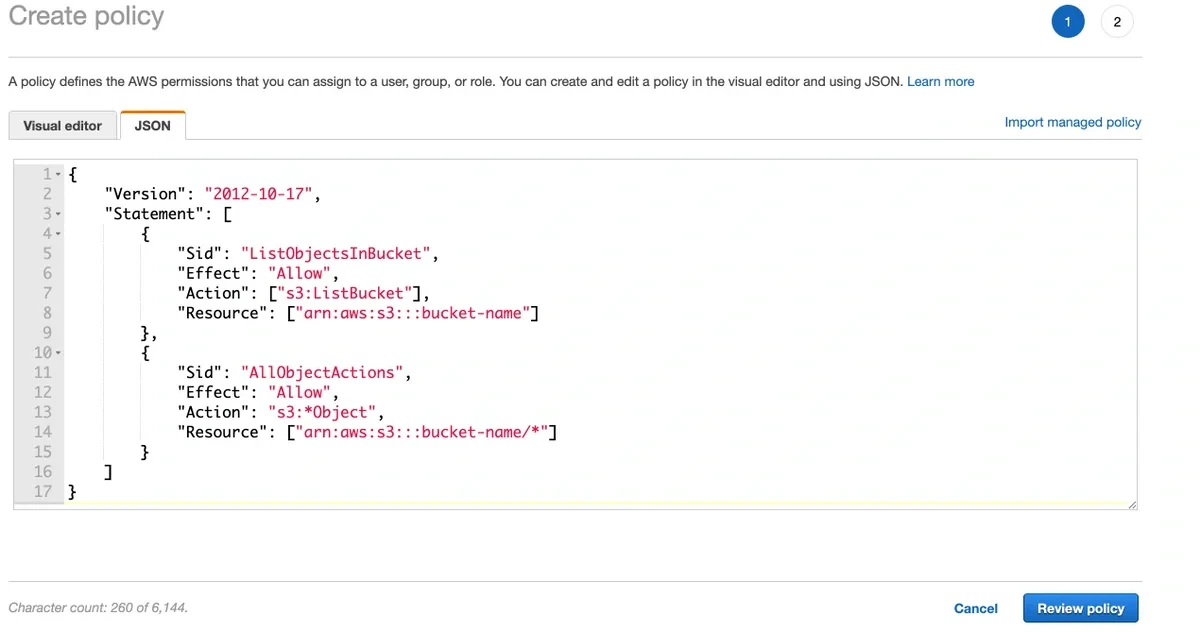
 For **read-write** buckets, Click **create policy.** Choose **JSON**, then Copy the following policy and replace "your-bucket" with your bucket name:
 ```json theme={null}
{
"Version": "2012-10-17",
"Statement": [
{
"Sid": "ListObjectsInBucket",
"Effect": "Allow",
"Action": ["s3:ListBucket"],
"Resource": ["arn:aws:s3:::bucket-name"]
},
{
"Sid": "ReadWriteObjects",
"Effect": "Allow",
"Action": [
"s3:PutObject",
"s3:GetObject",
"s3:DeleteObject"
],
"Resource": ["arn:aws:s3:::bucket-name/*"]
}
]
}
```
All three object actions are required for pipelines that write to S3. Integrate.io ETL writes each output file to a temporary object and then finalizes it, which on Amazon S3 is a copy-and-delete operation. This needs `s3:PutObject` to write the file, `s3:GetObject` to read the temporary object while finalizing it, and `s3:DeleteObject` to remove the temporary object afterward. Granting `s3:PutObject` alone causes writes to fail while the file is being finalized.
Then click **Review policy.** On the next page, click **Create policy.** For more information, refer to AWS IAM documentation on the web.
### To create an Amazon S3 connection in Integrate.io ETL
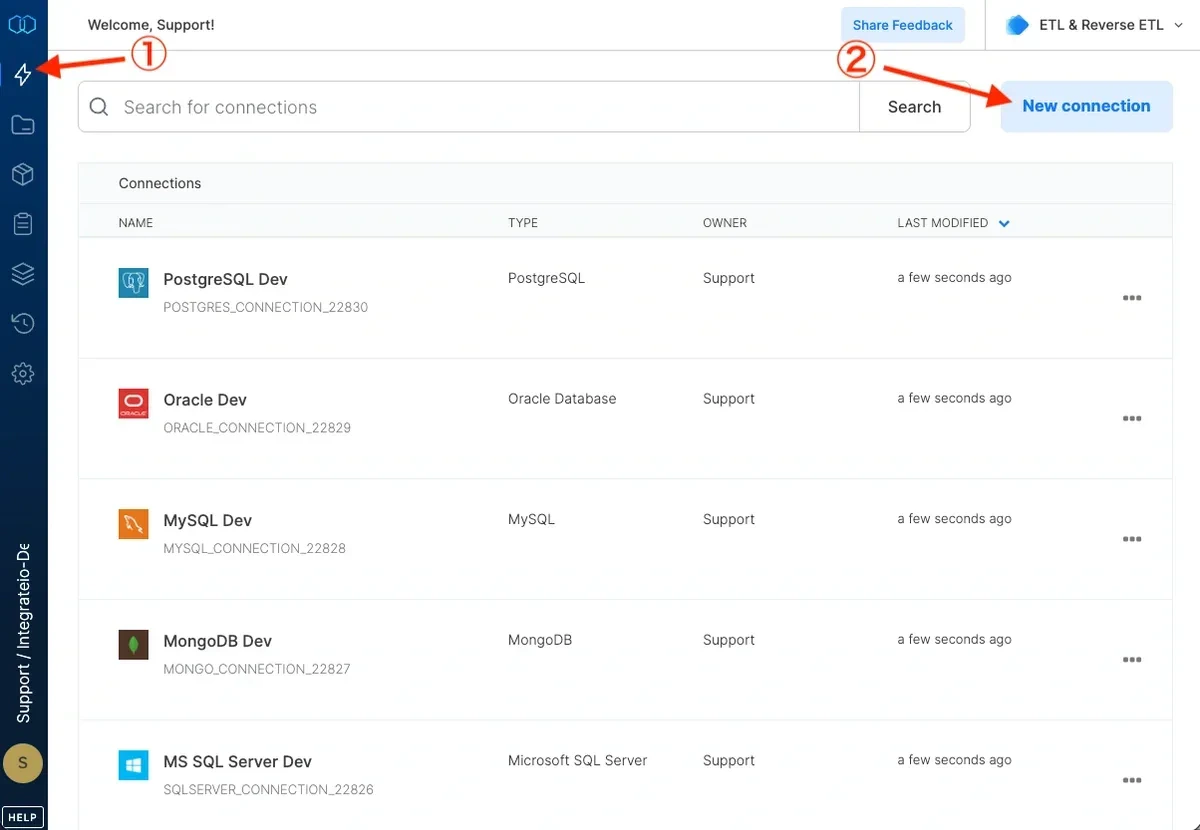
Click the **Connections** icon (lightning bolt) on the top left menu.
To create a connection, click **New connection.**
```json theme={null}
{
"Version": "2012-10-17",
"Statement": [
{
"Sid": "ListObjectsInBucket",
"Effect": "Allow",
"Action": ["s3:ListBucket"],
"Resource": ["arn:aws:s3:::bucket-name"]
},
{
"Sid": "ReadWriteObjects",
"Effect": "Allow",
"Action": [
"s3:PutObject",
"s3:GetObject",
"s3:DeleteObject"
],
"Resource": ["arn:aws:s3:::bucket-name/*"]
}
]
}
```
All three object actions are required for pipelines that write to S3. Integrate.io ETL writes each output file to a temporary object and then finalizes it, which on Amazon S3 is a copy-and-delete operation. This needs `s3:PutObject` to write the file, `s3:GetObject` to read the temporary object while finalizing it, and `s3:DeleteObject` to remove the temporary object afterward. Granting `s3:PutObject` alone causes writes to fail while the file is being finalized.
Then click **Review policy.** On the next page, click **Create policy.** For more information, refer to AWS IAM documentation on the web.
### To create an Amazon S3 connection in Integrate.io ETL
Click the **Connections** icon (lightning bolt) on the top left menu.
To create a connection, click **New connection.**
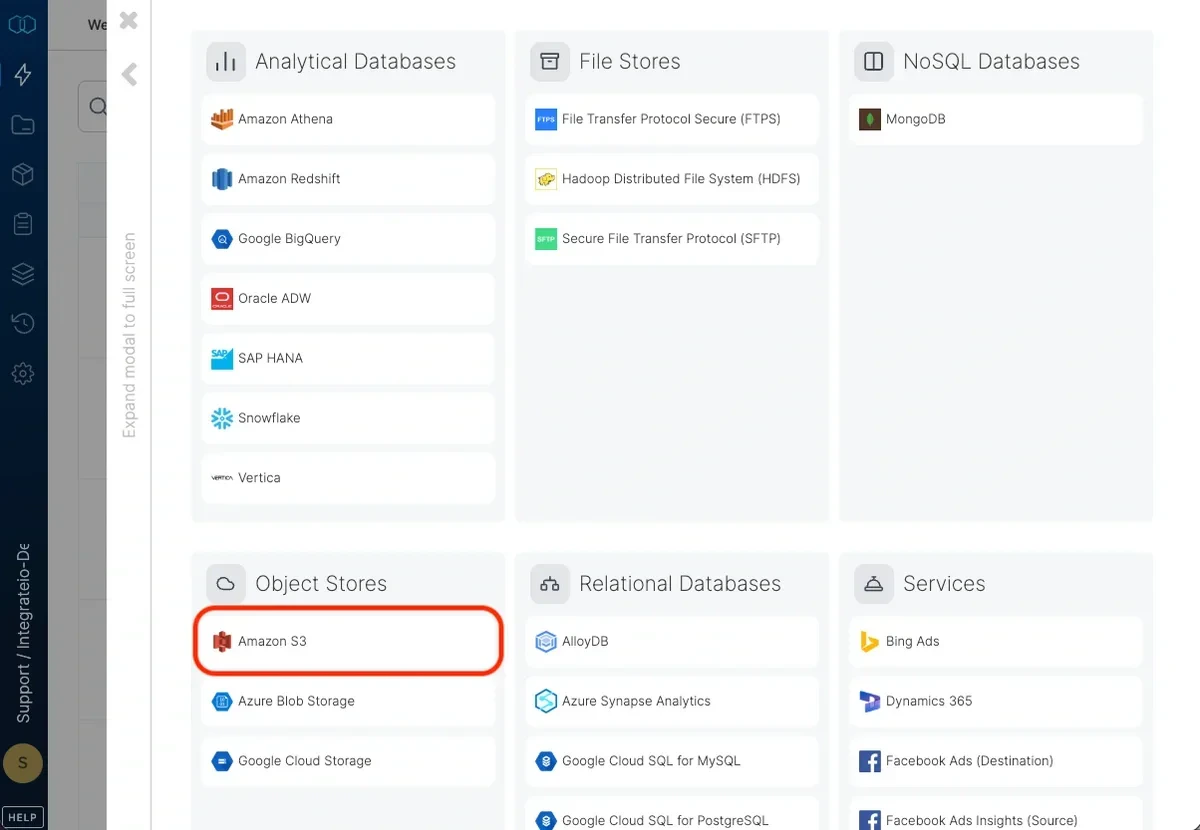
 Select **Amazon S3**.
 Type a name for the connection, then from the credentials.csv file you previously saved in **To save user security credentials** above, copy the Access key id and Secret access key into the respective fields.
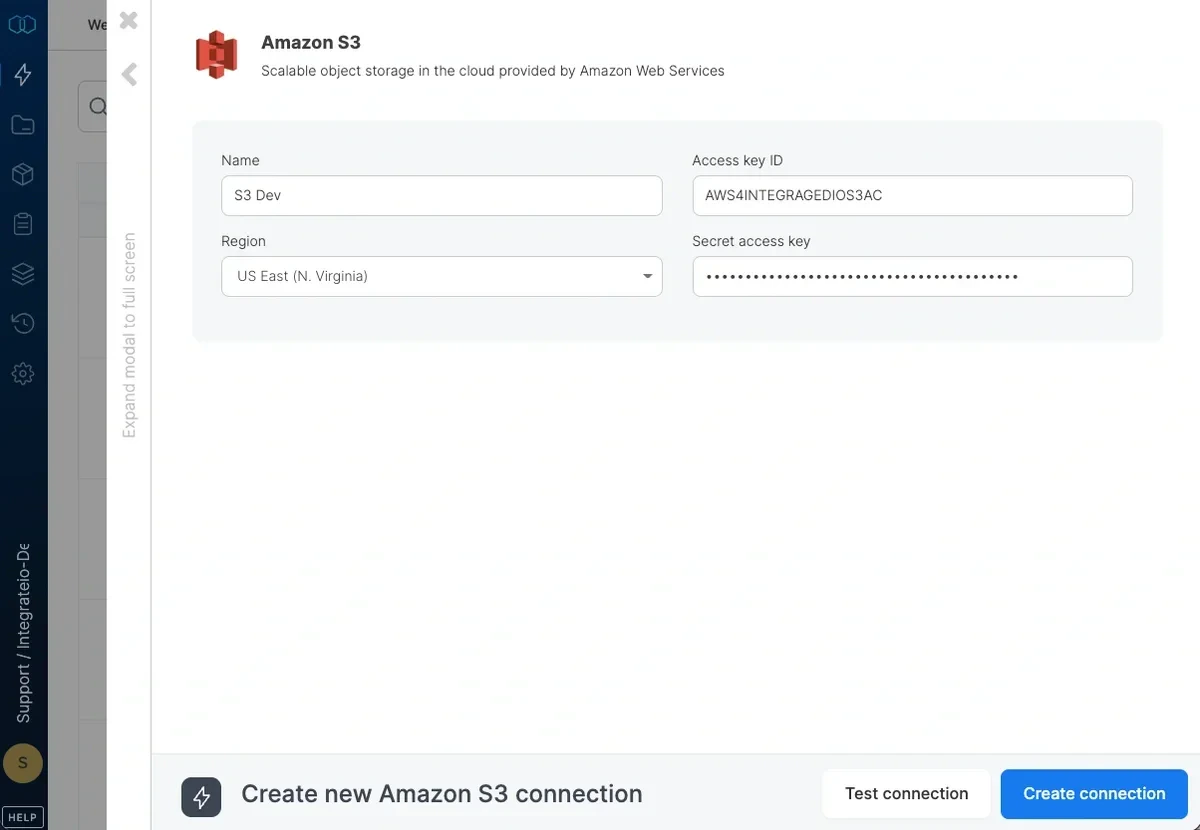 If the S3 buckets reside in a region that requires AWS Signature v4, fill in the region for the connection. See region list [here](https://docs.aws.amazon.com/general/latest/gr/rande.html#s3_region).
Click **Test connection**. If the credentials are correct, a message that the connection test was successful appears.
Click **Create amazon s3 connection**.
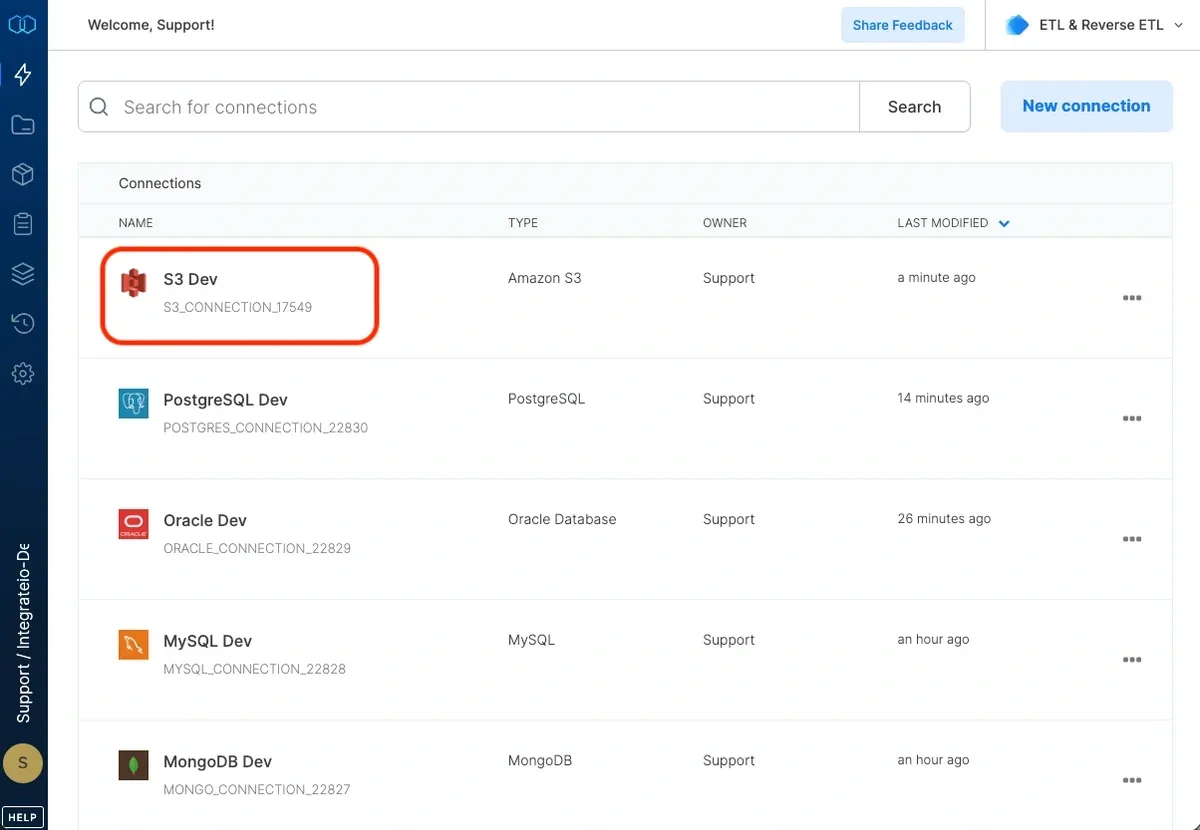
The connection is created and appears in the list of connections.
If the S3 buckets reside in a region that requires AWS Signature v4, fill in the region for the connection. See region list [here](https://docs.aws.amazon.com/general/latest/gr/rande.html#s3_region).
Click **Test connection**. If the credentials are correct, a message that the connection test was successful appears.
Click **Create amazon s3 connection**.
The connection is created and appears in the list of connections.
 Now you can create a package and test it on your actual data stored in S3.