> ## Documentation Index
> Fetch the complete documentation index at: https://www.integrate.io/docs/llms.txt
> Use this file to discover all available pages before exploring further.
# ETL: Connecting to HubSpot (Service Token)
> Connect Integrate.io ETL to HubSpot using a service token, configure API access, and load contacts, deals, and marketing data into your pipelines.
## How to Retrieve a HubSpot Private App Token for Integrate.io
You can use **HubSpot Private Apps** to connect your HubSpot account securely with **Integrate.io** using an **Access Token (Bearer Token)**. This guide walks you through creating the token from the HubSpot Dashboard.
## Step 1: Log In to HubSpot
Go to [https://app.hubspot.com](https://app.hubspot.com)
Log in with an account that has **Super Admin** or **App Management** permissions.
## Step 2: Create a Private App
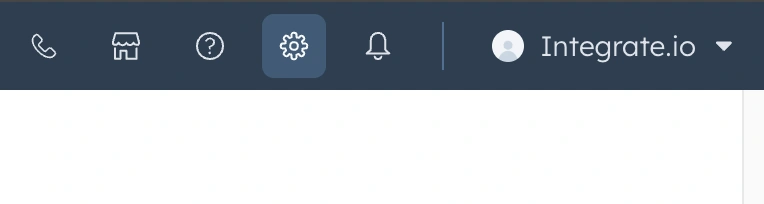
In the top right, click the **Settings** icon.
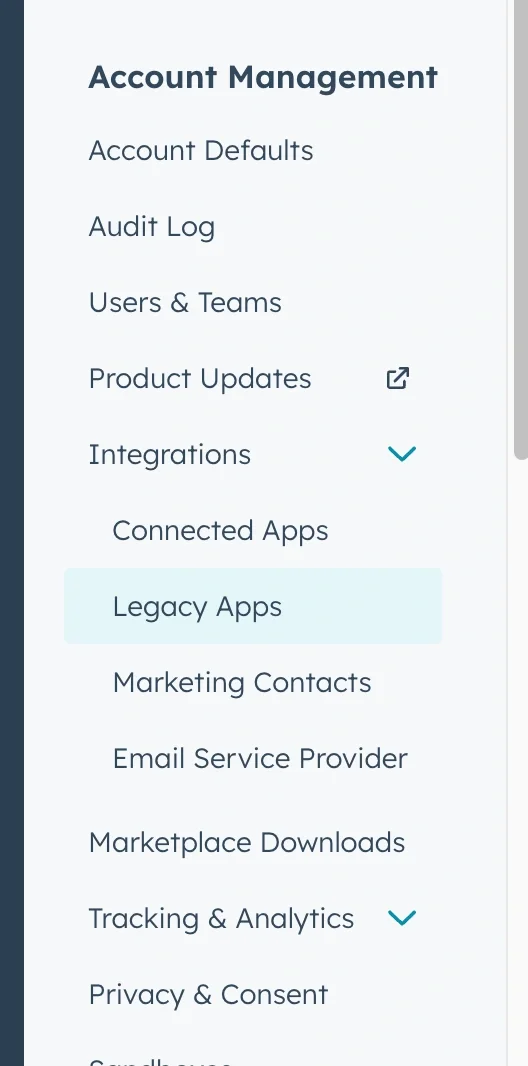
 In the left sidebar, scroll down and click **Integrations > Legacy Apps**
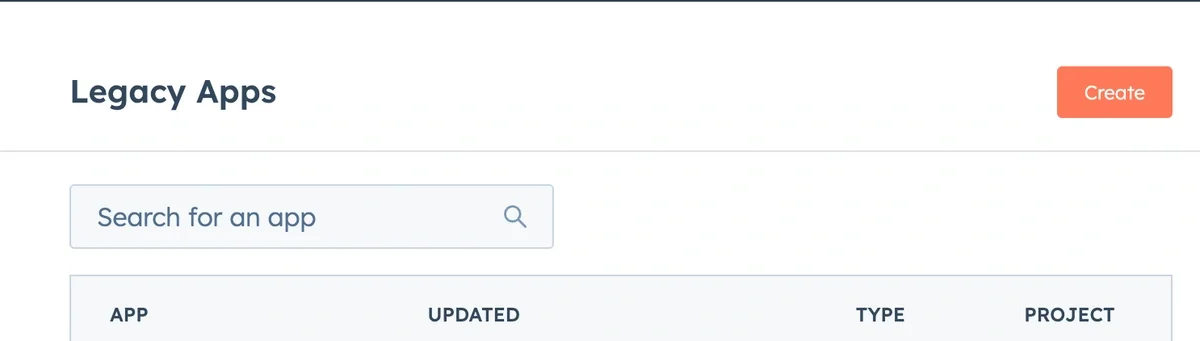
 Click the **Create** button
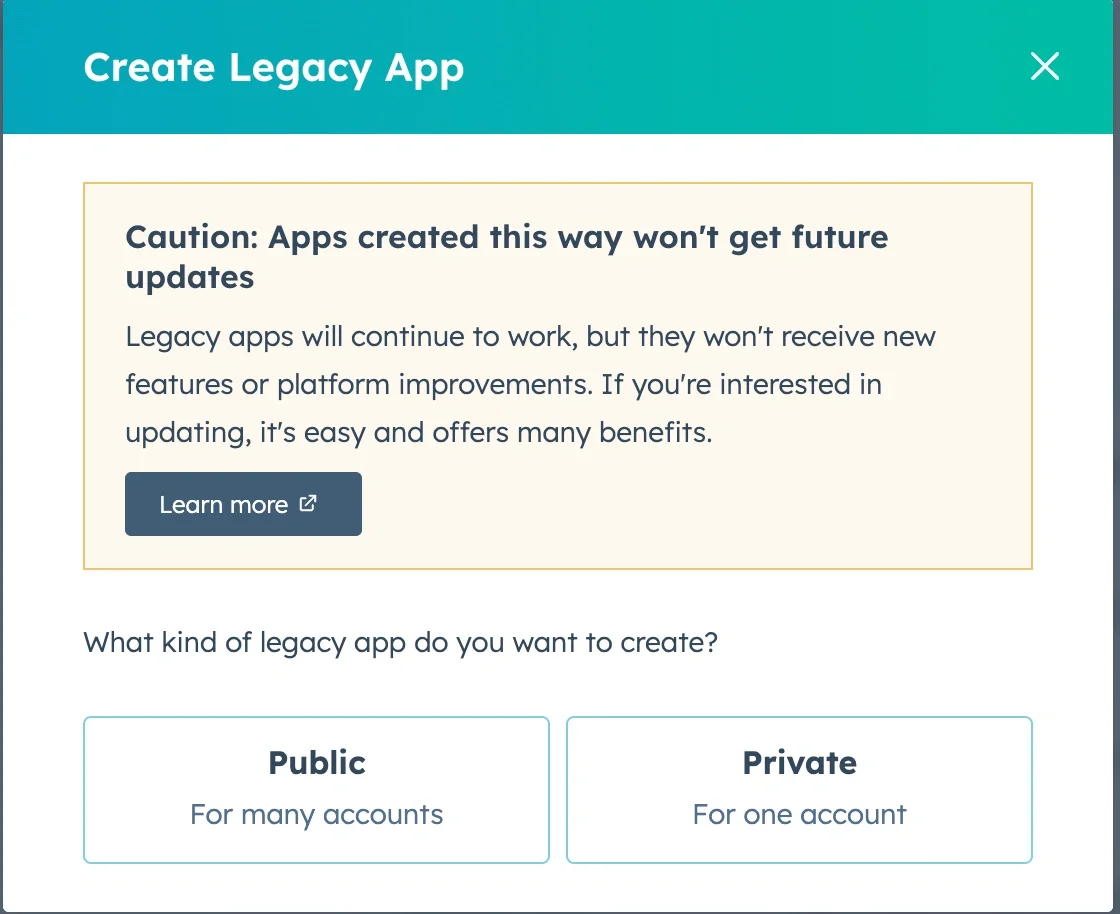
 Select **Private** (For one account)
 ## Step 3: Configure the App
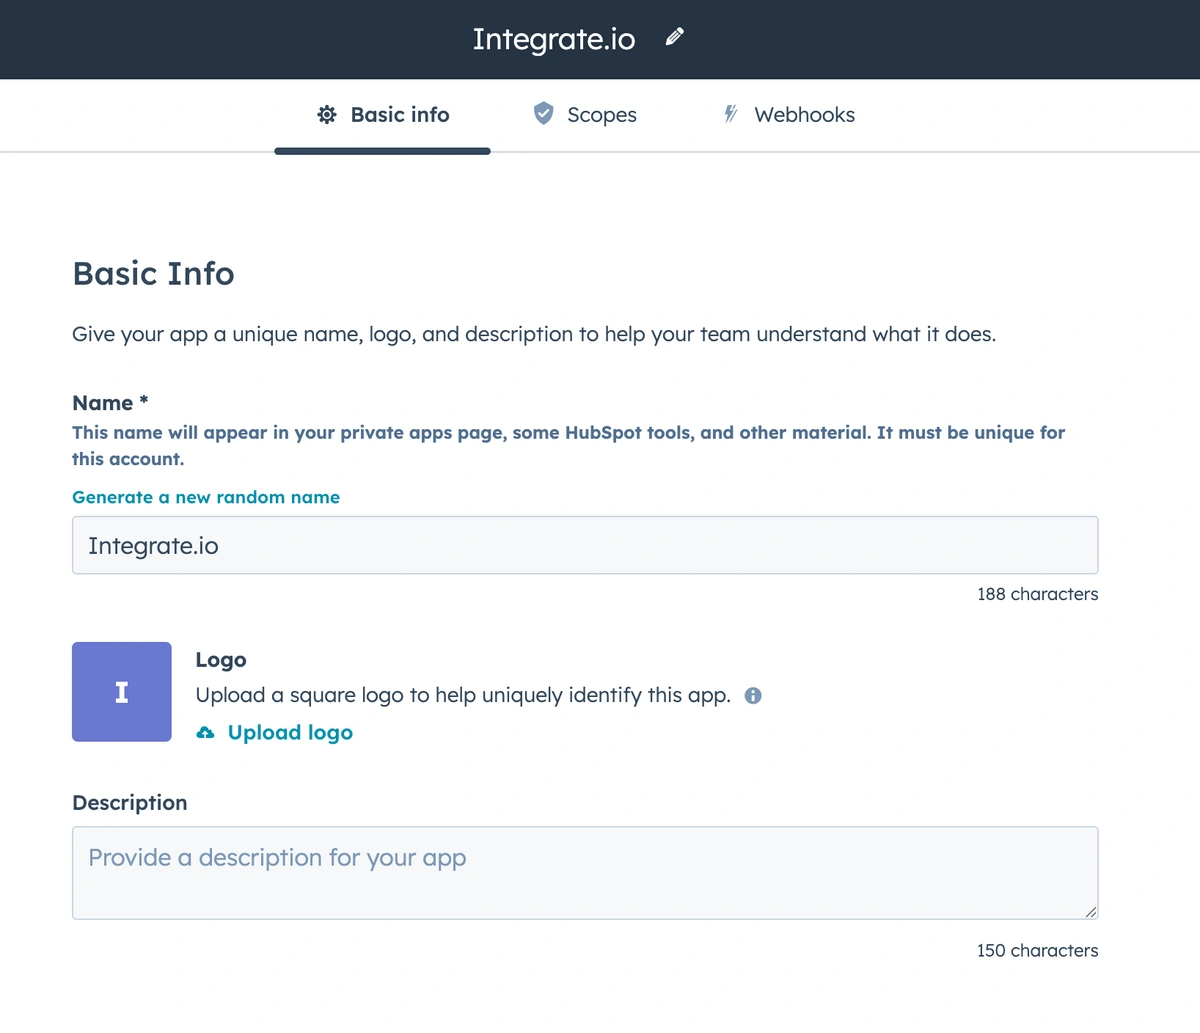
**Give your app a name**, e.g. `Integrate.io Sync`
(Optional) Add a description, icon, or team owner for tracking
## Step 3: Configure the App
**Give your app a name**, e.g. `Integrate.io Sync`
(Optional) Add a description, icon, or team owner for tracking
 ## Step 4: Define Access Scopes
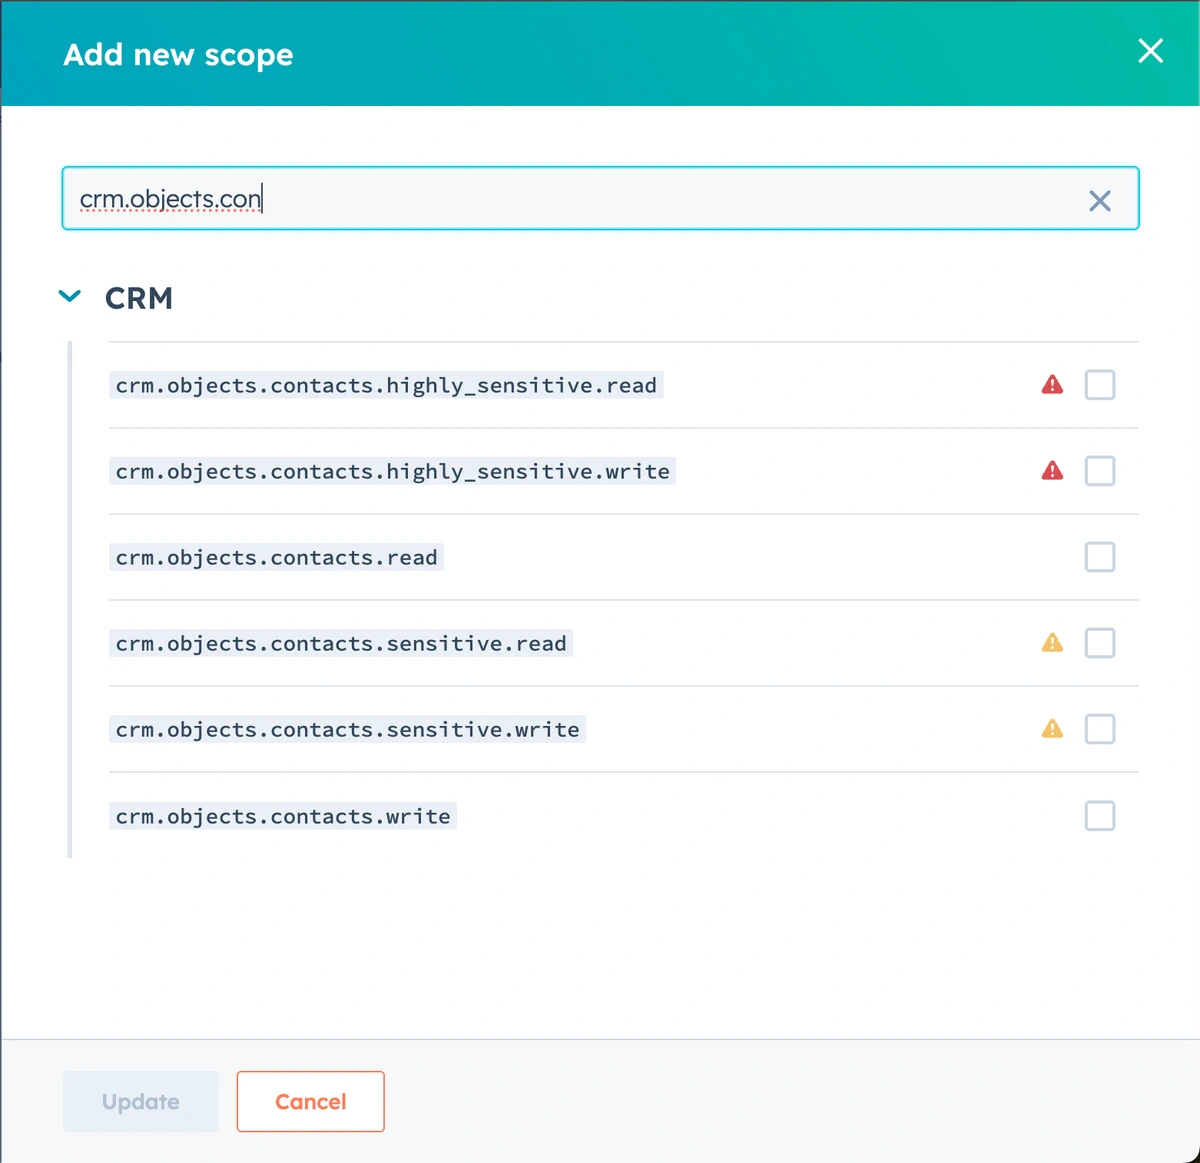
Under **Scopes**, search and select the APIs your integration needs access to.
Some common scopes for data sync into Integrate.io:
| Scope Category | Scope Name | Description |
| -------------- | --------------------------- | ------------------------ |
| CRM | `crm.objects.contacts.read` | Read contacts |
| CRM | `crm.objects.deals.read` | Read deals |
| Marketing | `marketing.emails.read` | Read marketing emails |
| Analytics | `reports.read` | Access analytics reports |
| Custom Objects | `crm.objects.custom.read` | Read custom CRM objects |
For exporting (writing to HubSpot), select appropriate **write** scopes.
## Step 4: Define Access Scopes
Under **Scopes**, search and select the APIs your integration needs access to.
Some common scopes for data sync into Integrate.io:
| Scope Category | Scope Name | Description |
| -------------- | --------------------------- | ------------------------ |
| CRM | `crm.objects.contacts.read` | Read contacts |
| CRM | `crm.objects.deals.read` | Read deals |
| Marketing | `marketing.emails.read` | Read marketing emails |
| Analytics | `reports.read` | Access analytics reports |
| Custom Objects | `crm.objects.custom.read` | Read custom CRM objects |
For exporting (writing to HubSpot), select appropriate **write** scopes.
 ## Step 5: Create the App and Copy the Token
Click **Create App**
Once created, you'll see your **Access Token** in the **Auth** tab
* **Copy and store this token securely**
The access token is like a password. Treat it as sensitive.
## Step 6: Use Token in Integrate.io
In **Integrate.io**:
Go to **Connections > Create New Connection**
Select **HubSpot**
For **authentication**, select:
* **Access Token (Private App)**
Paste the token you copied from HubSpot
Integrate.io will now use this token for authenticated API calls.
## Token Expiration
HubSpot Private App tokens do **not expire** unless:
* You **regenerate** the token
* You **delete the private app**
* Your user permissions are removed
## Step 5: Create the App and Copy the Token
Click **Create App**
Once created, you'll see your **Access Token** in the **Auth** tab
* **Copy and store this token securely**
The access token is like a password. Treat it as sensitive.
## Step 6: Use Token in Integrate.io
In **Integrate.io**:
Go to **Connections > Create New Connection**
Select **HubSpot**
For **authentication**, select:
* **Access Token (Private App)**
Paste the token you copied from HubSpot
Integrate.io will now use this token for authenticated API calls.
## Token Expiration
HubSpot Private App tokens do **not expire** unless:
* You **regenerate** the token
* You **delete the private app**
* Your user permissions are removed