> ## Documentation Index
> Fetch the complete documentation index at: https://www.integrate.io/docs/llms.txt
> Use this file to discover all available pages before exploring further.
# ETL: Connecting to Intercom
> Connect Intercom to Integrate.io ETL for reading customer messaging data. Set up API credentials for both free and premium Intercom accounts.
Integrate.io ETL can access your Intercom data in both free and premium accounts. This article details creating the Intercom connection and the process of building a data pipeline to read Intercom data in Integrate.io ETL. There are also pre-built templates to read data from Intercom. Please see [Create a package from a template](/docs/etl/create-a-package-from-a-template/) for instructions on using a template.
## To create an Intercom connection in Integrate.io ETL
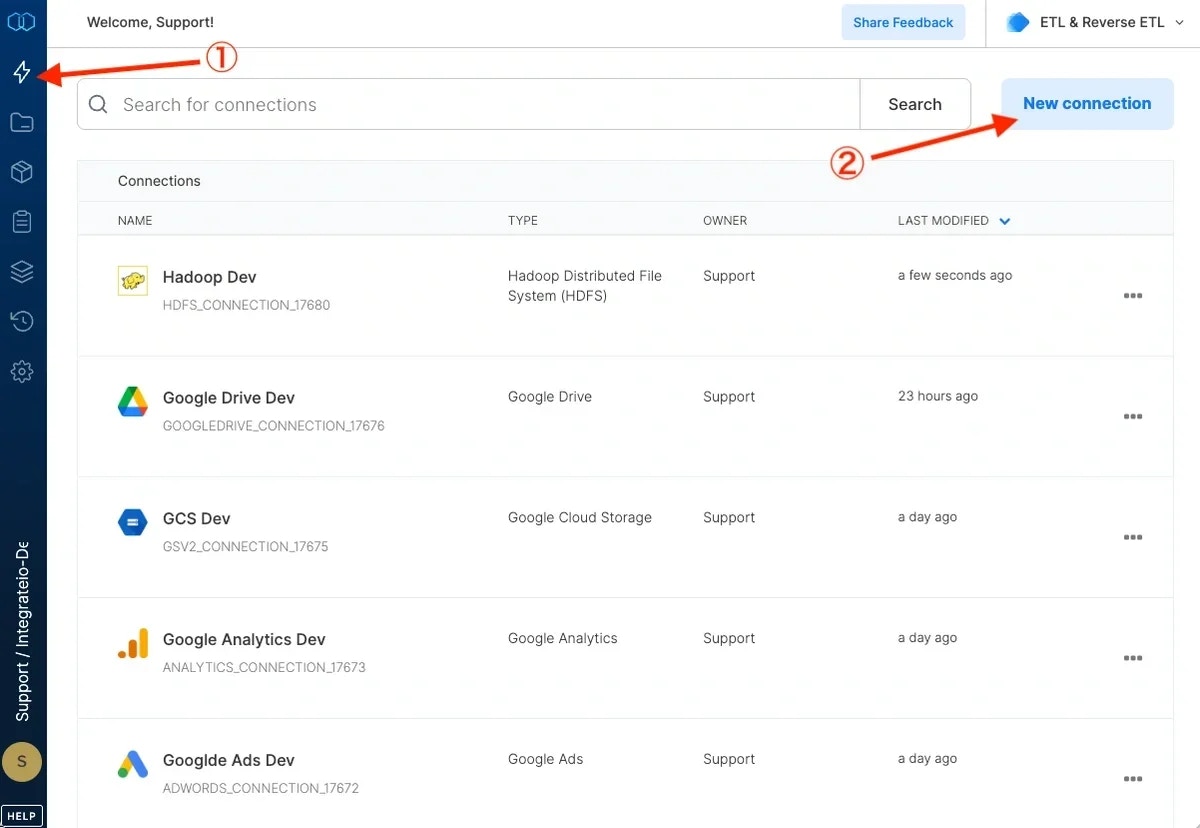
Click the **Connections** icon (lightning bolt) on the top left menu.
To create a connection, click **New connection**.
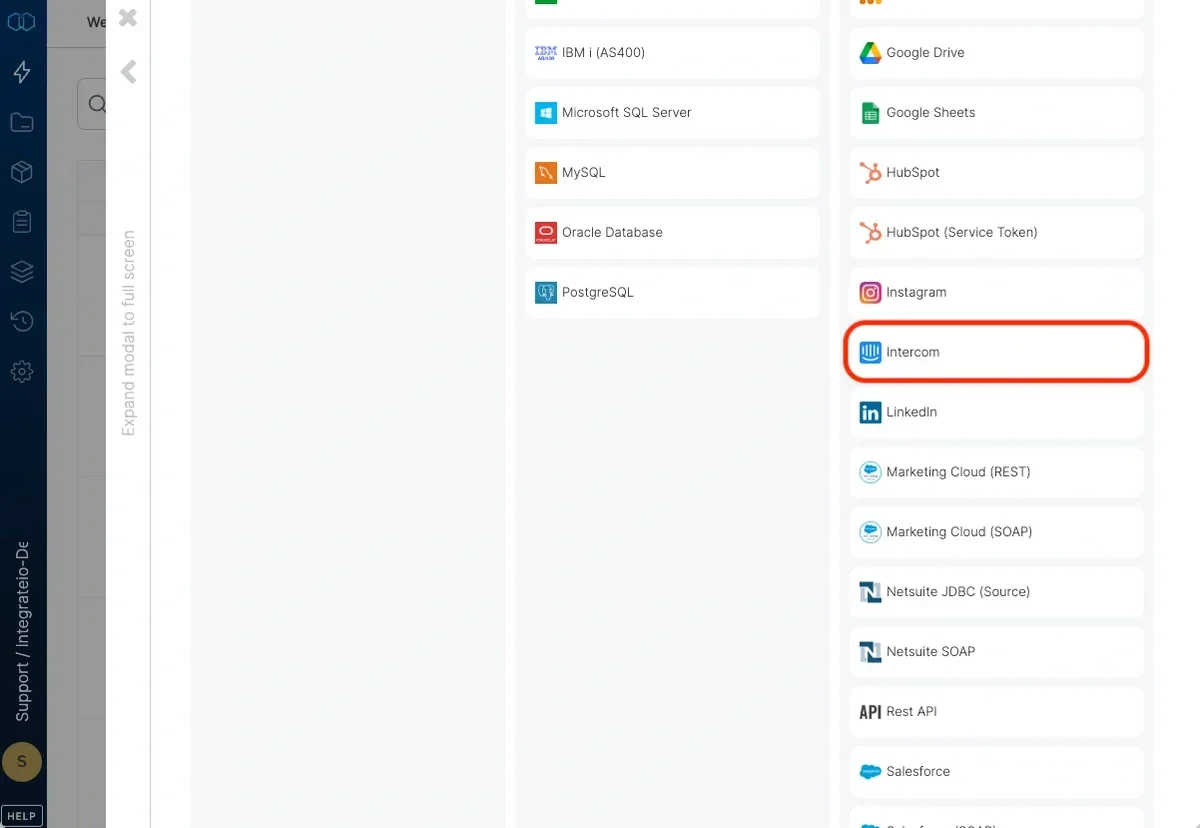
 Select Intercom.
 Click **Authenticate.** (If required, sign in to Intercom)
Click **Connect** to authorize Integrate.io ETL access to your Intercom account.
Click **Save Changes** to create connector after setting connector name.
Click **Authenticate.** (If required, sign in to Intercom)
Click **Connect** to authorize Integrate.io ETL access to your Intercom account.
Click **Save Changes** to create connector after setting connector name.
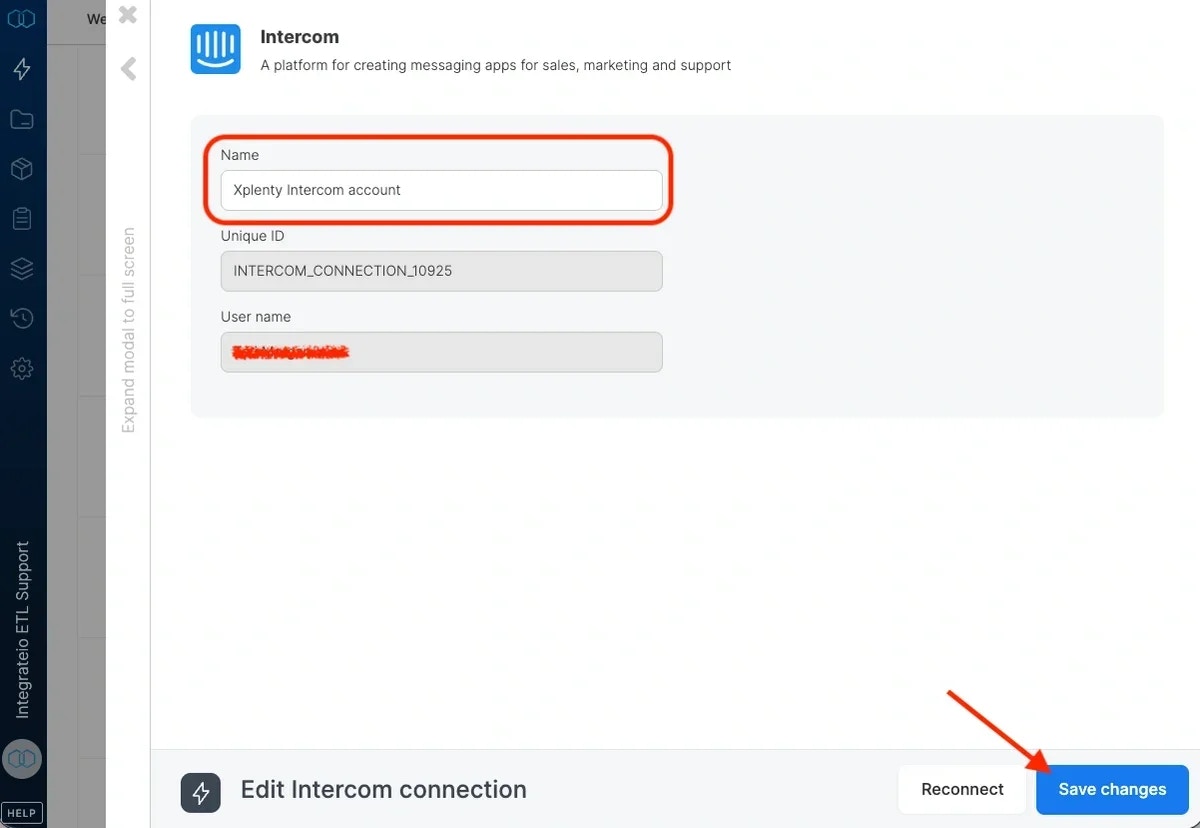 In the new Intercom connection window, name the connection and click **Create Intercom connection.**
## To modify Intercom connections in Integrate.io ETL
Click the **Connections** icon (lightning bolt) on the top left menu.
Click a connection to re-connect if your password has changed or the token has expired.
To delete an Intercom connection, click the three vertical dots on the far right of the connection listing and select the Delete connection option.
## To build a data pipeline to read Intercom companies data in Integrate.io ETL
In the new Intercom connection window, name the connection and click **Create Intercom connection.**
## To modify Intercom connections in Integrate.io ETL
Click the **Connections** icon (lightning bolt) on the top left menu.
Click a connection to re-connect if your password has changed or the token has expired.
To delete an Intercom connection, click the three vertical dots on the far right of the connection listing and select the Delete connection option.
## To build a data pipeline to read Intercom companies data in Integrate.io ETL
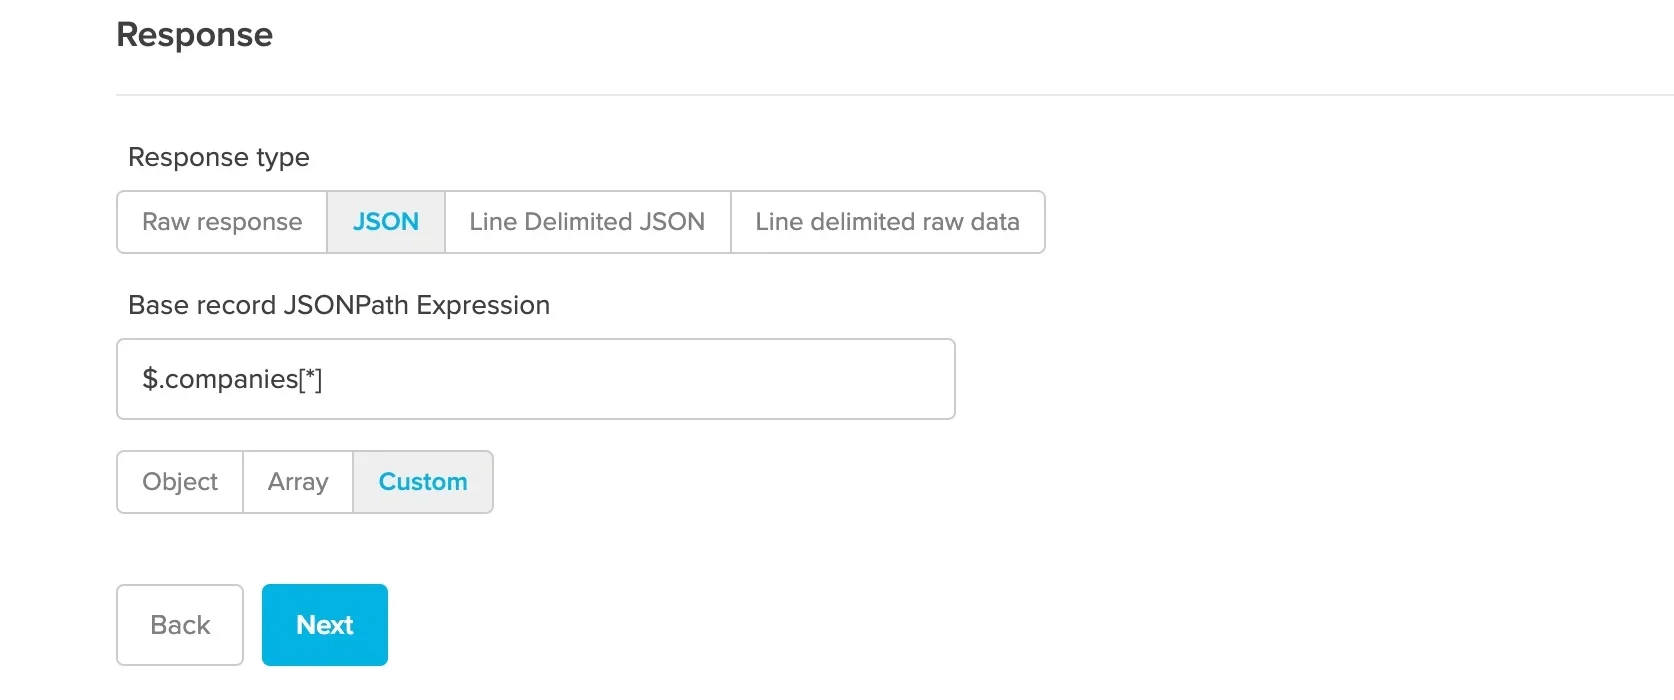
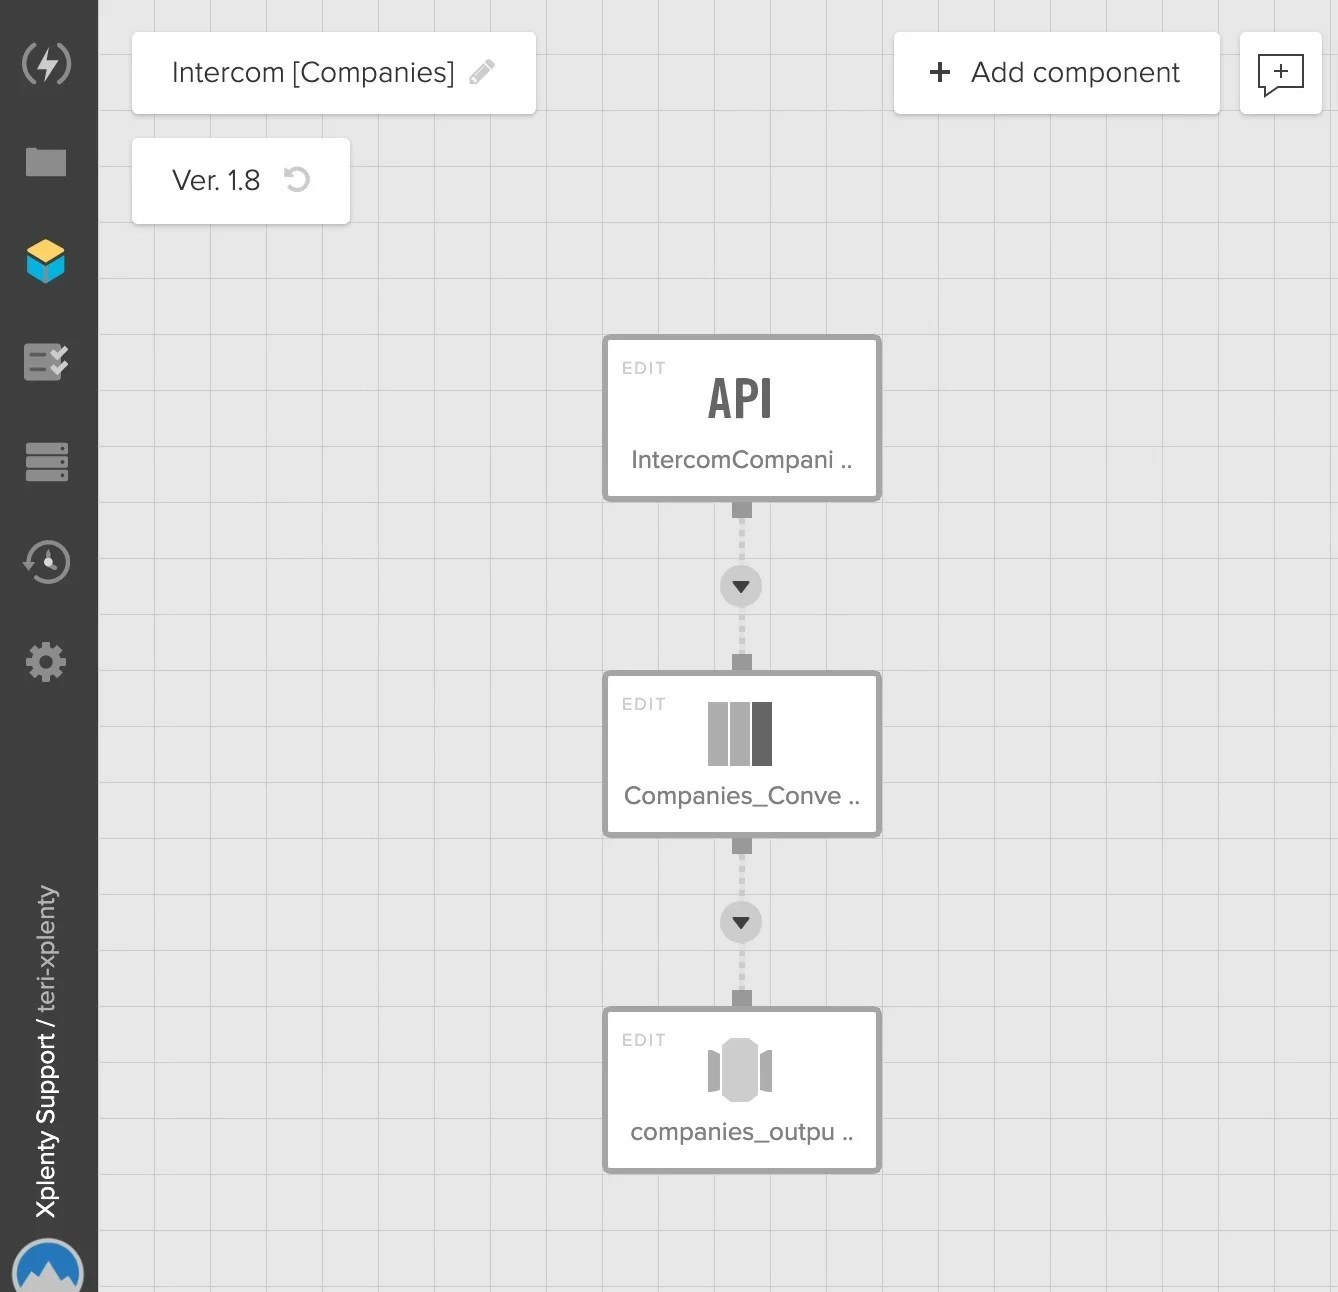 ## REST API Component: IntercomCompanies
* **Authentication** - Click **Connection** and then select your Intercom connection. If you haven't created your Intercom connection yet, click **+ New** and follow the instructions found above.
## REST API Component: IntercomCompanies
* **Authentication** - Click **Connection** and then select your Intercom connection. If you haven't created your Intercom connection yet, click **+ New** and follow the instructions found above.
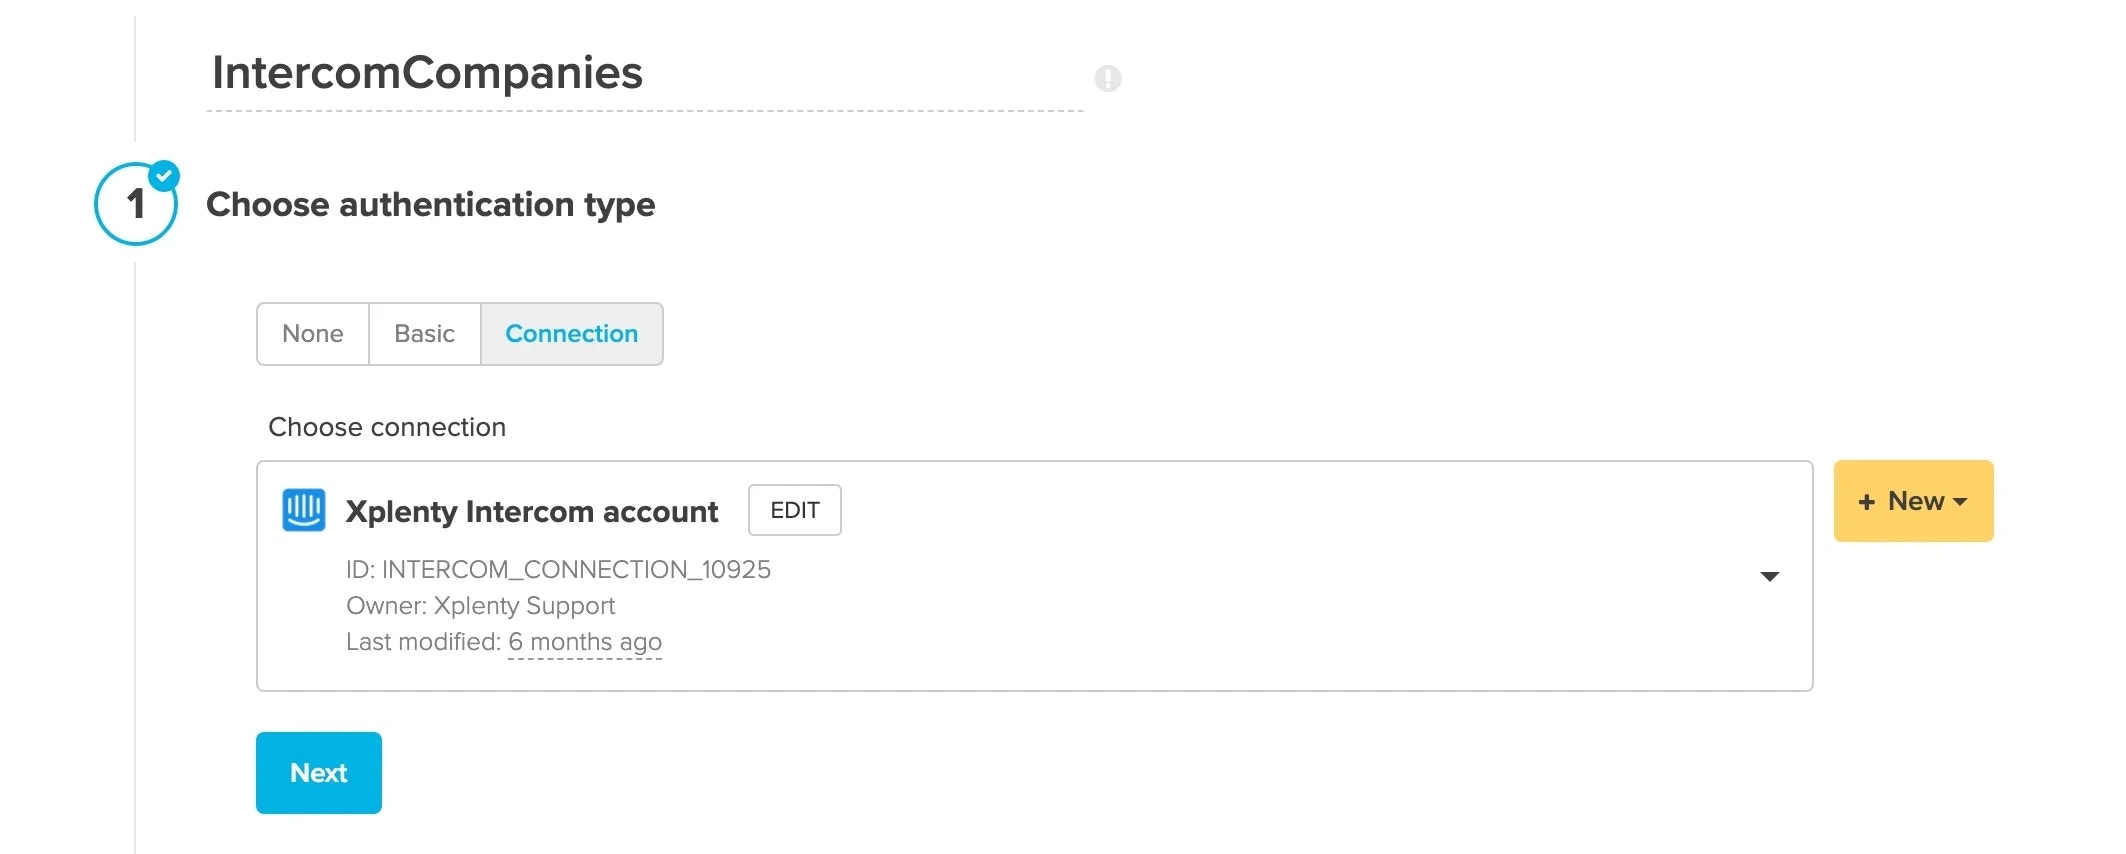 * **URL** - Enter the URL for the Companies endpoint of the Intercom API: **[https://api.intercom.io/companies](https://api.intercom.io/companies)**. Make sure the method is set to **GET.**
* **Headers** - Click **Add** and create Content-type, Accept, and Intercom-version headers as shown here:
* **URL** - Enter the URL for the Companies endpoint of the Intercom API: **[https://api.intercom.io/companies](https://api.intercom.io/companies)**. Make sure the method is set to **GET.**
* **Headers** - Click **Add** and create Content-type, Accept, and Intercom-version headers as shown here:
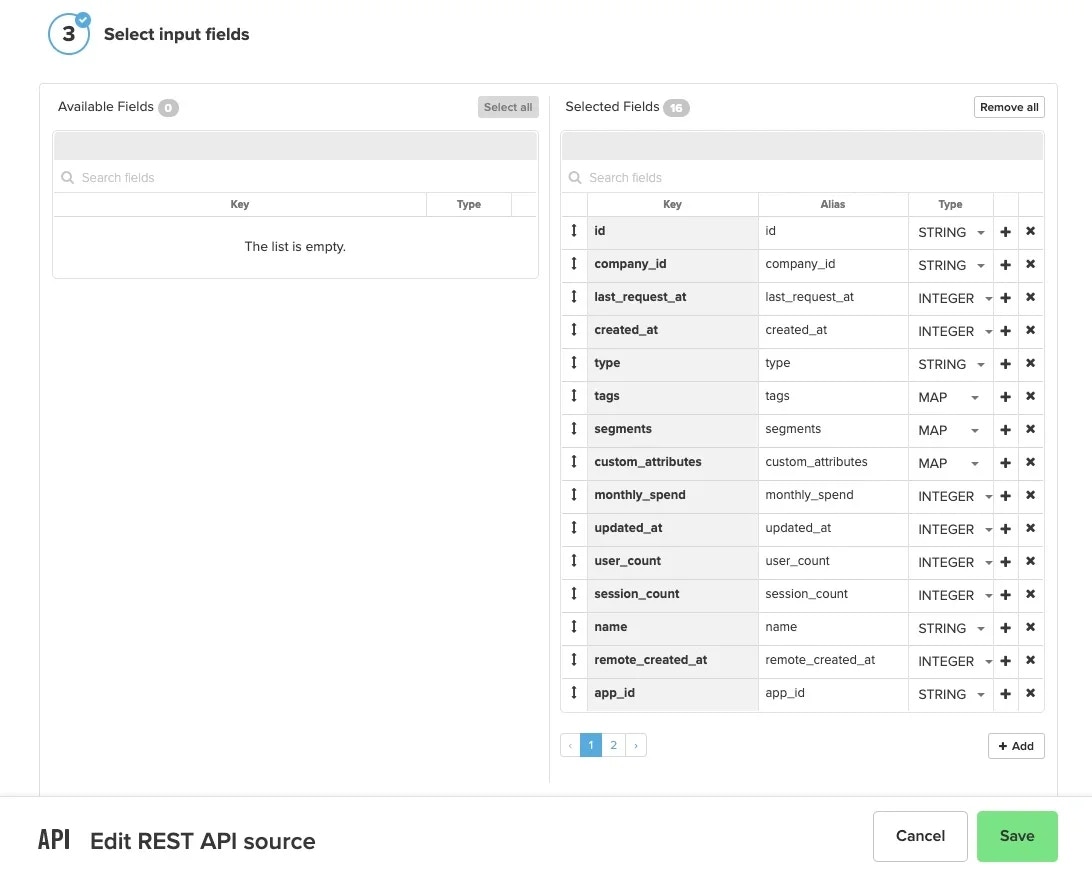
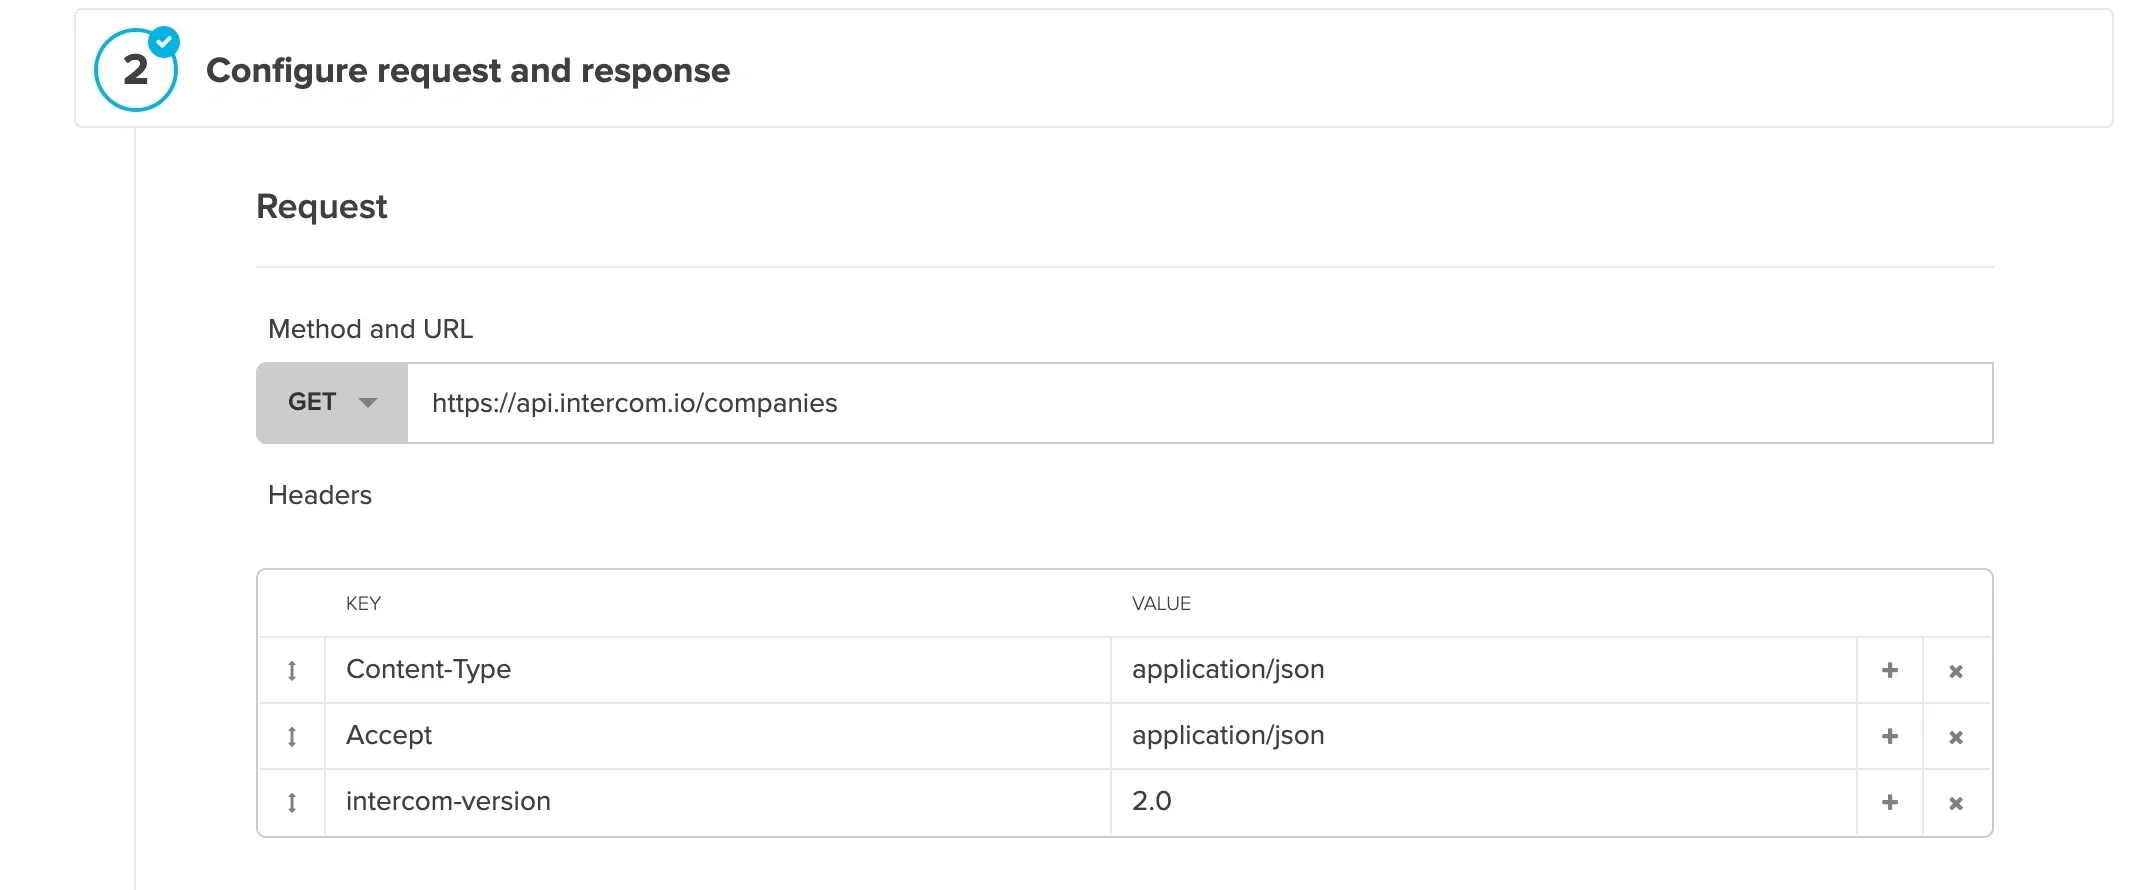 * **Response** - Type \$.companies\[\*] in the Base record JSONPath Expression field.
 * **Input fields** - Click **Select all** to move all the Available fields over to the Selected fields or pick and choose which fields you would like by clicking on the **+** icon next to the field name in the Available Fields column. Then click **Save.**
 ## Select Component: Companies\_ConvertDates
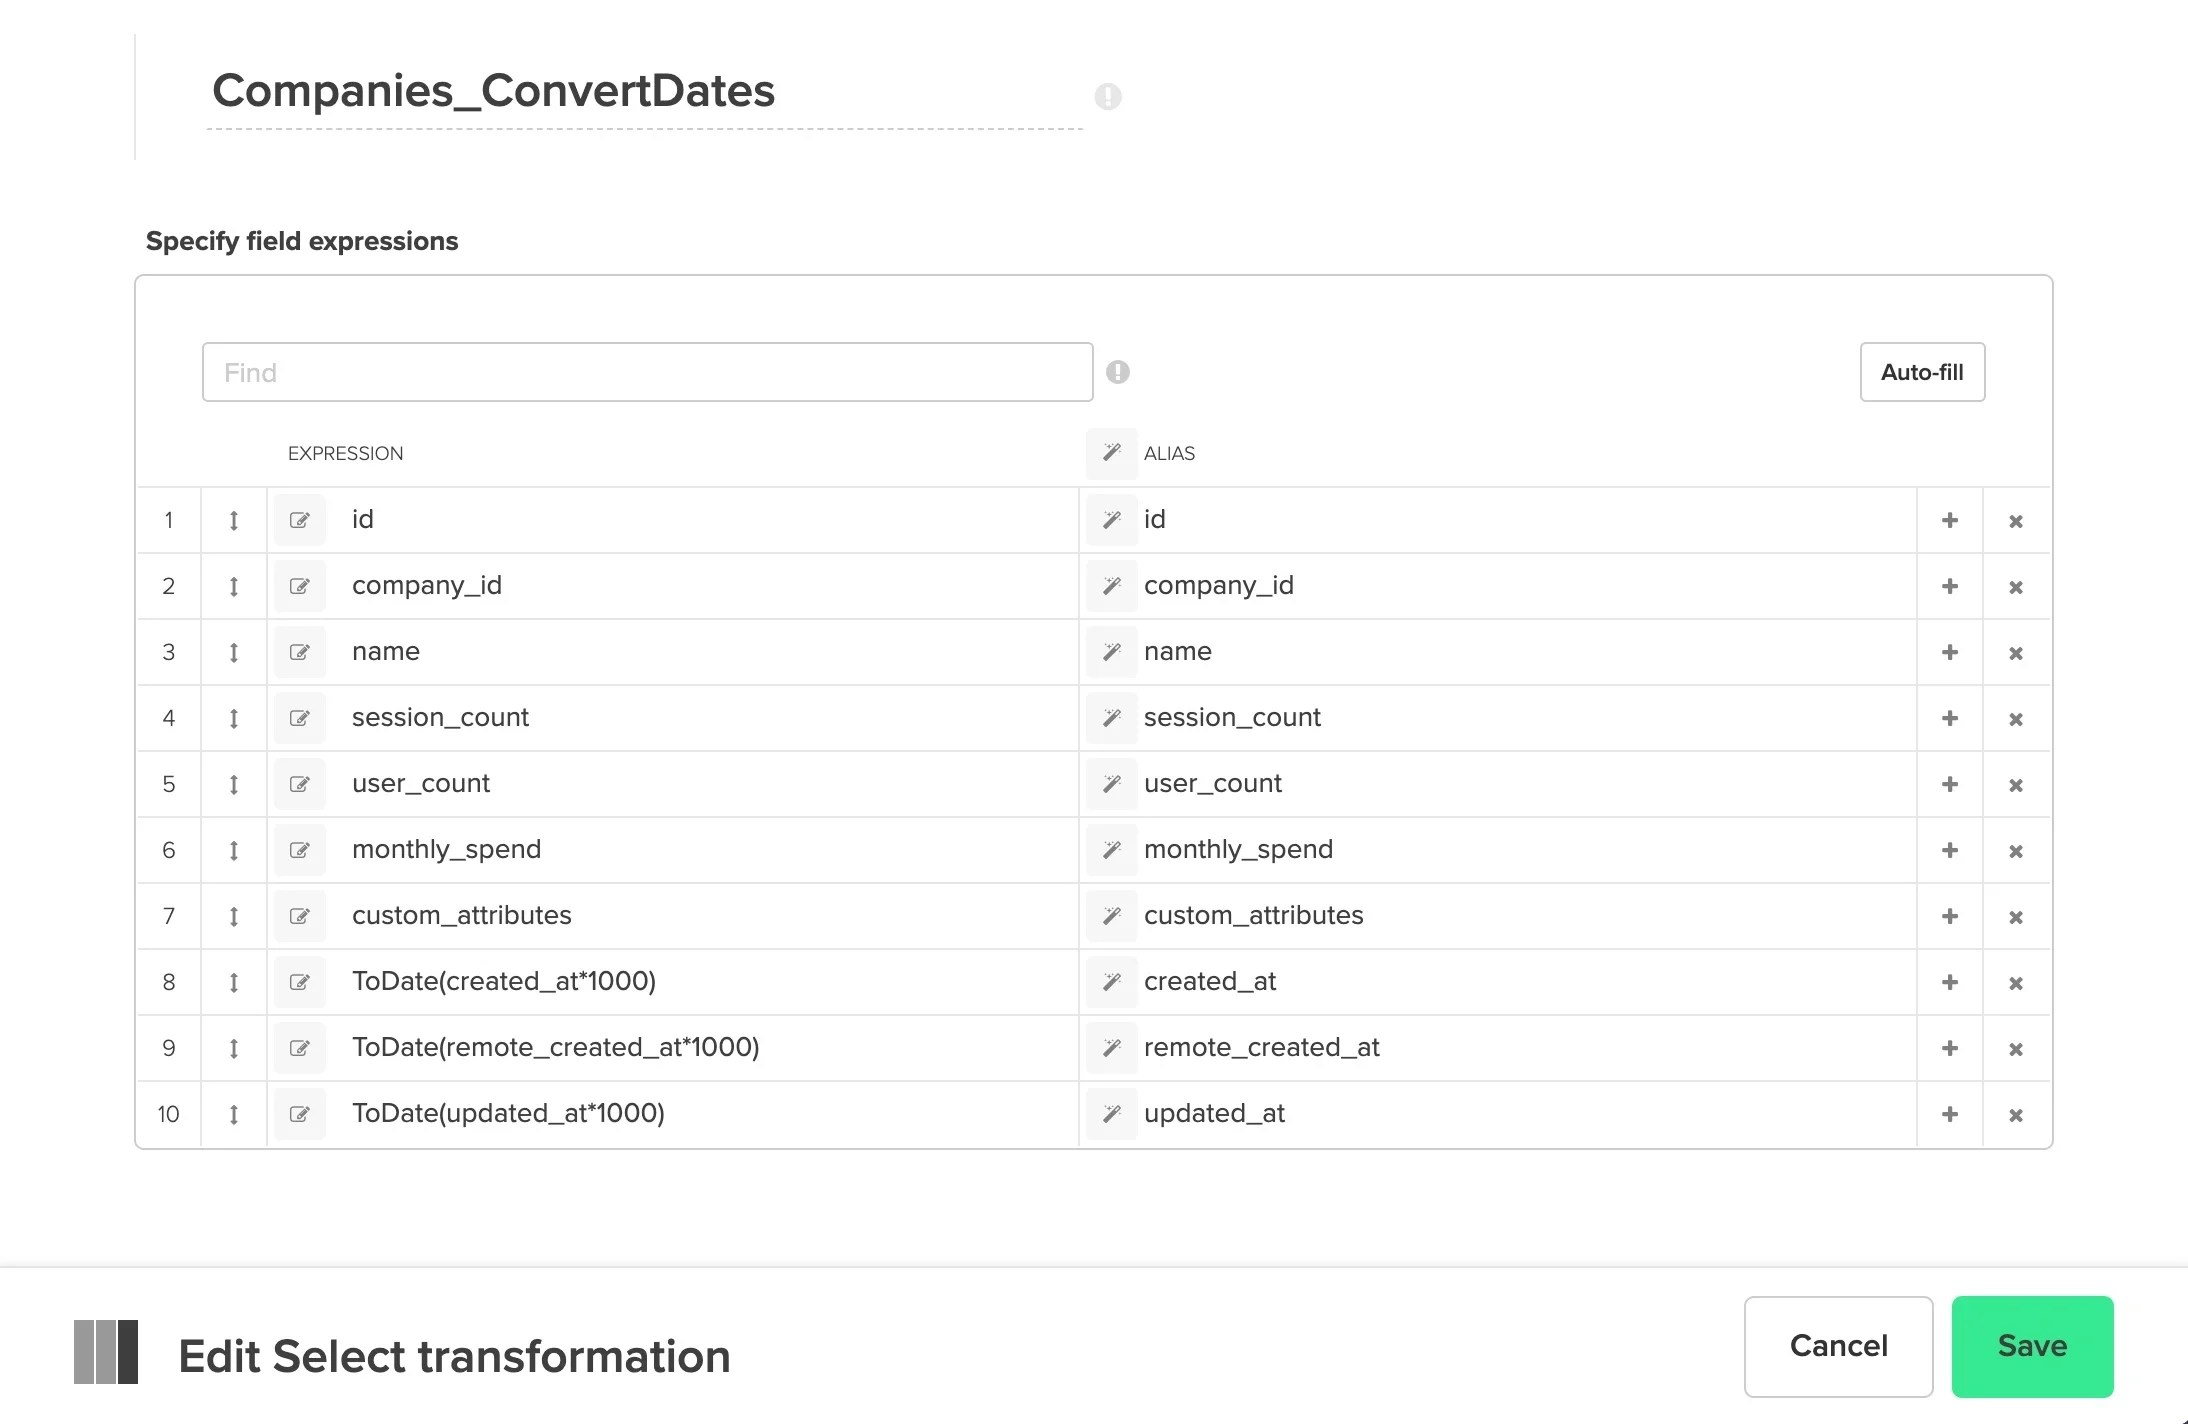
* Click **Autofill** to bring in all the fields from the source component. If desired, convert the three Unix timestamp fields (created\_at, remote\_created\_at, and updated\_at) into Datetime data types. Multiply the three fields times 1000 and pass the result into the ToDate function (for more information on the ToDate function see [this](/docs/etl/todate/) article) - like this **ToDate(created\_at \* 1000)**. Click **Save.**
## Select Component: Companies\_ConvertDates
* Click **Autofill** to bring in all the fields from the source component. If desired, convert the three Unix timestamp fields (created\_at, remote\_created\_at, and updated\_at) into Datetime data types. Multiply the three fields times 1000 and pass the result into the ToDate function (for more information on the ToDate function see [this](/docs/etl/todate/) article) - like this **ToDate(created\_at \* 1000)**. Click **Save.**
 ## Destination Component: companies\_output
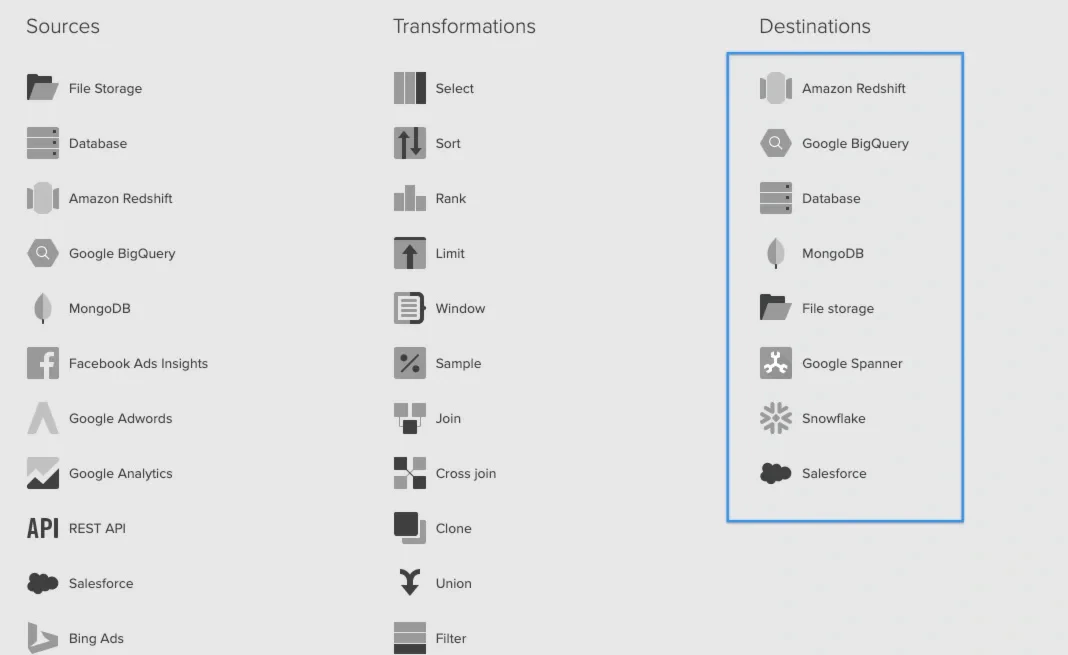
* The template shows a Redshift destination component; however, if you'd prefer to use a different destination, delete the Redshift component and select a destination component of your choice.
## Destination Component: companies\_output
* The template shows a Redshift destination component; however, if you'd prefer to use a different destination, delete the Redshift component and select a destination component of your choice.
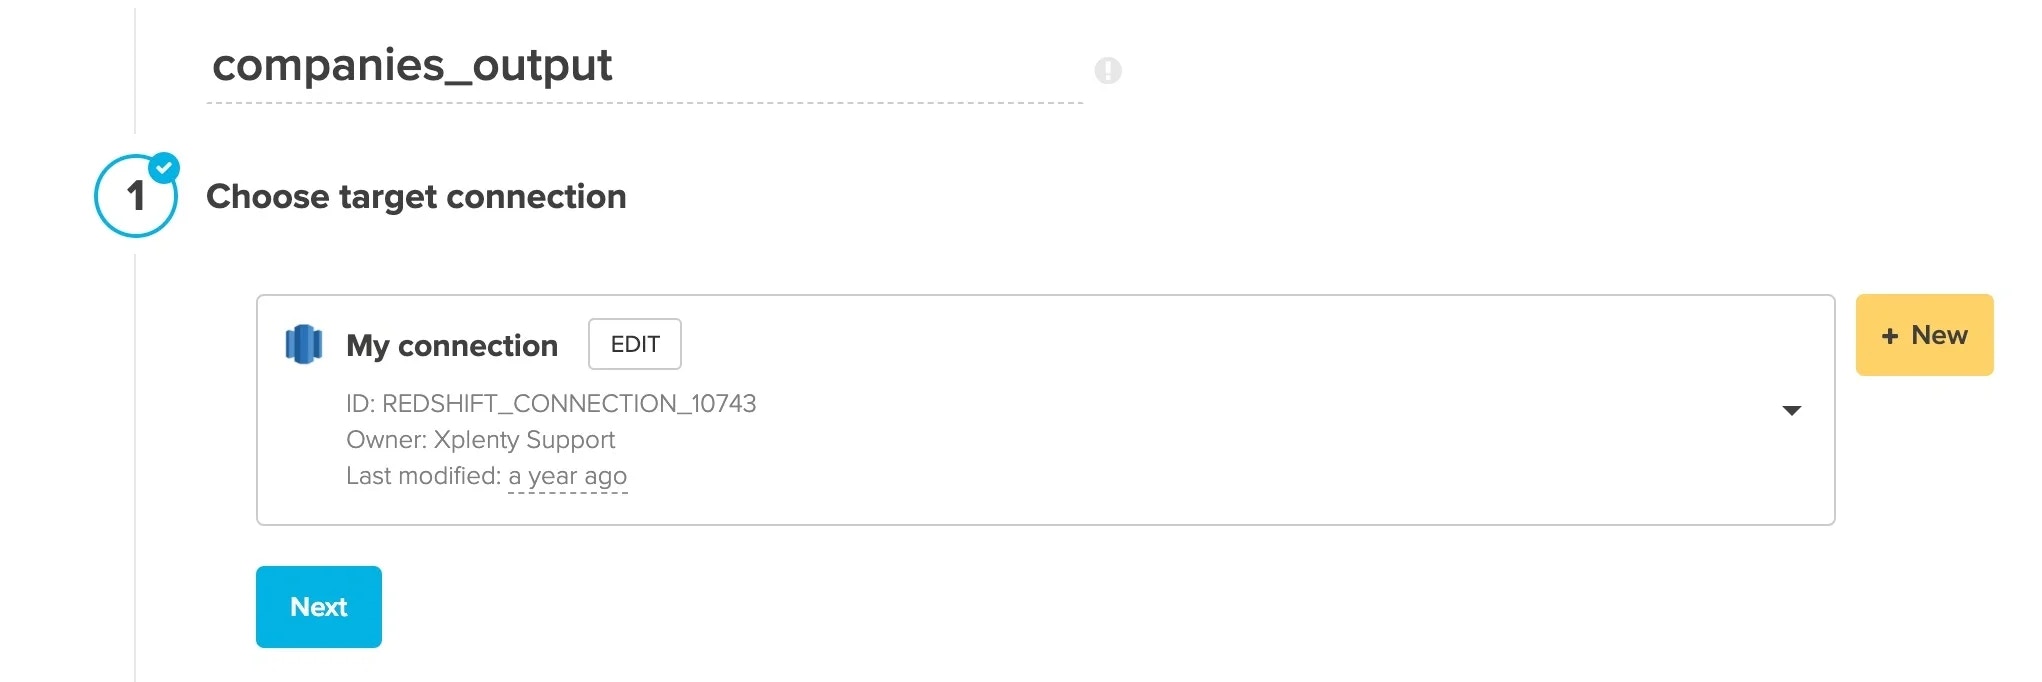
 * **Choose target connection** - Select your target connection. If you haven't created your connection yet, click **+ New.**
 * **Destination properties** - Fill in the values for target schema and table, select an operation type, pre or post-action SQL, and advanced options.
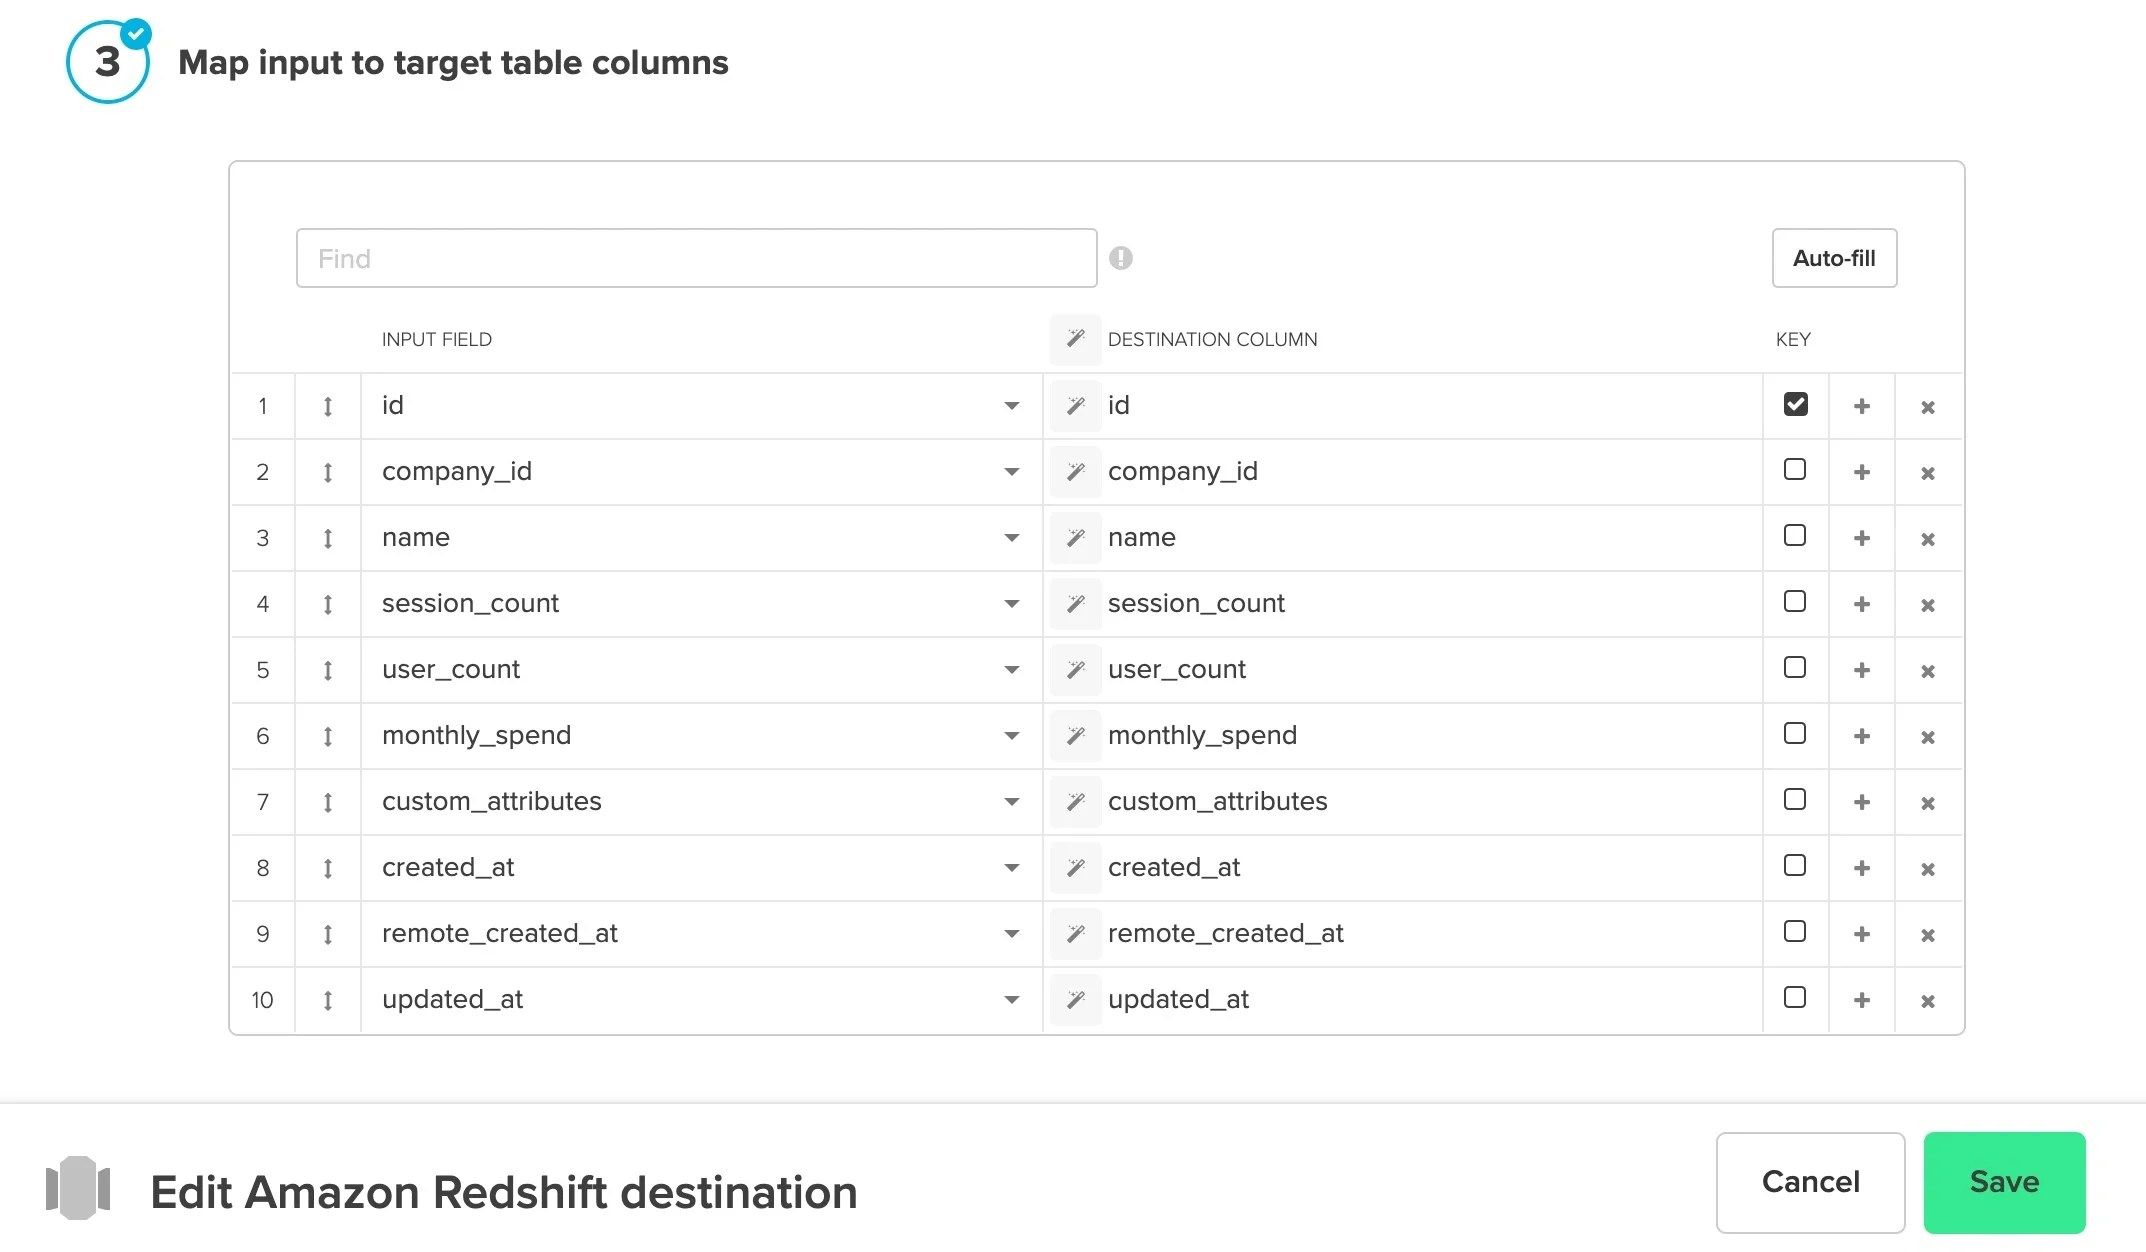
* **Schema mapping** - Click **Auto-fill** to bring in all of the fields. If you've selected a Merge operation type, click the **Key** box next to the merge key field(s). Click **Save.**
* **Destination properties** - Fill in the values for target schema and table, select an operation type, pre or post-action SQL, and advanced options.
* **Schema mapping** - Click **Auto-fill** to bring in all of the fields. If you've selected a Merge operation type, click the **Key** box next to the merge key field(s). Click **Save.**