> ## Documentation Index
> Fetch the complete documentation index at: https://www.integrate.io/docs/llms.txt
> Use this file to discover all available pages before exploring further.
# ETL: Package Designer
> Use the Integrate.io ETL package designer to build and configure data pipelines visually. Edit package name, description, and component layout.
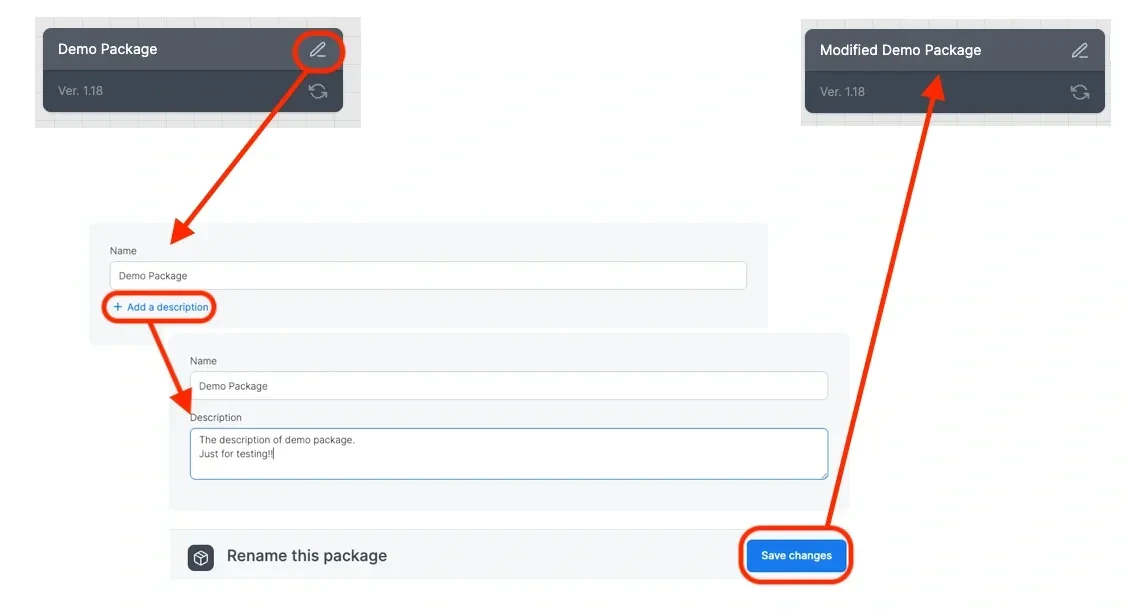 Click the package name.
In the **Package name** text box, type a new name.
In the **Package description** text box, type a new name.
## To add a note
Click the package name.
In the **Package name** text box, type a new name.
In the **Package description** text box, type a new name.
## To add a note
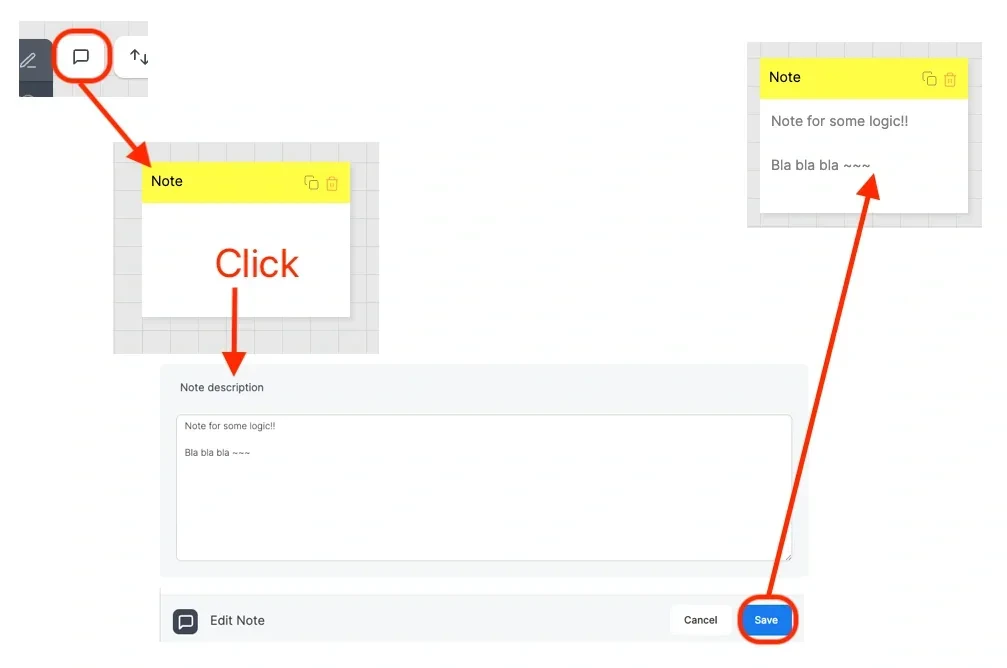 Click the new note icon. A note appears.
To edit the note, click it and enter text.
To color-code the note, select a color from the swatch row at the top of the note editor. The available colors are yellow, blue, green, red, purple, and gray. New notes default to yellow.
Use colors to group notes by purpose, such as marking priorities or distinguishing source, transformation, and destination annotations.
Click **done** to save the note. The selected color applies to the note on the canvas and on the minimap, and persists when you save and reload the package.
You can add as many notes as you require.
The note name appears in a tooltip on hover, so meaning never depends on color alone.
## After you have added at least one source\ task component, you can perform the following actions on the package and components:
* To open a component for editing - click the component.
Click the new note icon. A note appears.
To edit the note, click it and enter text.
To color-code the note, select a color from the swatch row at the top of the note editor. The available colors are yellow, blue, green, red, purple, and gray. New notes default to yellow.
Use colors to group notes by purpose, such as marking priorities or distinguishing source, transformation, and destination annotations.
Click **done** to save the note. The selected color applies to the note on the canvas and on the minimap, and persists when you save and reload the package.
You can add as many notes as you require.
The note name appears in a tooltip on hover, so meaning never depends on color alone.
## After you have added at least one source\ task component, you can perform the following actions on the package and components:
* To open a component for editing - click the component.
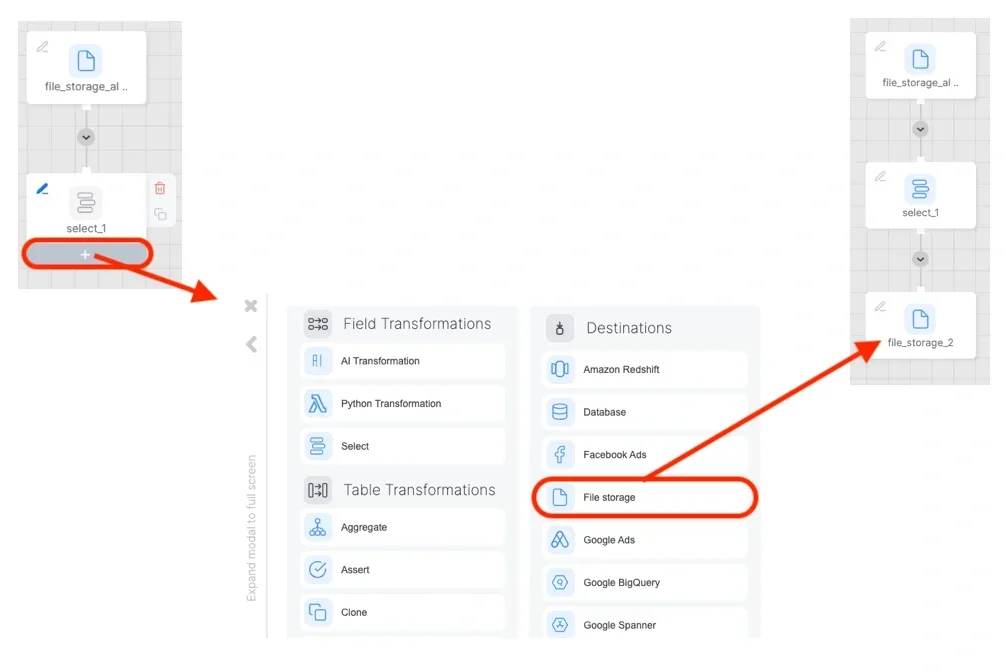
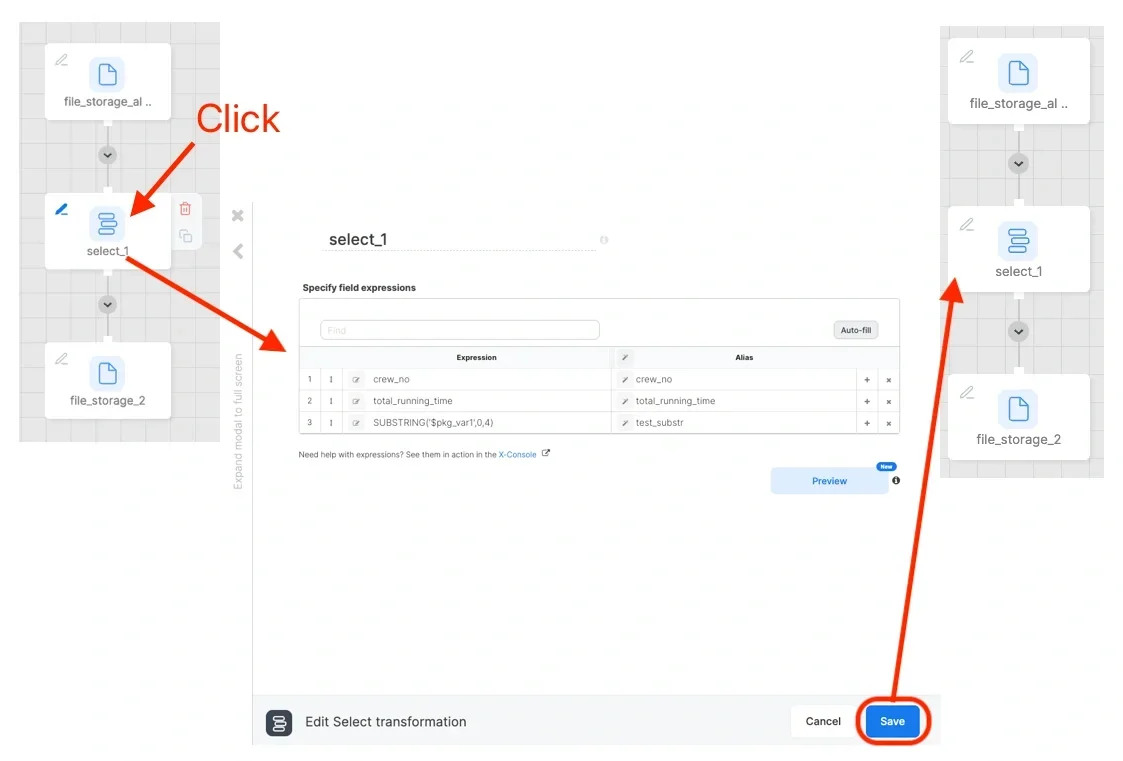 * To add a component to a package - click the blue connector under an existing component, or click **+ Add Component**.
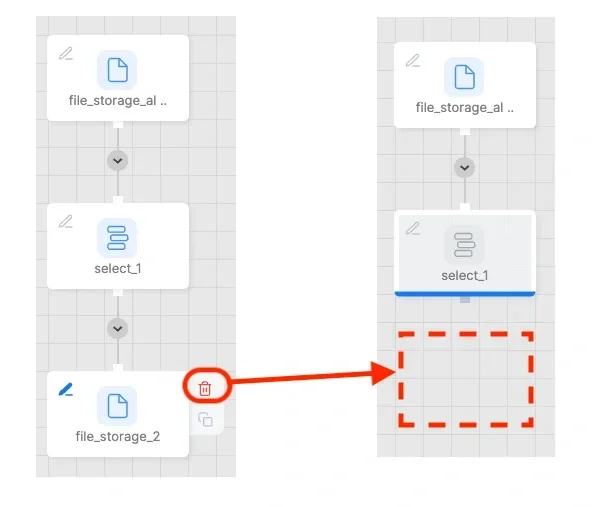
 * To delete a component - hover on the component until the red delete icon appears on the component, then click the red delete icon.
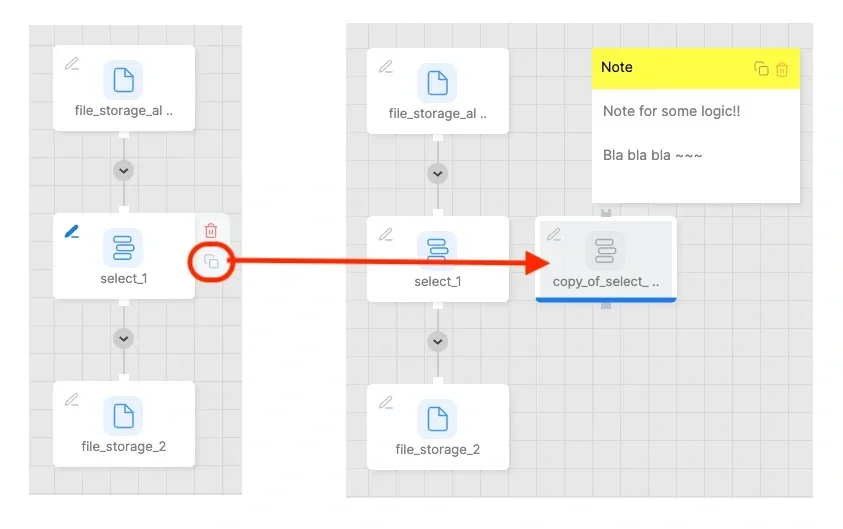
 * To duplicate a component - hover on the component until the black duplicate icon appears on the component, then click the black duplicate icon.
 * To cut the dataflow between components - click the disconnect icon on the hover on the dotted line near a component, then click disconnect.
* To connect a dataflow between two components - drag the blue connector on the first connector and drop it on the target connector.
## To copy components to the same or a different package
* To cut the dataflow between components - click the disconnect icon on the hover on the dotted line near a component, then click disconnect.
* To connect a dataflow between two components - drag the blue connector on the first connector and drop it on the target connector.
## To copy components to the same or a different package
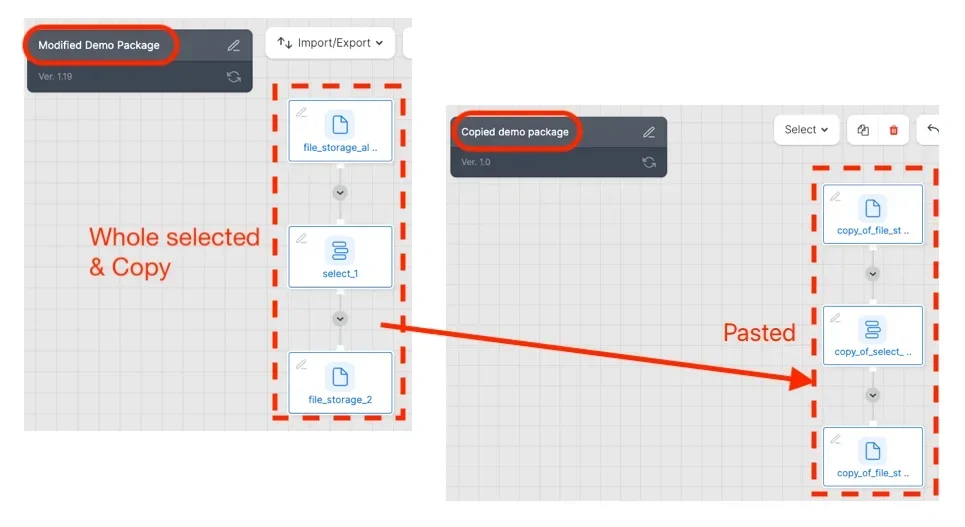 Select the component(s) to copy using any of the following methods:
* Click an empty space on the canvas, and drag to select the required component(s).
* Select all the components in the package by clicking **select** and then clicking **All** (to unselect components, click **None**).
* Select only components that are connected to each other by clicking **select** and then clicking **Connected**.
Press **Ctrl+C** (on a Mac, press **Cmd+C**).
Open the required package and press **Ctrl+V** (on a Mac, press Cmd+V).
## To modify a component's name:
Click the component.
In the first text box in the component, type a new name.
## To add or edit a component description:
Every source, transformation, and destination component supports an optional free-text description shown under the component name. Use it to record what a component does or any caveats other package authors should know.
Open the component for editing.
Under the component name, click **Add description**.
Type your description in the textarea (up to 500 characters), then click outside the textarea to save.
To change an existing description, click the pencil icon next to the description text.
The description is saved with the component and persists when you save the package and reload it. Notes use their own editor and do not have a separate description field.
## To undo / redo your last changes to a package
Select the component(s) to copy using any of the following methods:
* Click an empty space on the canvas, and drag to select the required component(s).
* Select all the components in the package by clicking **select** and then clicking **All** (to unselect components, click **None**).
* Select only components that are connected to each other by clicking **select** and then clicking **Connected**.
Press **Ctrl+C** (on a Mac, press **Cmd+C**).
Open the required package and press **Ctrl+V** (on a Mac, press Cmd+V).
## To modify a component's name:
Click the component.
In the first text box in the component, type a new name.
## To add or edit a component description:
Every source, transformation, and destination component supports an optional free-text description shown under the component name. Use it to record what a component does or any caveats other package authors should know.
Open the component for editing.
Under the component name, click **Add description**.
Type your description in the textarea (up to 500 characters), then click outside the textarea to save.
To change an existing description, click the pencil icon next to the description text.
The description is saved with the component and persists when you save the package and reload it. Notes use their own editor and do not have a separate description field.
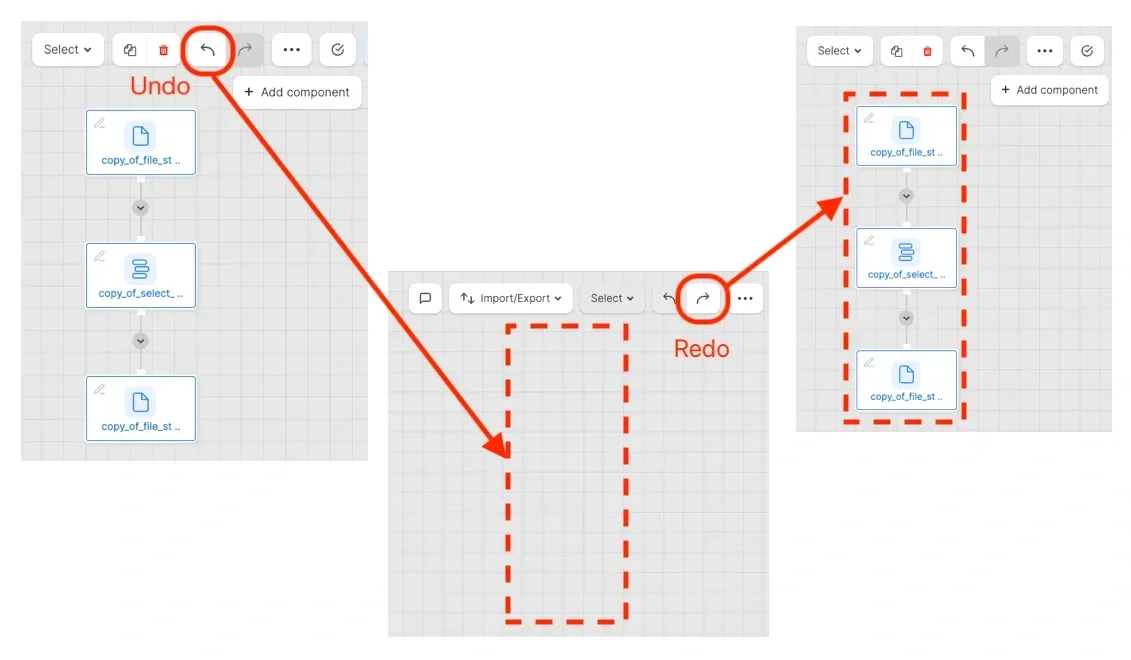
## To undo / redo your last changes to a package
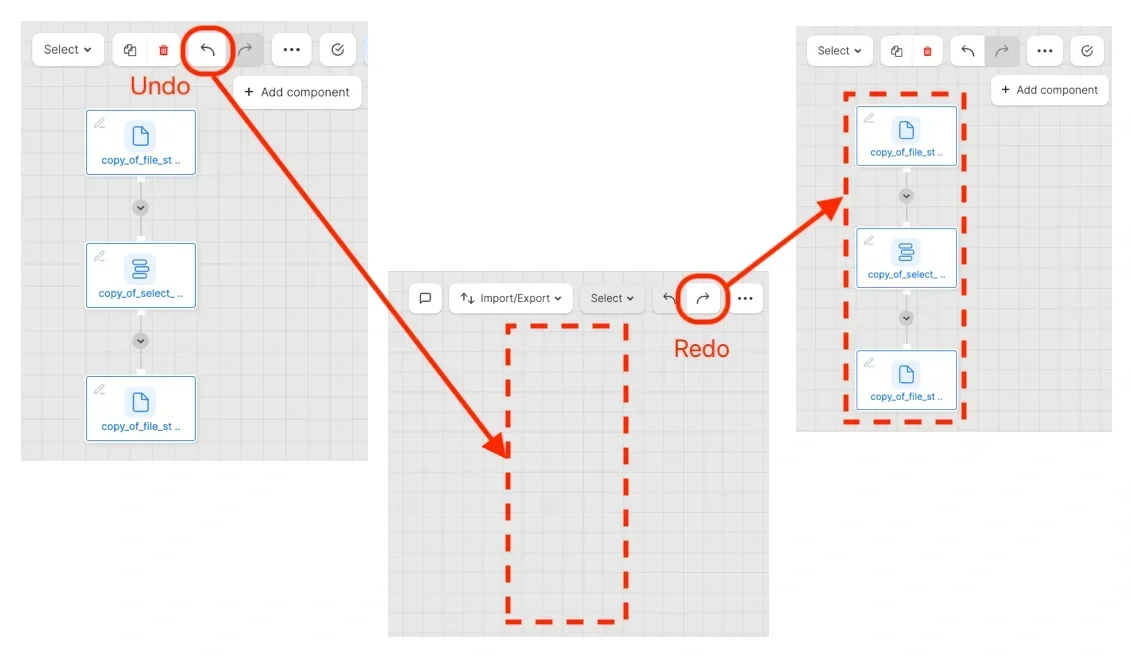 Click the undo / redo arrow icon.
## To use the expression editor in a component field:
Click the undo / redo arrow icon.
## To use the expression editor in a component field:
 Open the required component.
Click the edit icon on the field.
To activate auto-complete, press **Ctrl+SPACEBAR**. A list of field names (available in this component), functions and data types appears. Scroll to the required item and click to add it to the expression.
## To change the order of fields in a component:
Click and drag the arrow located to the left of the field up or down to the new position.
Open the required component.
Click the edit icon on the field.
To activate auto-complete, press **Ctrl+SPACEBAR**. A list of field names (available in this component), functions and data types appears. Scroll to the required item and click to add it to the expression.
## To change the order of fields in a component:
Click and drag the arrow located to the left of the field up or down to the new position.