> ## Documentation Index
> Fetch the complete documentation index at: https://www.integrate.io/docs/llms.txt
> Use this file to discover all available pages before exploring further.
# ETL: Google Sheetからデータを取得する
> Integrate.io ETLのRest APIコンポーネントを使ってGoogle SheetのシートIDとセル範囲を指定し、batchGetエンドポイント経由でデータを取得する方法と認証設定について解説します。
## Rest API コンポーネントの設定
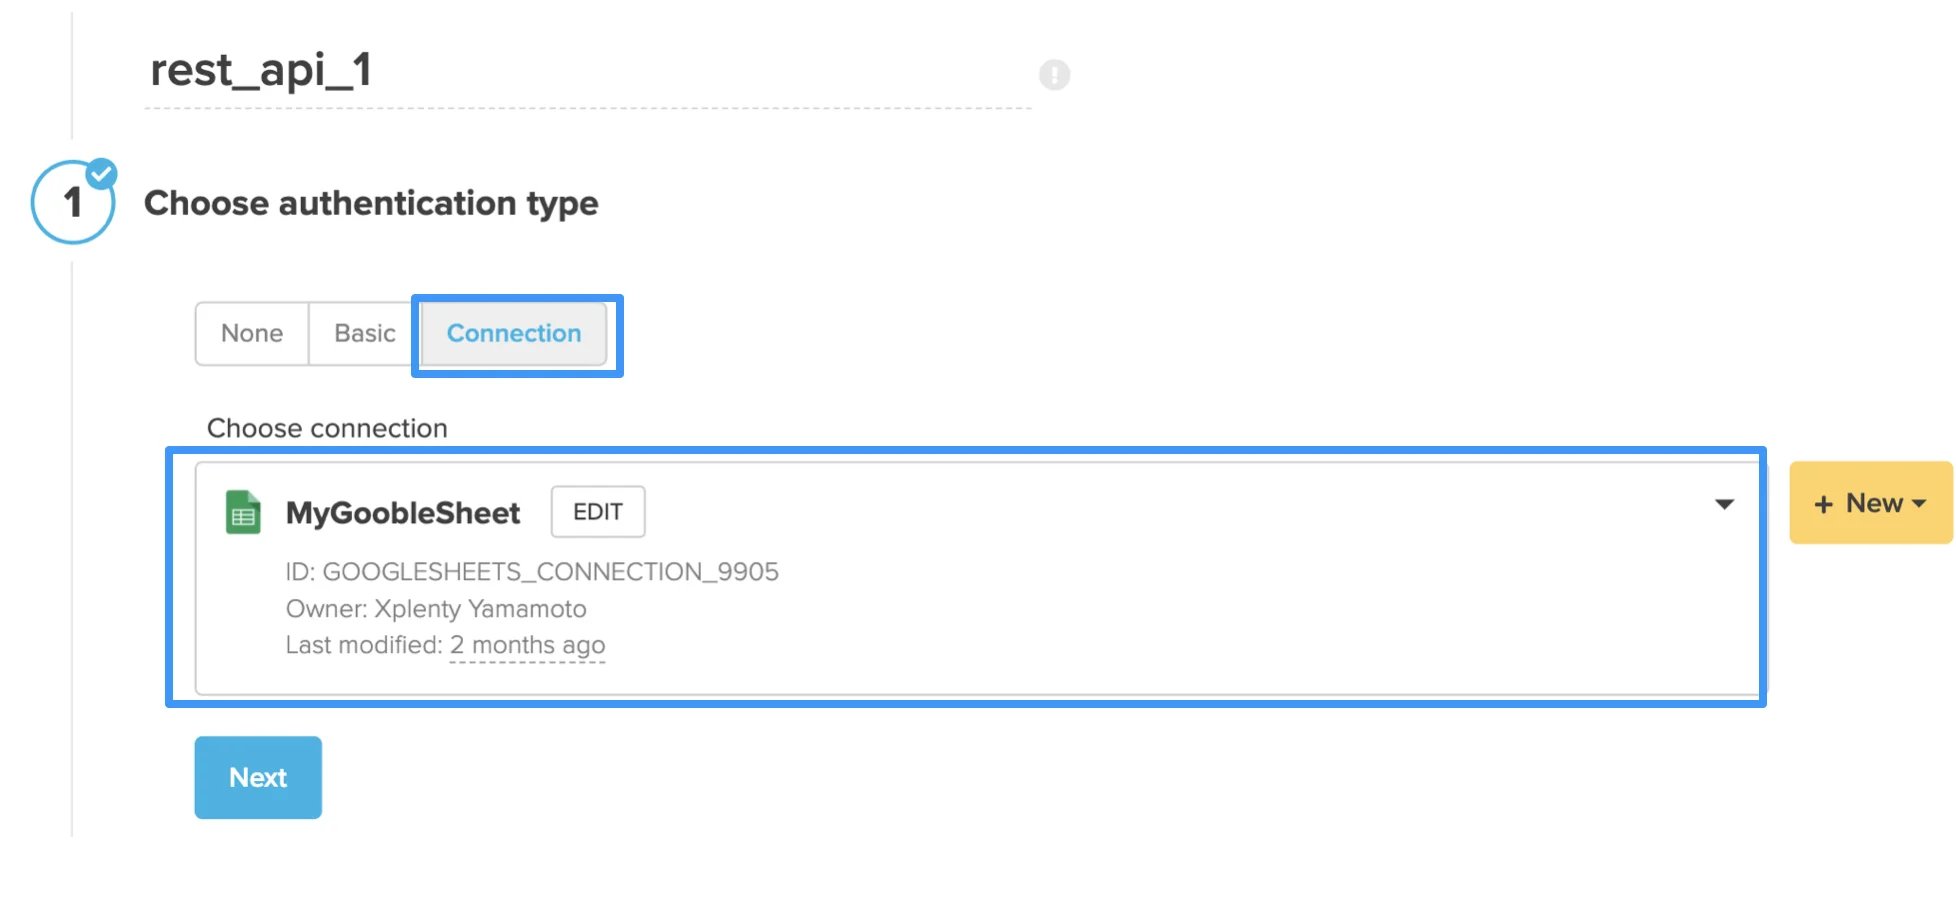
### 認証(Authentication)の設定
あらかじめ接続画面で作成したGoogle Sheetの認証を選択する。
 ### URLの指定方法
**URL:**
`https://sheets.googleapis.com/v4/spreadsheets/シートID/values:batchGet?ranges=セル範囲&majorDimension=ROWS`
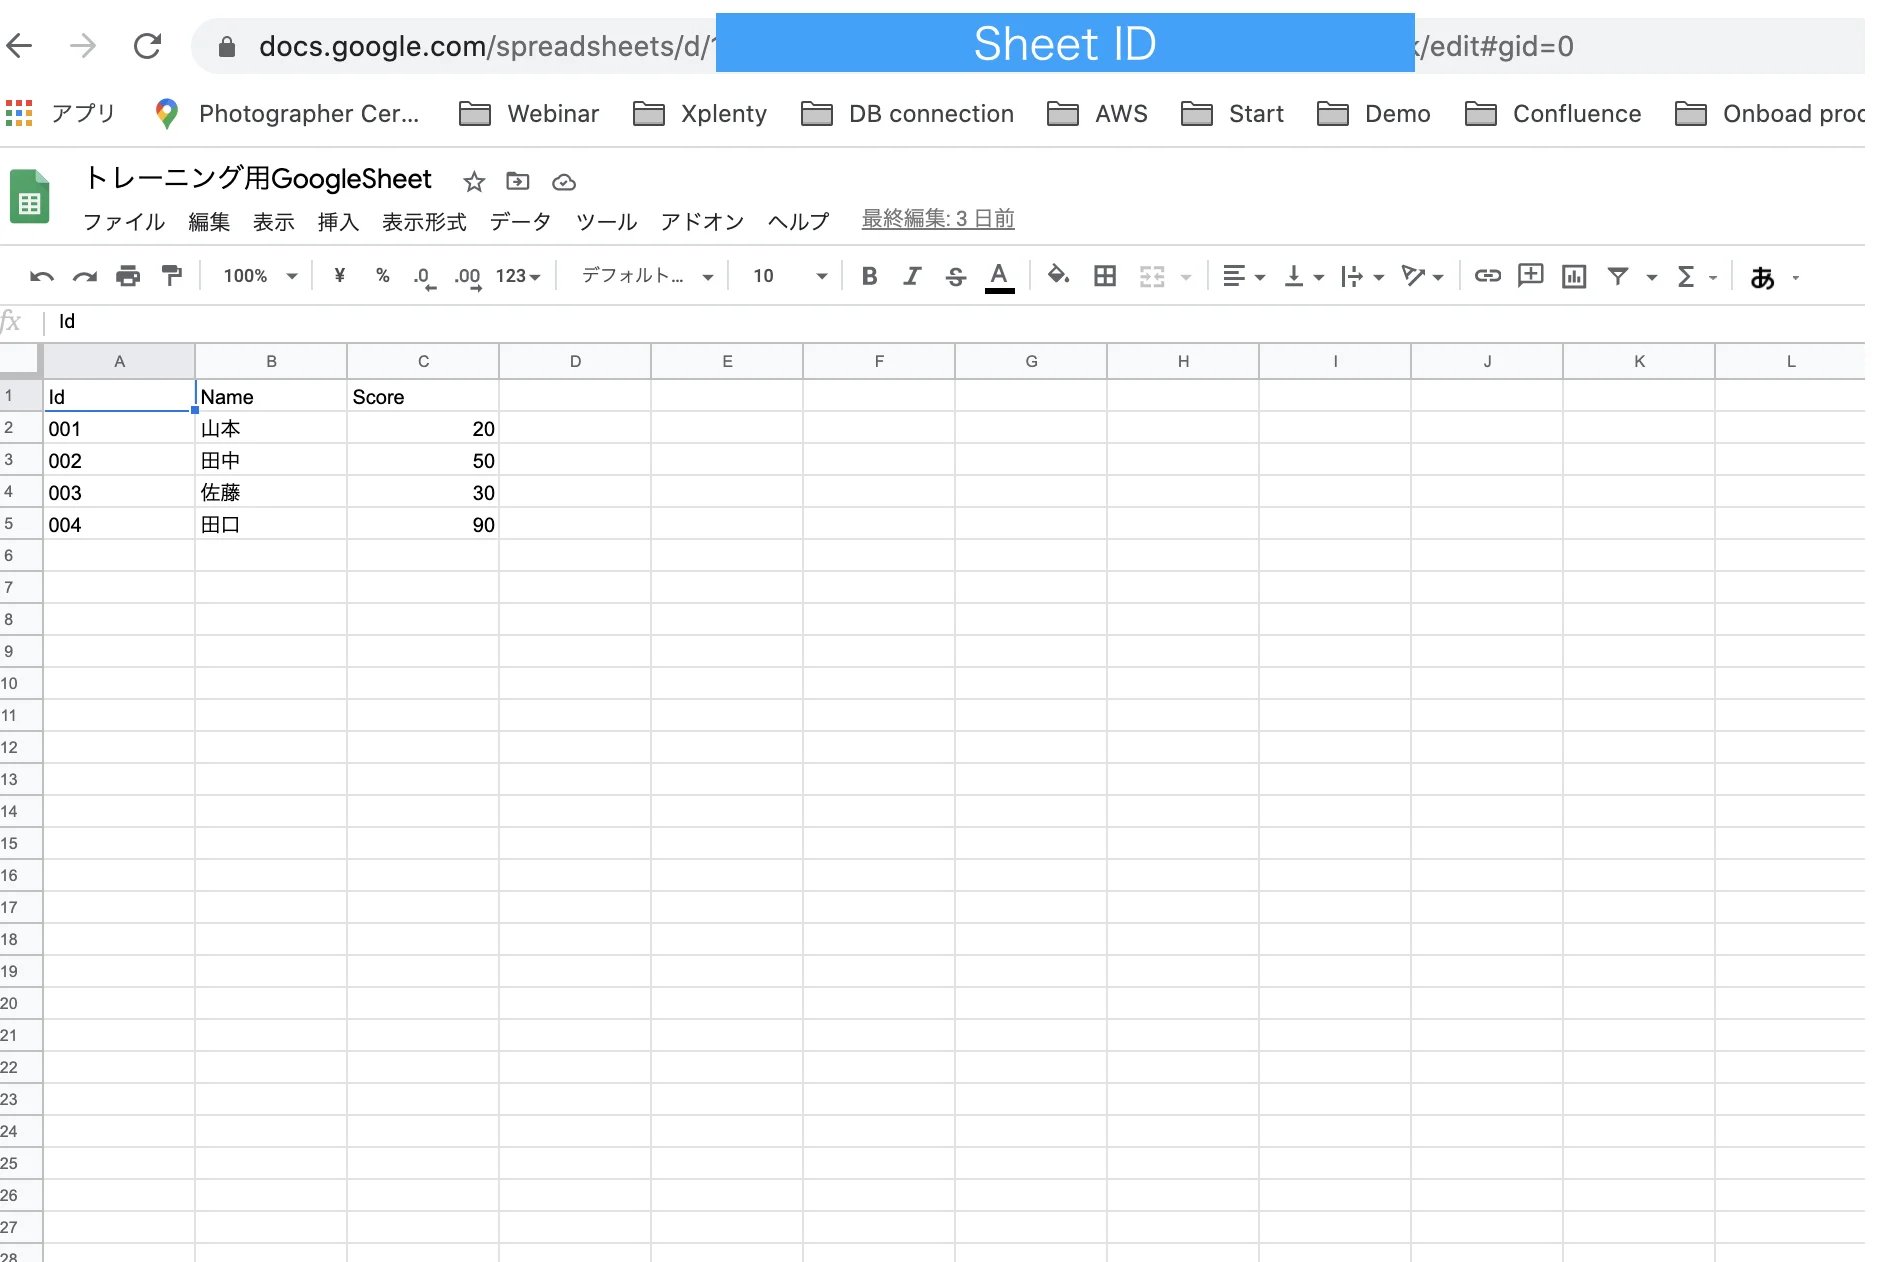
* **シートID:**
Google SheetのURLからシートIDを取得
### URLの指定方法
**URL:**
`https://sheets.googleapis.com/v4/spreadsheets/シートID/values:batchGet?ranges=セル範囲&majorDimension=ROWS`
* **シートID:**
Google SheetのURLからシートIDを取得
 * **セル範囲:**
例)A1:G1000 (A列の1行目からG列の1000行目まで)
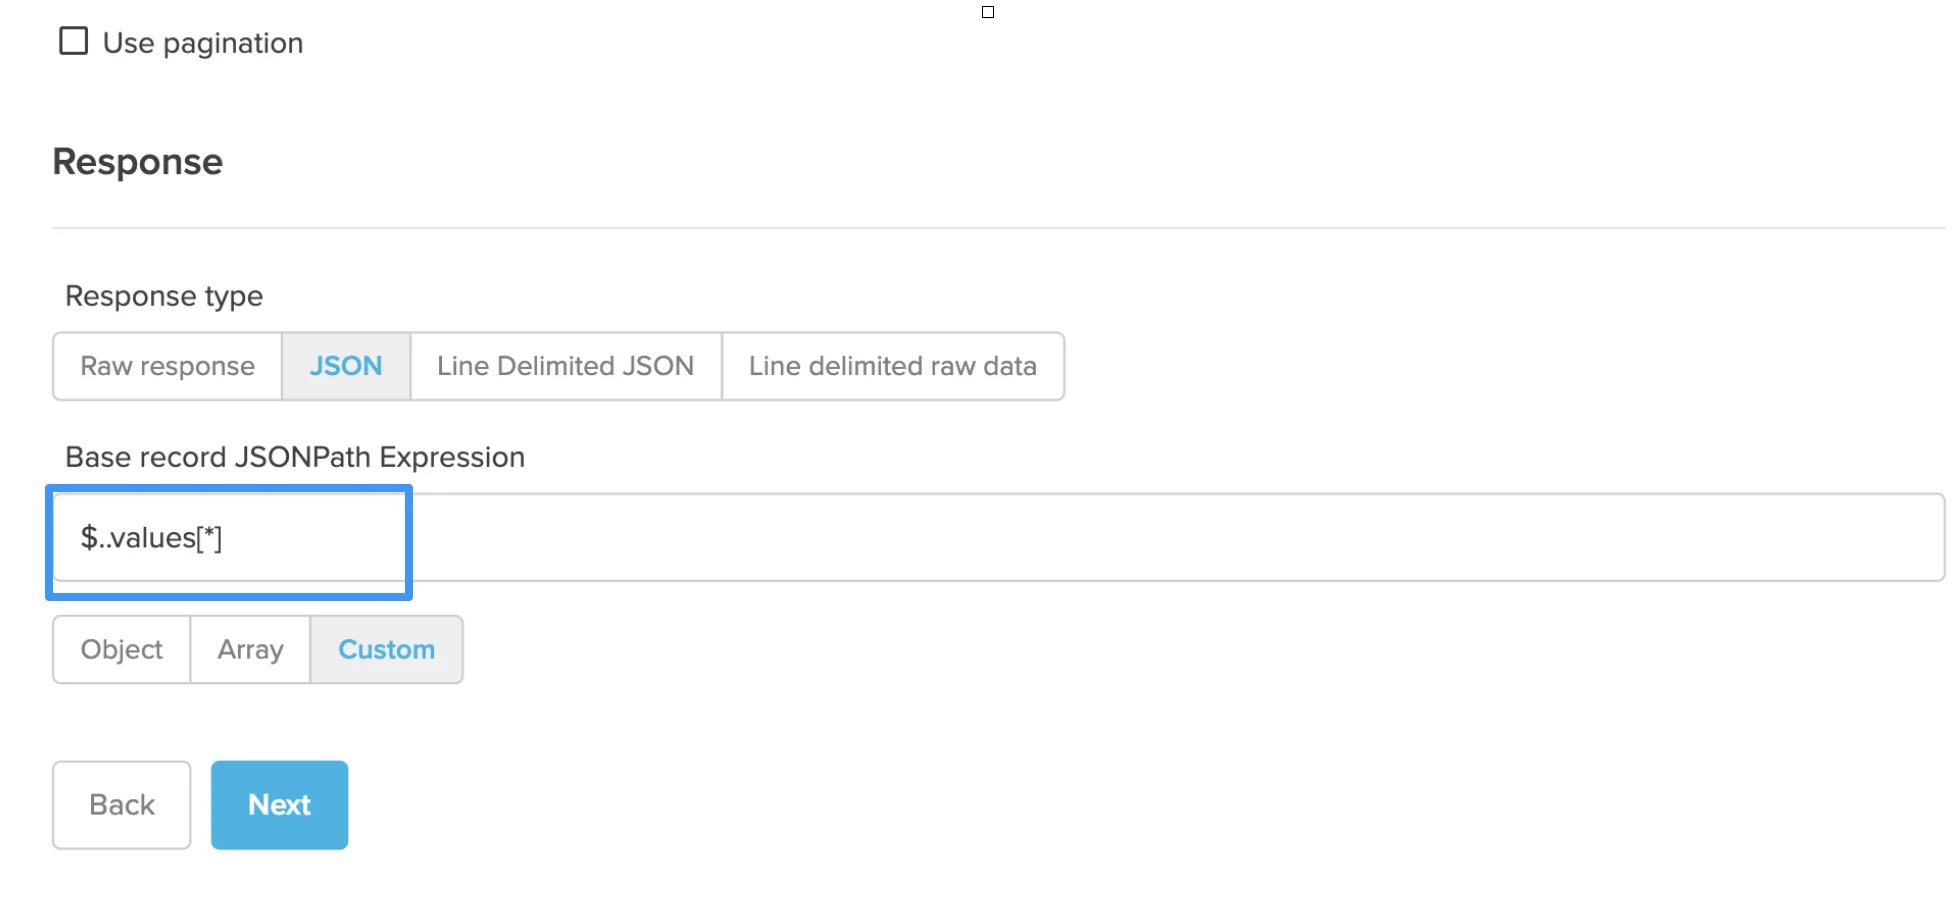
### Responseの設定
「\$..values\[\*]」と入力
* **セル範囲:**
例)A1:G1000 (A列の1行目からG列の1000行目まで)
### Responseの設定
「\$..values\[\*]」と入力
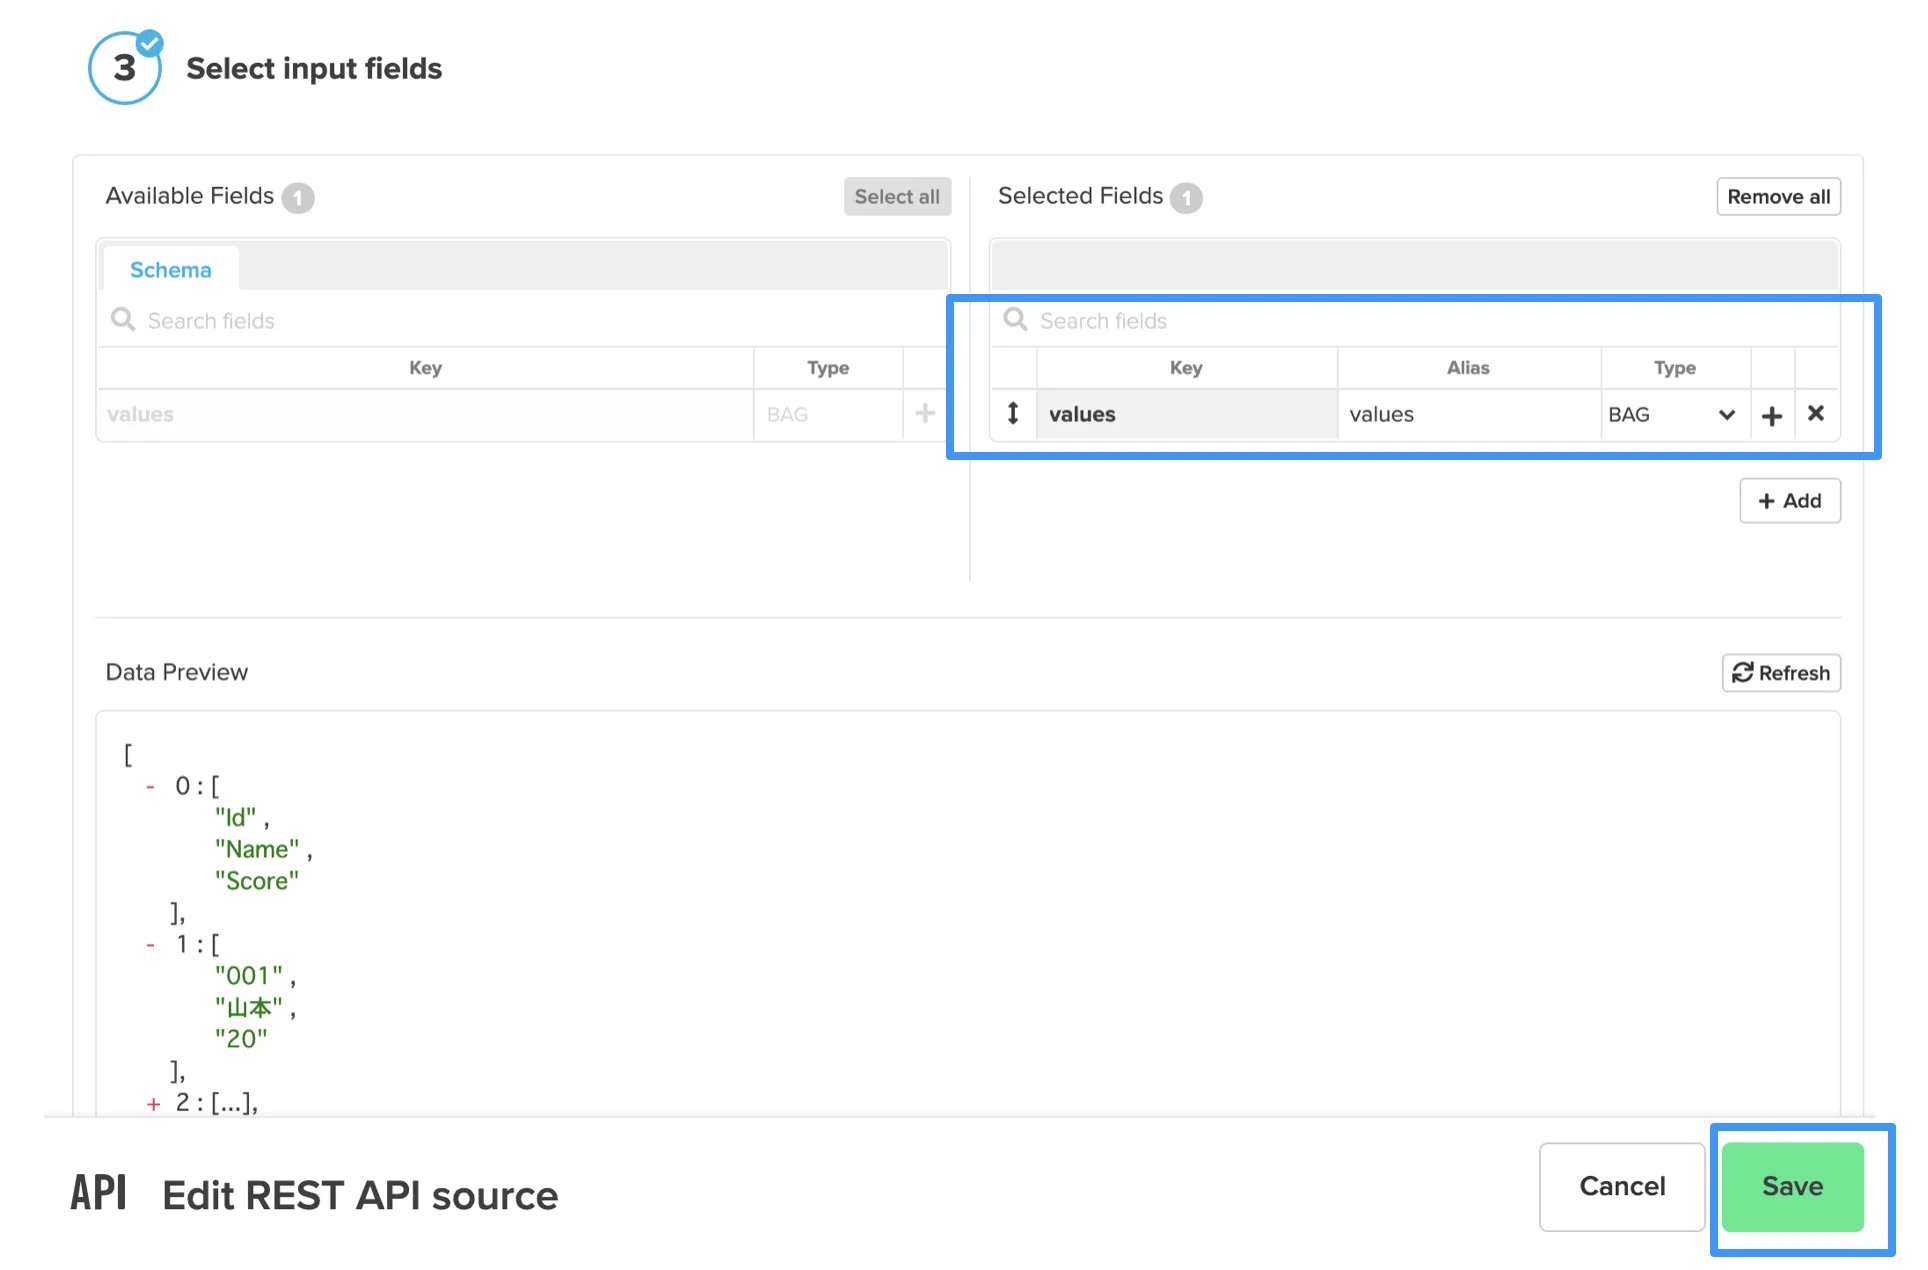
 ### フィールドの選択
 ## 取得したJSONのフラット化
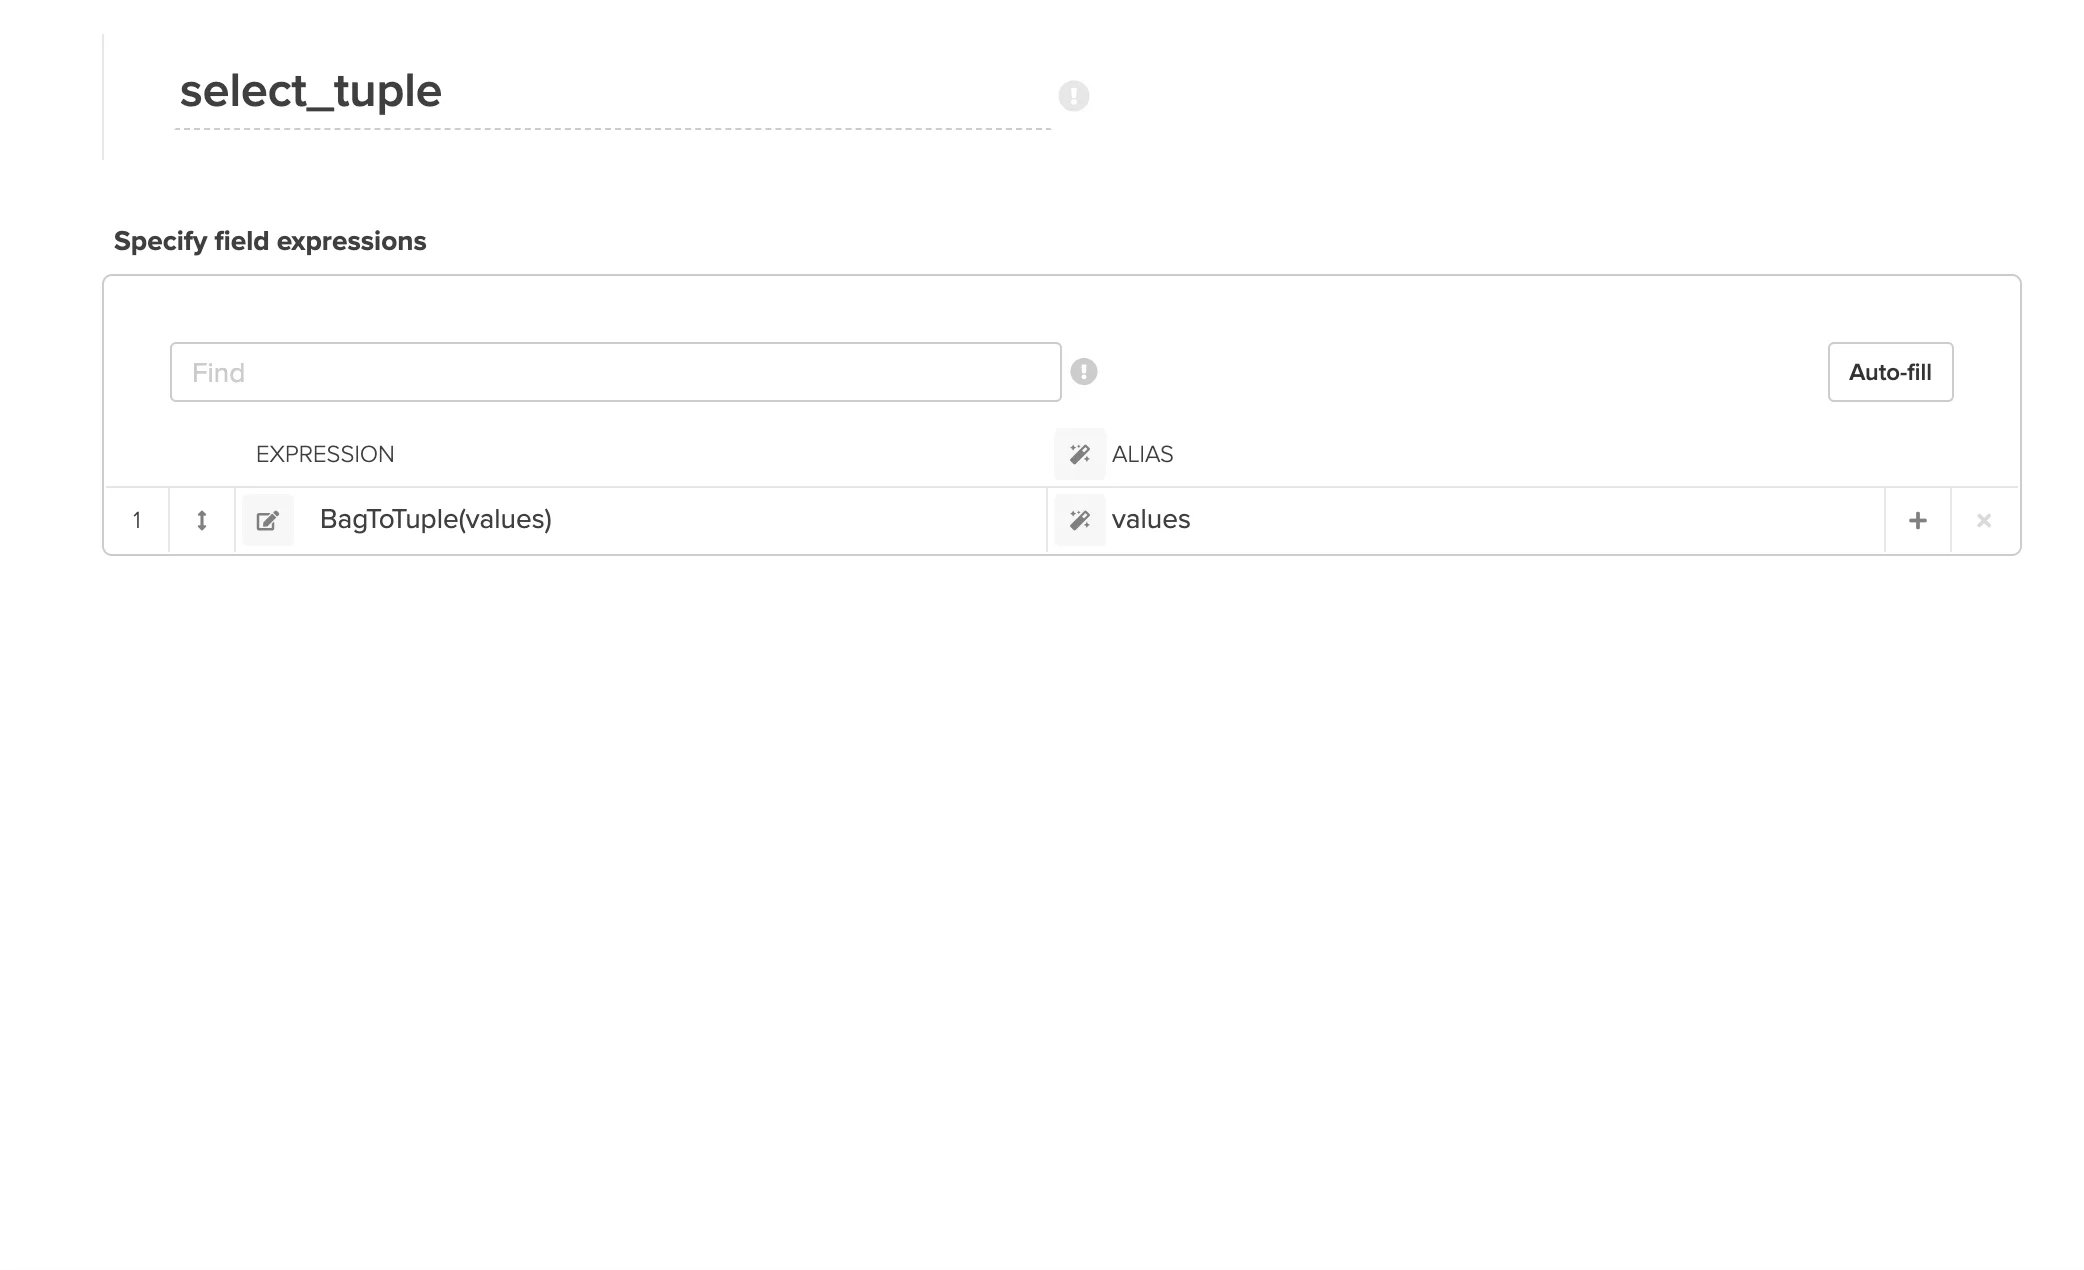
### 変換1:BAG型からTuple型に変換する
Selectコンポーネントを使用し、BagToTuple関数を使いTuple型に変換する
## 取得したJSONのフラット化
### 変換1:BAG型からTuple型に変換する
Selectコンポーネントを使用し、BagToTuple関数を使いTuple型に変換する
 ### 変換2:各列を配列番号を指定し、それぞれ取得する
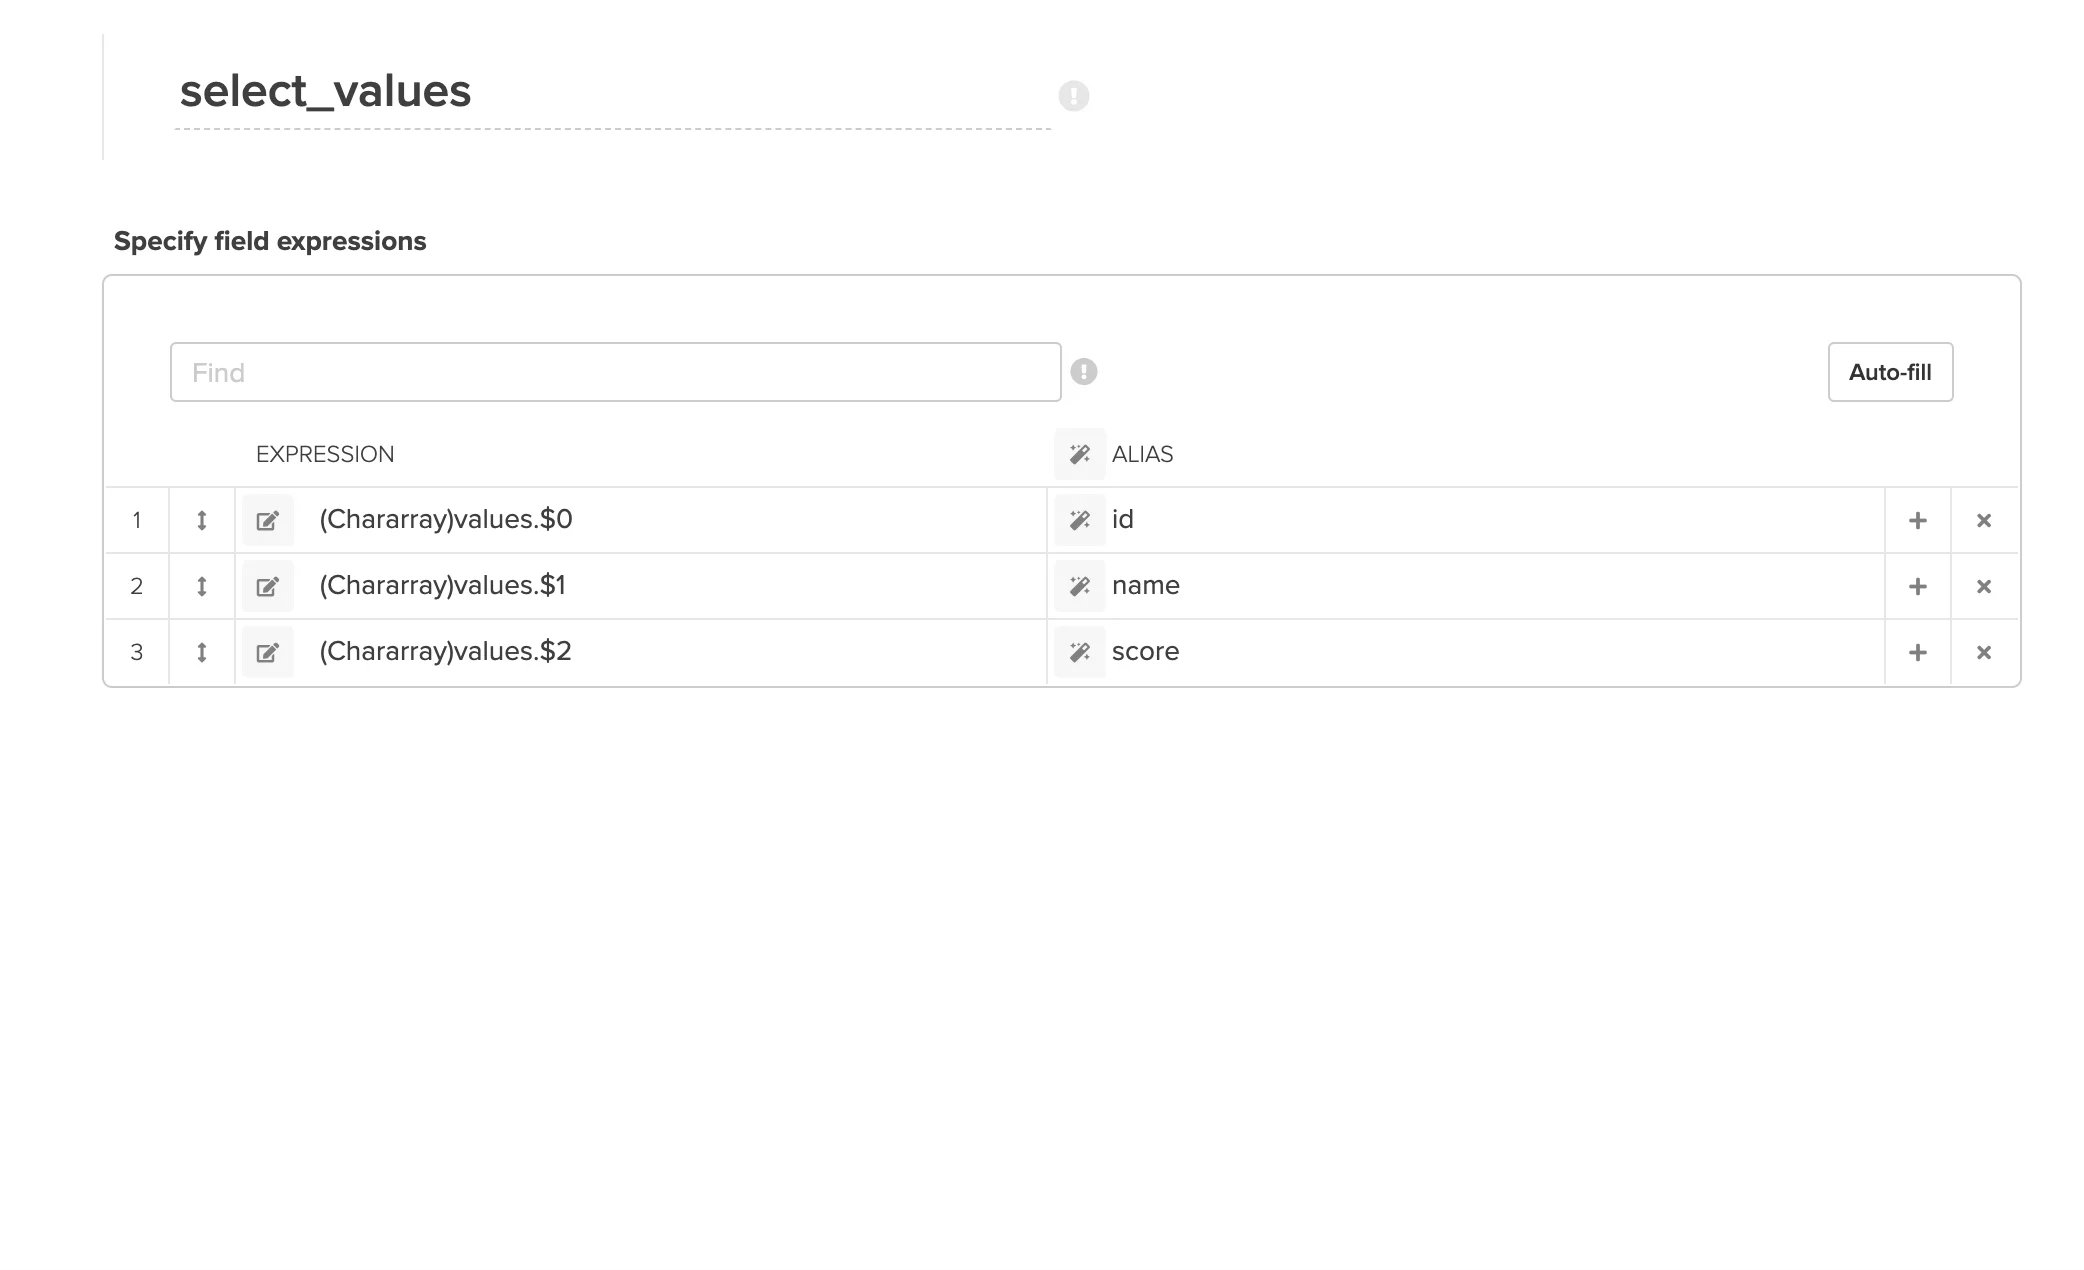
それぞれの列を配列番号(\$0)を指定し取得するとともに、Chararray関数で文字列型に変換する
### 変換2:各列を配列番号を指定し、それぞれ取得する
それぞれの列を配列番号(\$0)を指定し取得するとともに、Chararray関数で文字列型に変換する
 ### ヘッダ行をフィルターで除外
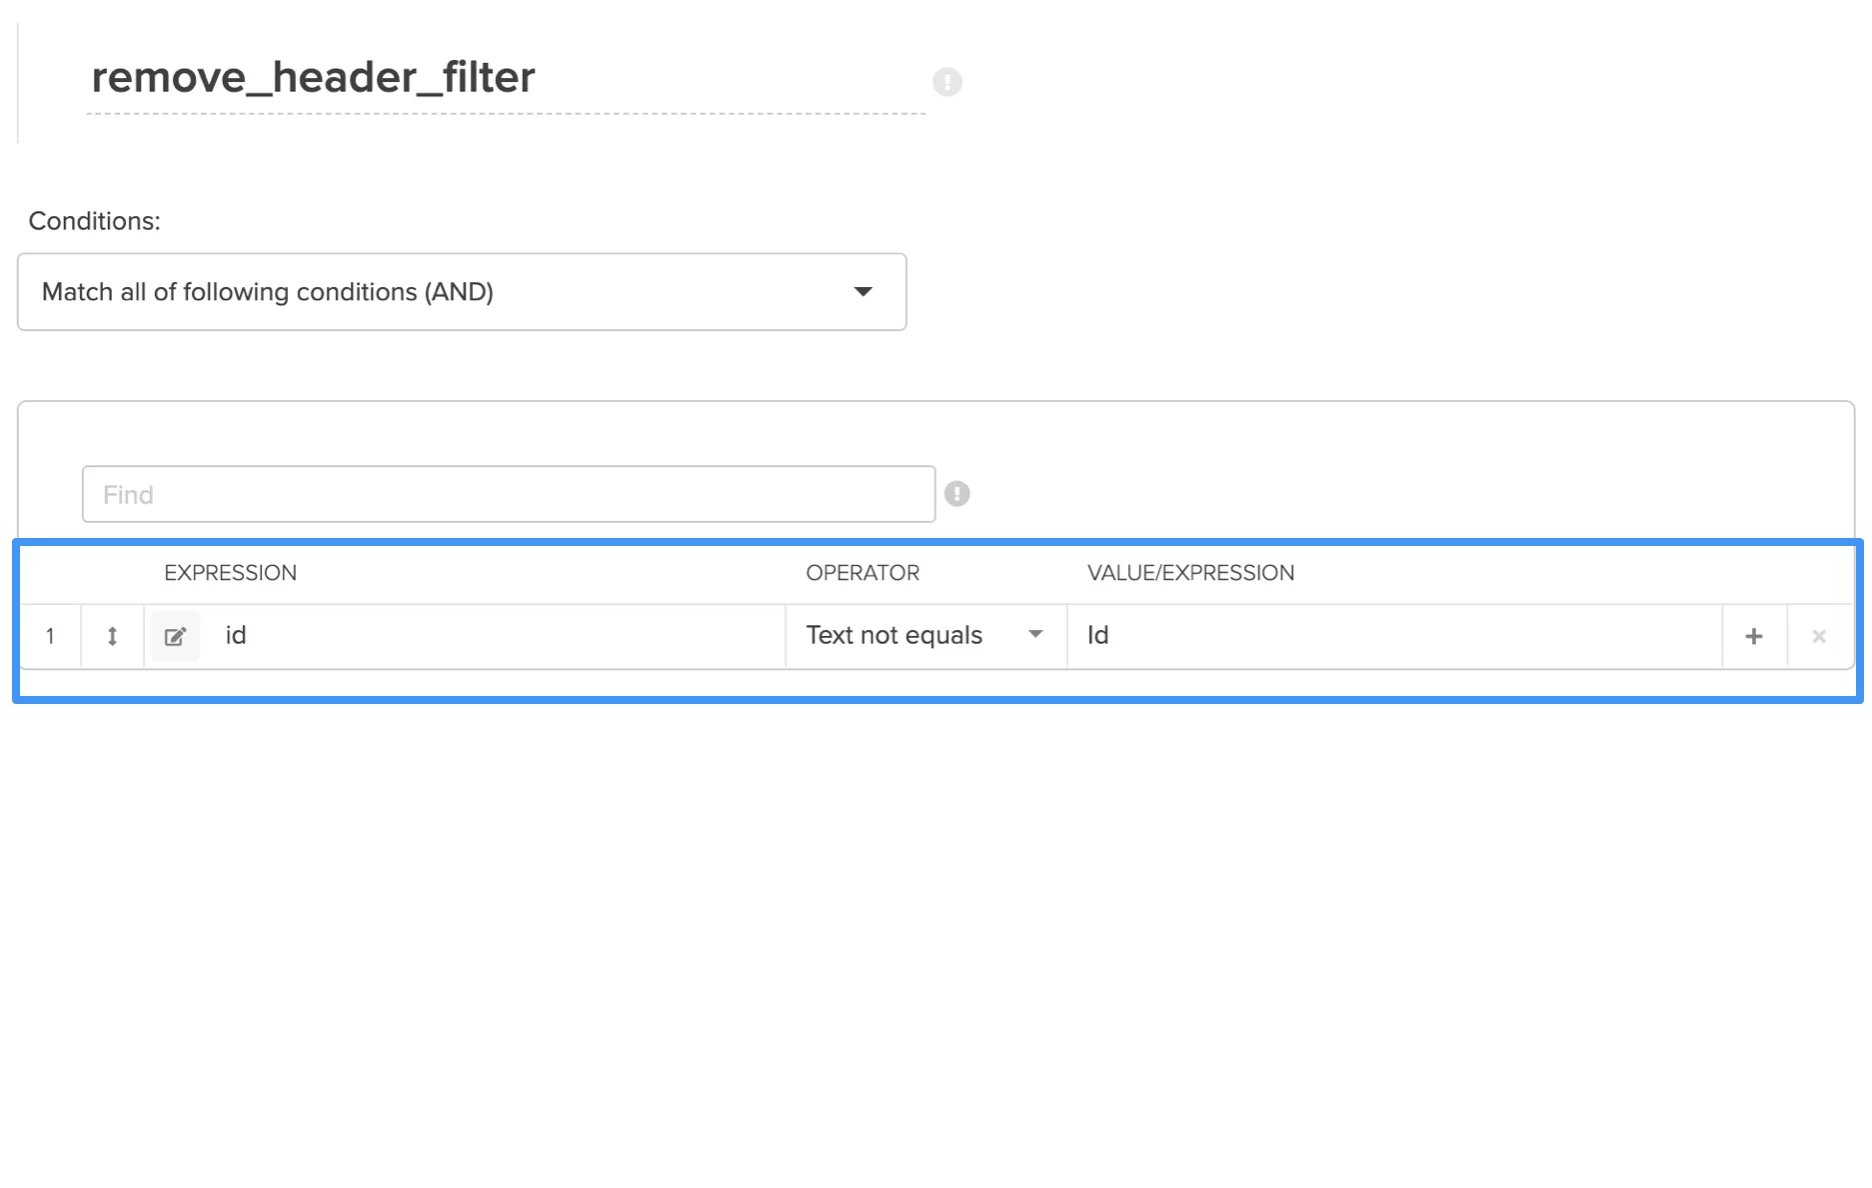
1行目にヘッダ行が含まれている場合、フィルタで除外する(Rest API側のセルの範囲指定でヘッダ行を除外する方法もあり。)
(例)id列に「Id」という文字が含まれていないデータのみ抽出
### ヘッダ行をフィルターで除外
1行目にヘッダ行が含まれている場合、フィルタで除外する(Rest API側のセルの範囲指定でヘッダ行を除外する方法もあり。)
(例)id列に「Id」という文字が含まれていないデータのみ抽出
 ## ロード先のコンポーネントをセットし、ジョブを実行して確認
最後にデータベース、DWH、ストレージなどにロードすれば完了です。
### パッケージ全体図
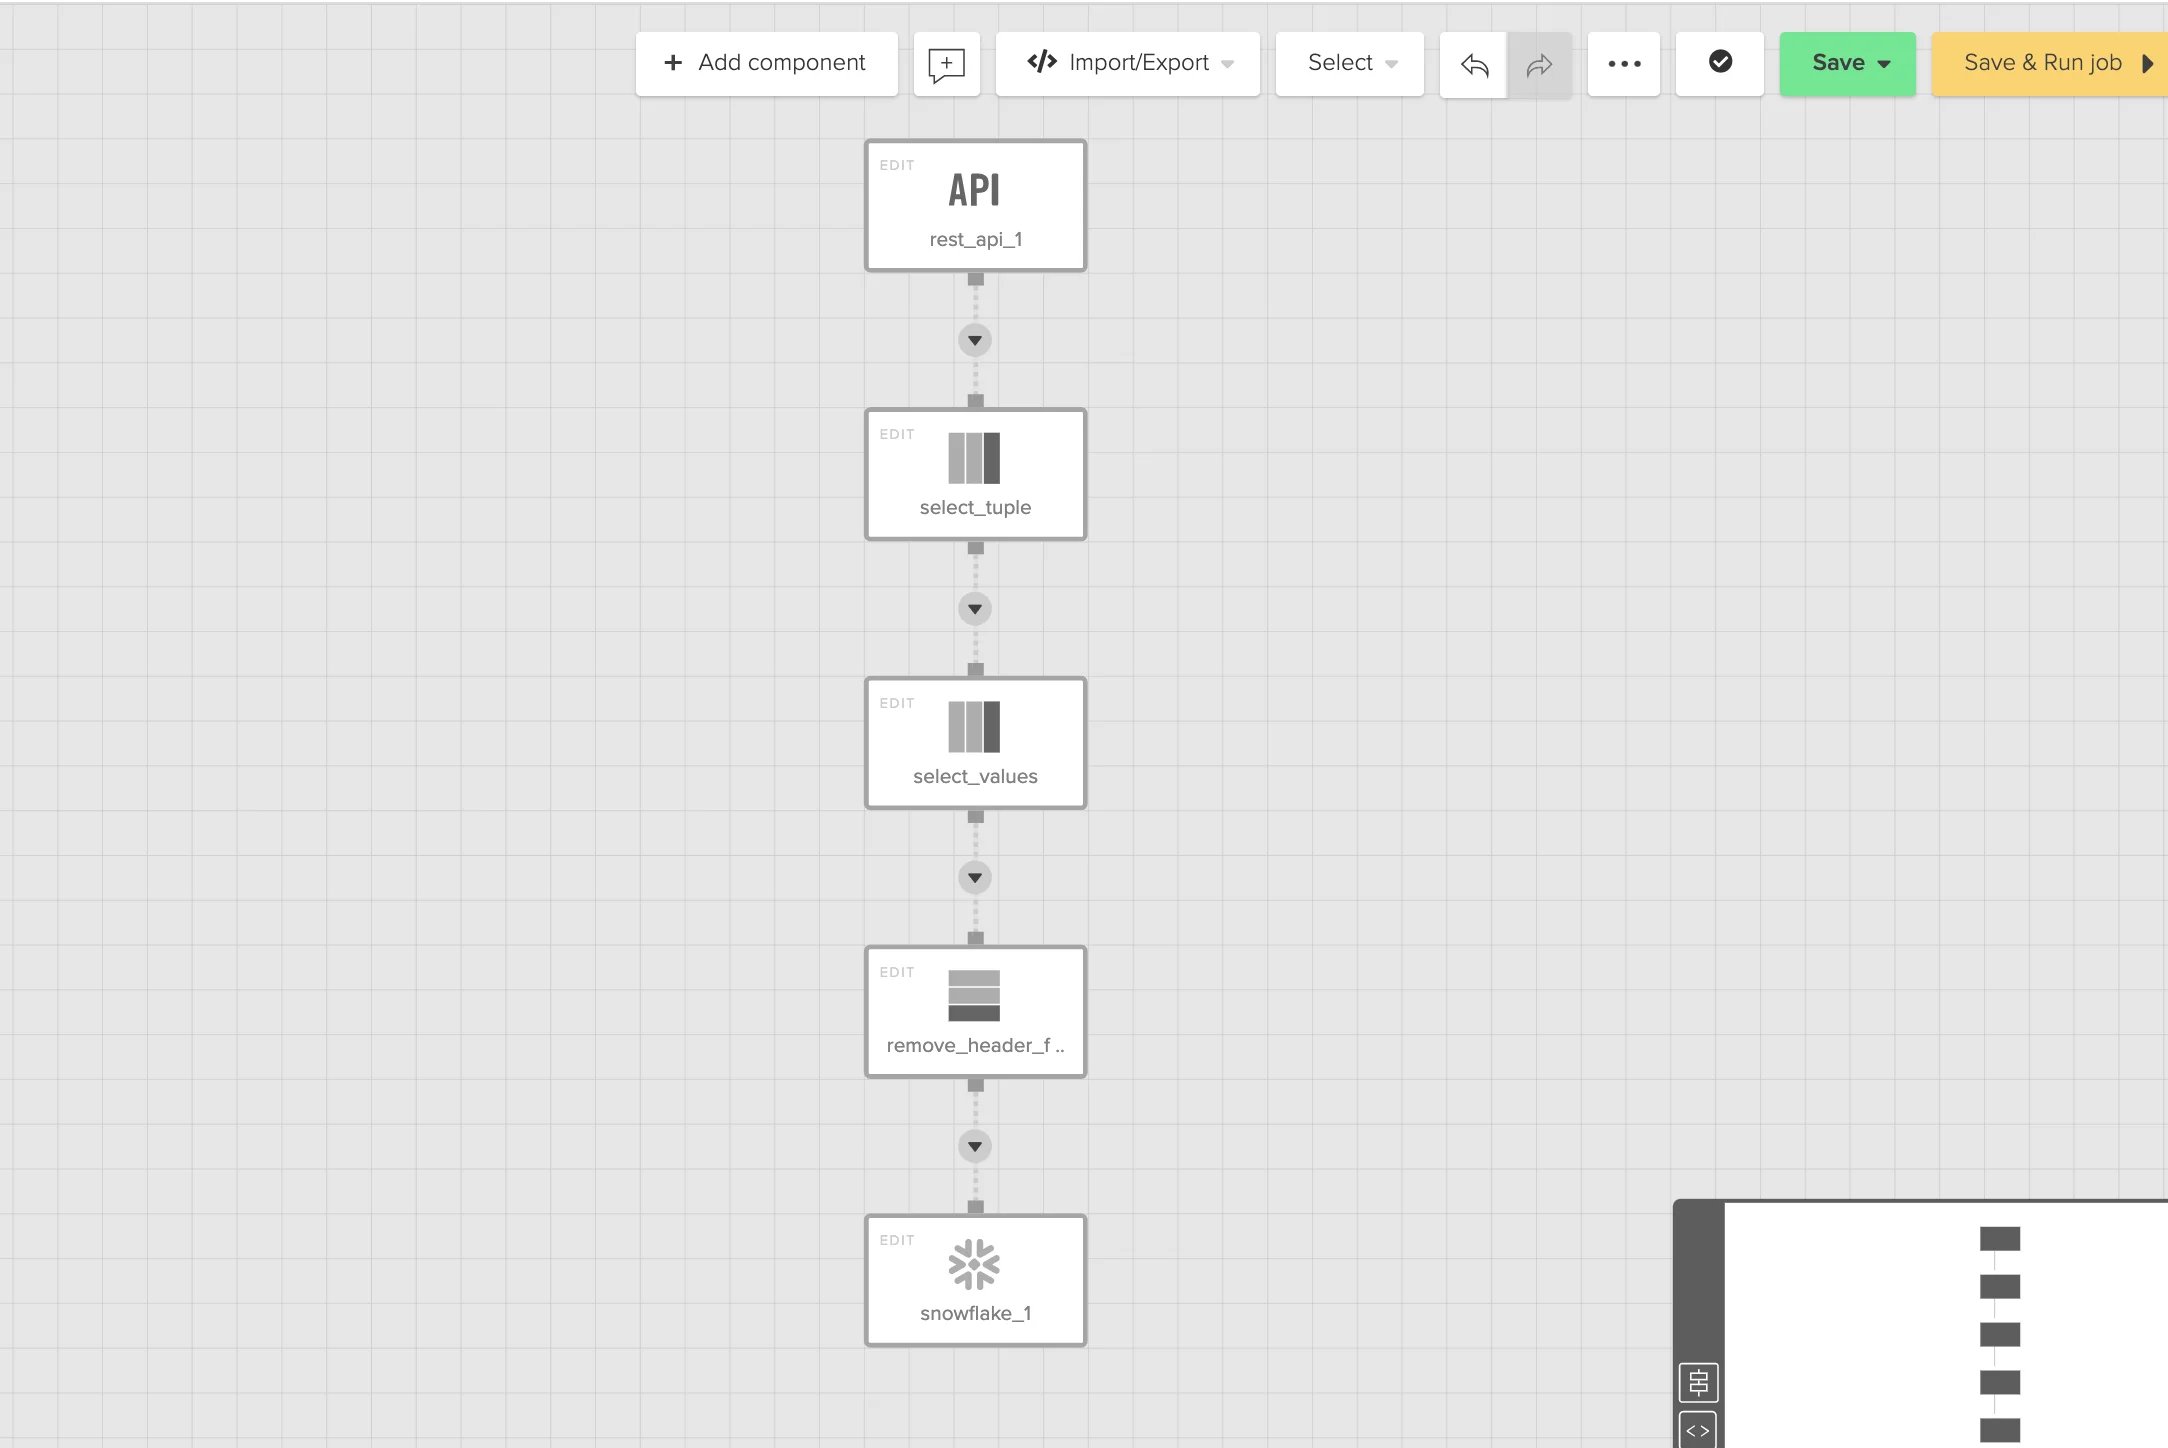
例)Snowflakeがロード先の場合、以下のようなフローになります。
## ロード先のコンポーネントをセットし、ジョブを実行して確認
最後にデータベース、DWH、ストレージなどにロードすれば完了です。
### パッケージ全体図
例)Snowflakeがロード先の場合、以下のようなフローになります。
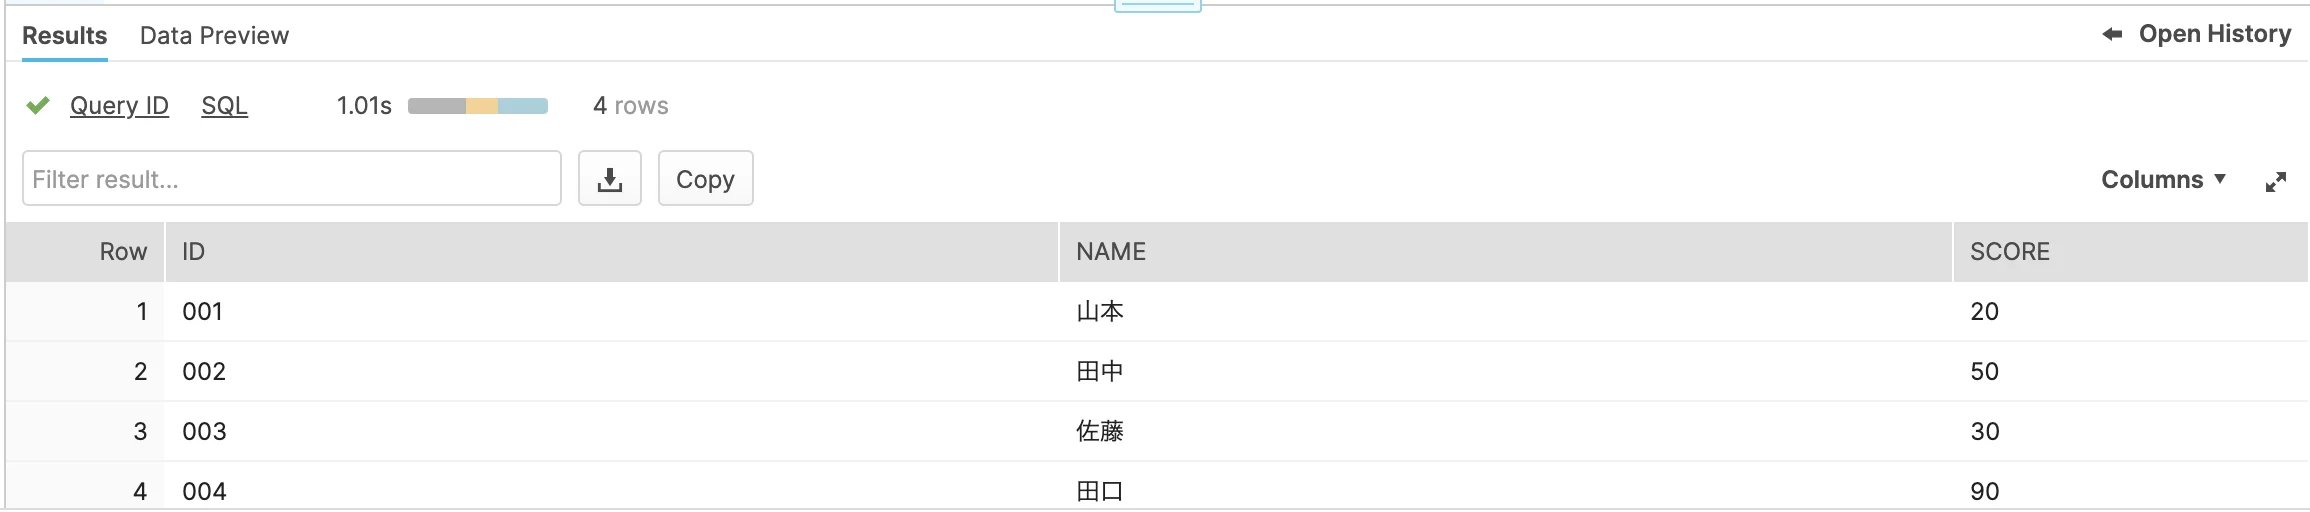
 ### データが正しく反映されたことを確認
 ## Google Sheetへの書き込みも可能です
Xpelntyでは、Selectコンポーネントの中でCurlリクエストを書くことで、Google Sheetへの書き込みが可能です。
## Google Sheetへの書き込みも可能です
Xpelntyでは、Selectコンポーネントの中でCurlリクエストを書くことで、Google Sheetへの書き込みが可能です。
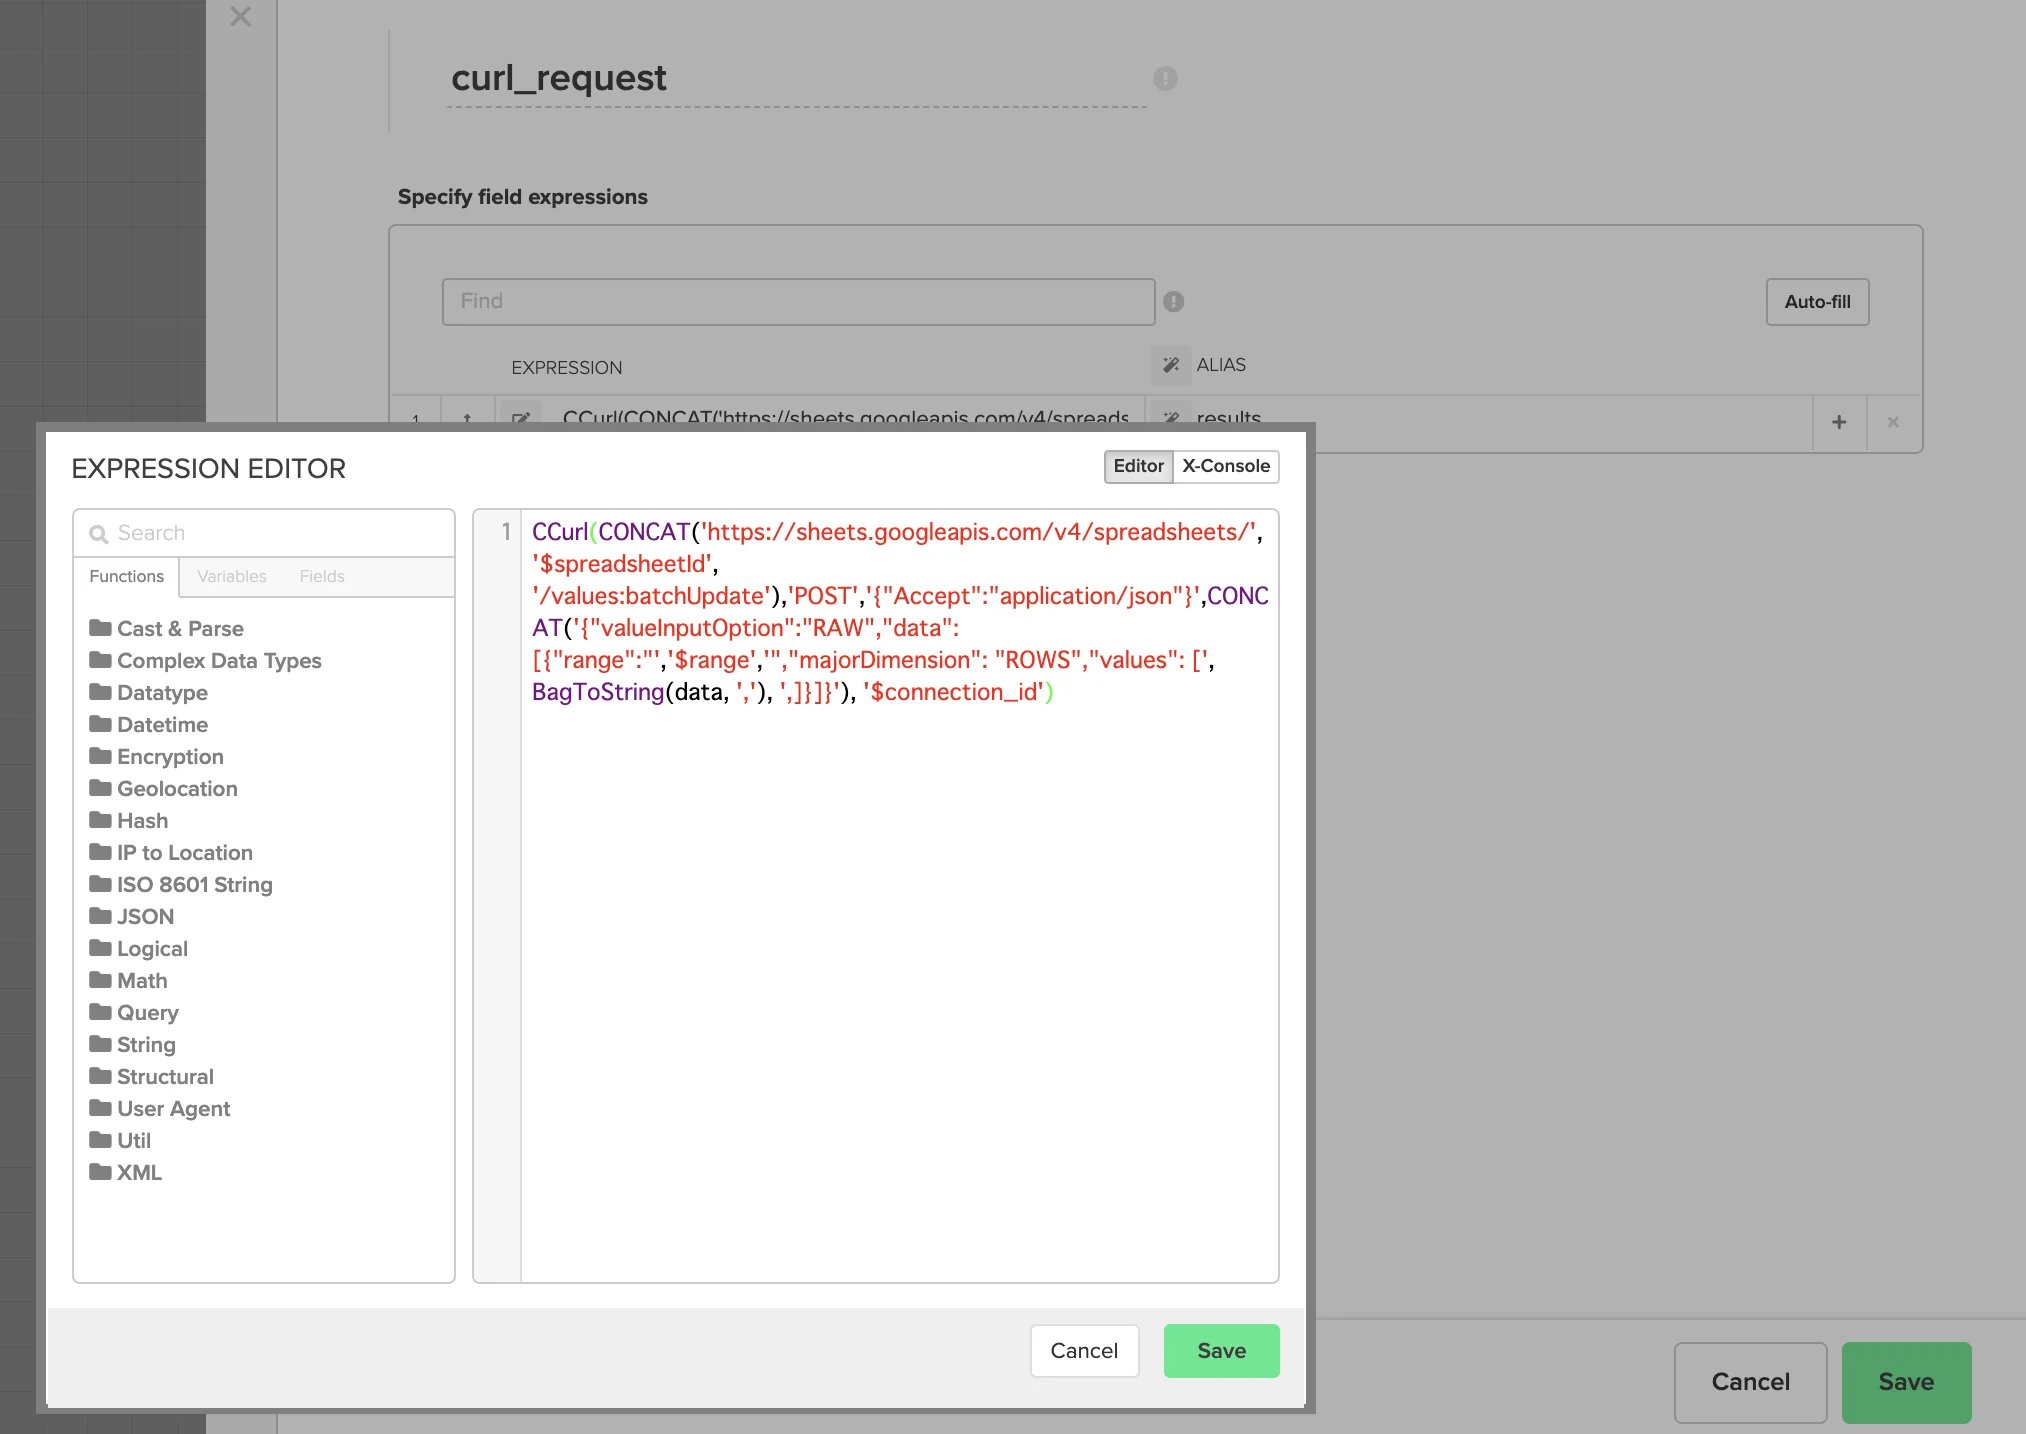 **書き込みリクエスト例:**
`CCurl(CONCAT('https://sheets.googleapis.com/v4/spreadsheets/', '$spreadsheetId', '/values:batchUpdate'),'POST','{"Accept":"application/json"}',CONCAT('{"valueInputOption":"RAW","data":[{"range":"','$range','","majorDimension": "ROWS","values": [', BagToString(data, ','), ',]}]}'), '$connection_id')`
**上記リクエストで使用している変数について**
* `$spreadsheetId`:GoogleSheetのIDを指定
* `$connection_id`:XplentyのコネクションIDを指定 (コネクション画面で確認することができます。)
例:GOOGLESHEETS\_CONNECTION\_9215
* `$range`:シート名およびセル範囲を指定。
例:campaign!A1:N100000
**書き込みリクエスト例:**
`CCurl(CONCAT('https://sheets.googleapis.com/v4/spreadsheets/', '$spreadsheetId', '/values:batchUpdate'),'POST','{"Accept":"application/json"}',CONCAT('{"valueInputOption":"RAW","data":[{"range":"','$range','","majorDimension": "ROWS","values": [', BagToString(data, ','), ',]}]}'), '$connection_id')`
**上記リクエストで使用している変数について**
* `$spreadsheetId`:GoogleSheetのIDを指定
* `$connection_id`:XplentyのコネクションIDを指定 (コネクション画面で確認することができます。)
例:GOOGLESHEETS\_CONNECTION\_9215
* `$range`:シート名およびセル範囲を指定。
例:campaign!A1:N100000