> ## Documentation Index
> Fetch the complete documentation index at: https://www.integrate.io/docs/llms.txt
> Use this file to discover all available pages before exploring further.
# ETL: HubspotのデータをAPIで更新する
> S3に保管されたコンタクトリストのCSVファイルをXplentyのCurlファンクションとHubspot APIを使用して読み込み、HubspotのContactデータを更新する方法を画面キャプチャとともに解説します。
前回は[Xplenty: HubspotのデータをAPIで取得する](/jp/etl/restapi-part03-jp)方法について紹介しましたが、今回はHubspotのAPIを使用し、XplentyからHubspotのContactデータを更新する方法について解説します。
**今回使用するAPIに関する参考ドキュメント:**\
[https://legacydocs.hubspot.com/docs/methods/contacts/create\_or\_update](https://legacydocs.hubspot.com/docs/methods/contacts/create_or_update)
## データの書き込み
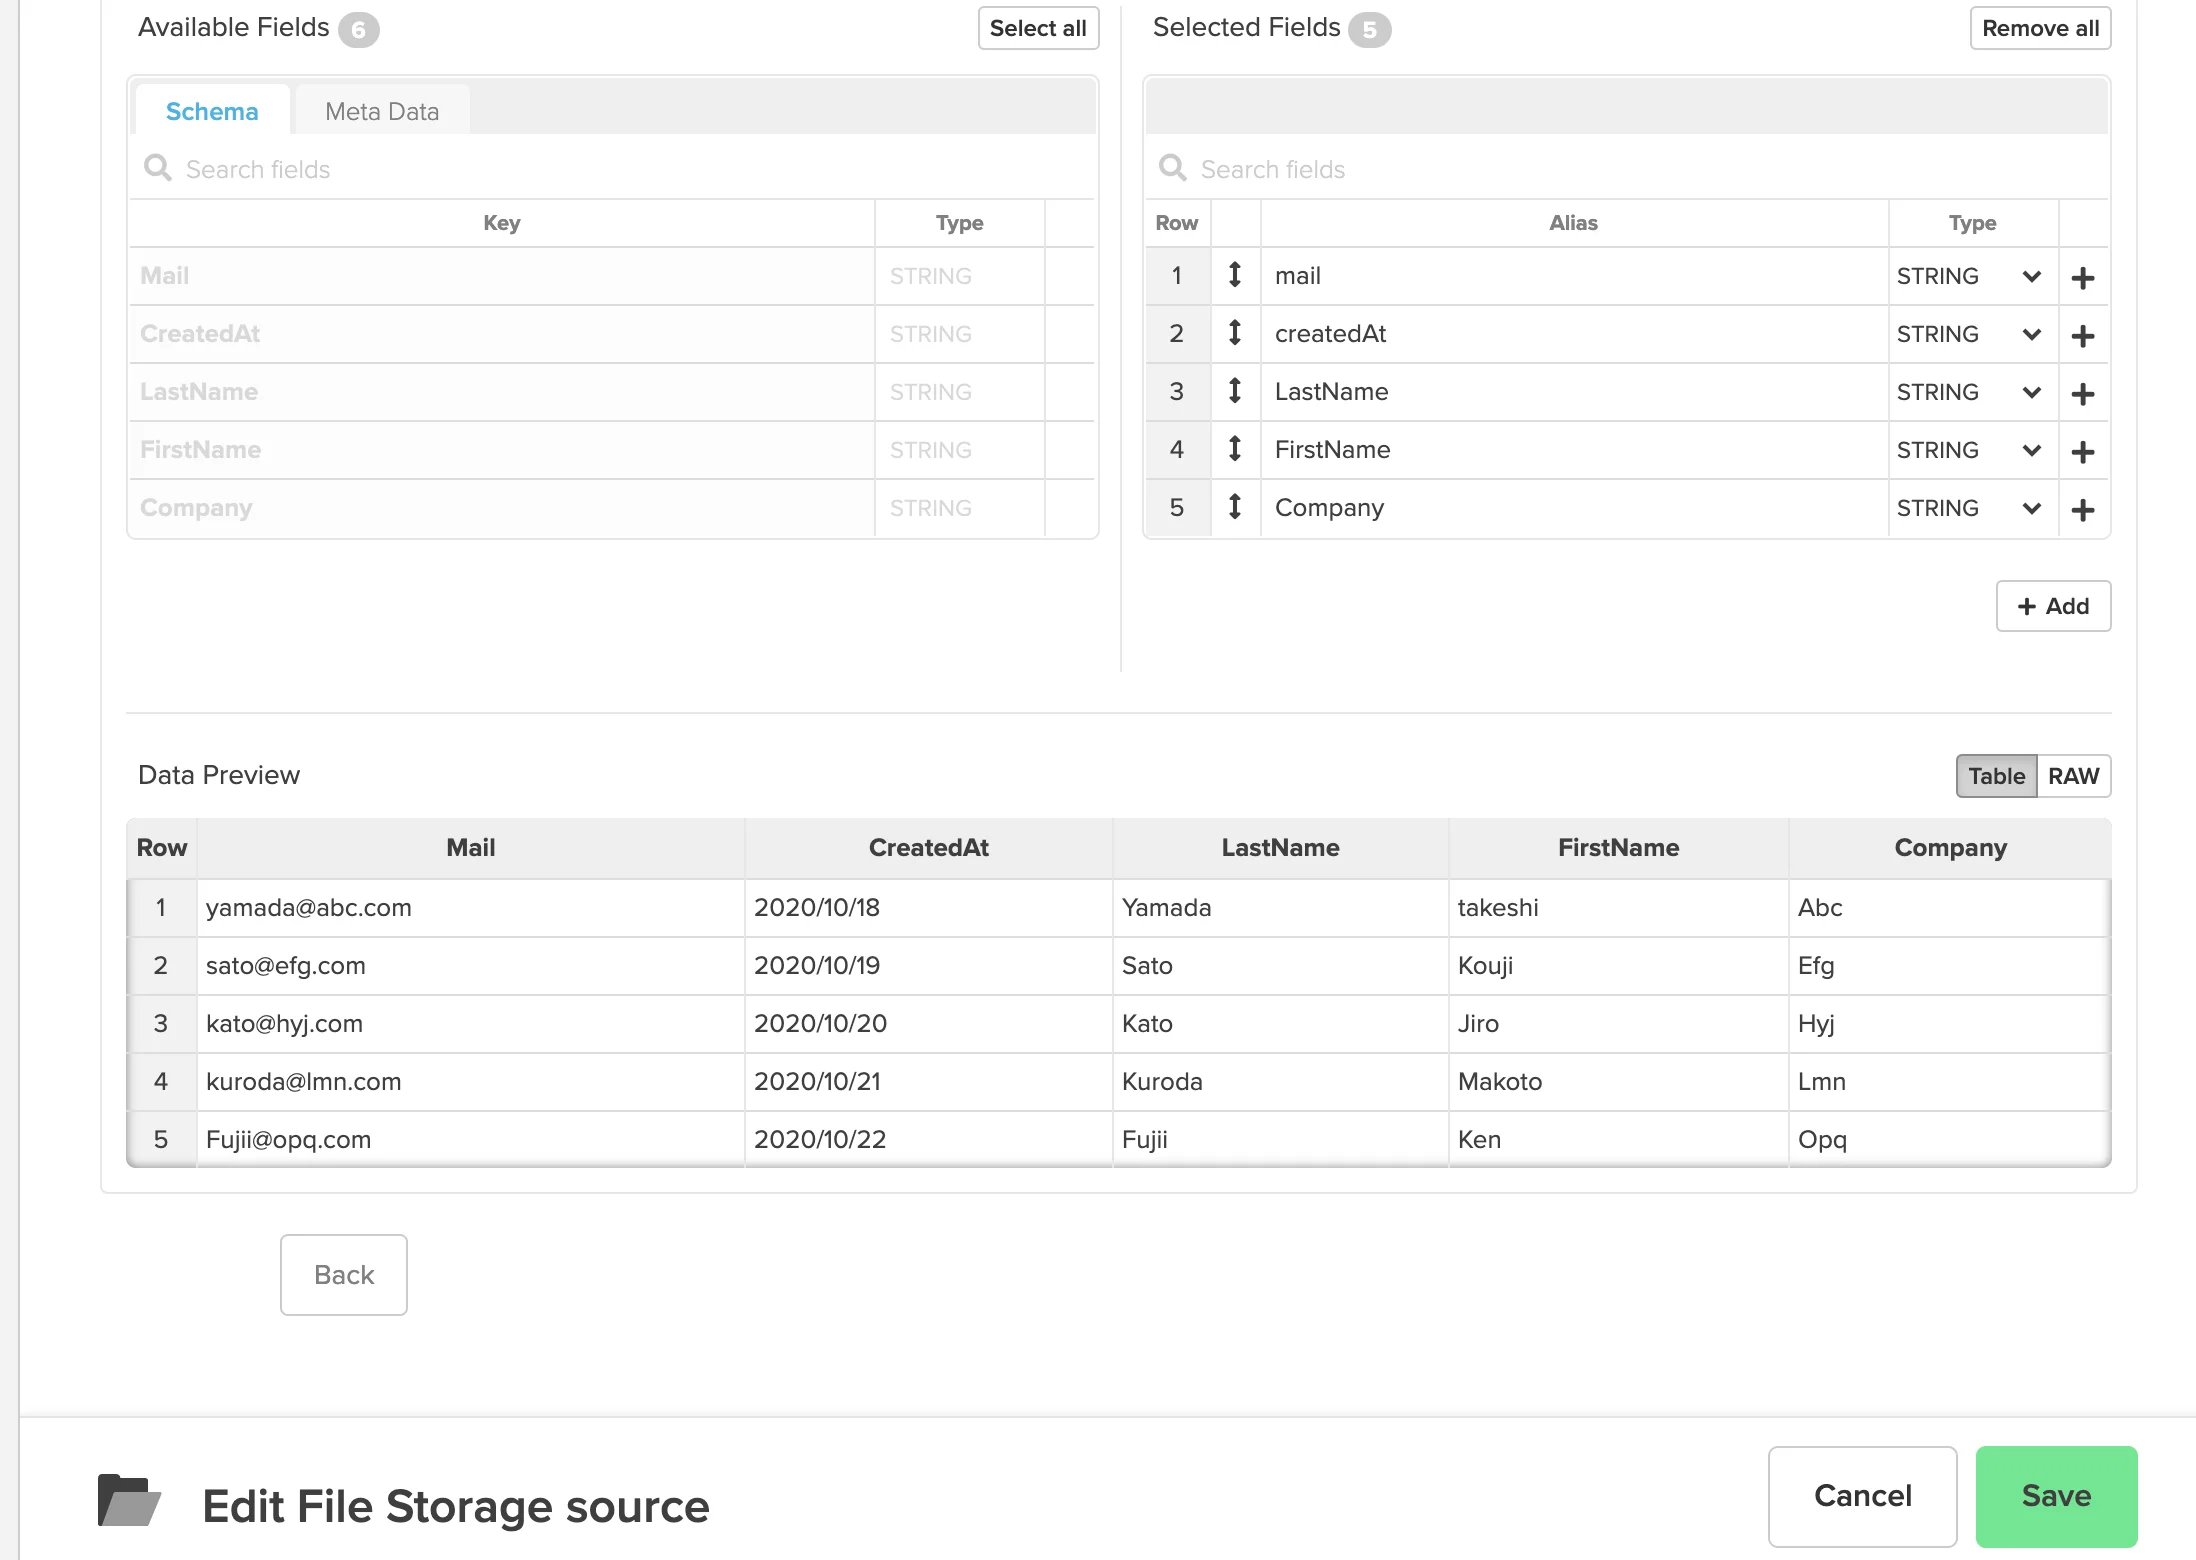
今回の例では、S3に保管されているコンタクトリストのCSVファイルをHubspotに更新する方法について紹介します。
## ストレージコンポーネント(ソース)を使用して、S3から今回Hubspotに更新するデータを取得します
 ## SelectコンポーネントでCurlファンクションを使用してリクエストを定義します
**Select コンポーネントの設定画面**
## SelectコンポーネントでCurlファンクションを使用してリクエストを定義します
**Select コンポーネントの設定画面**
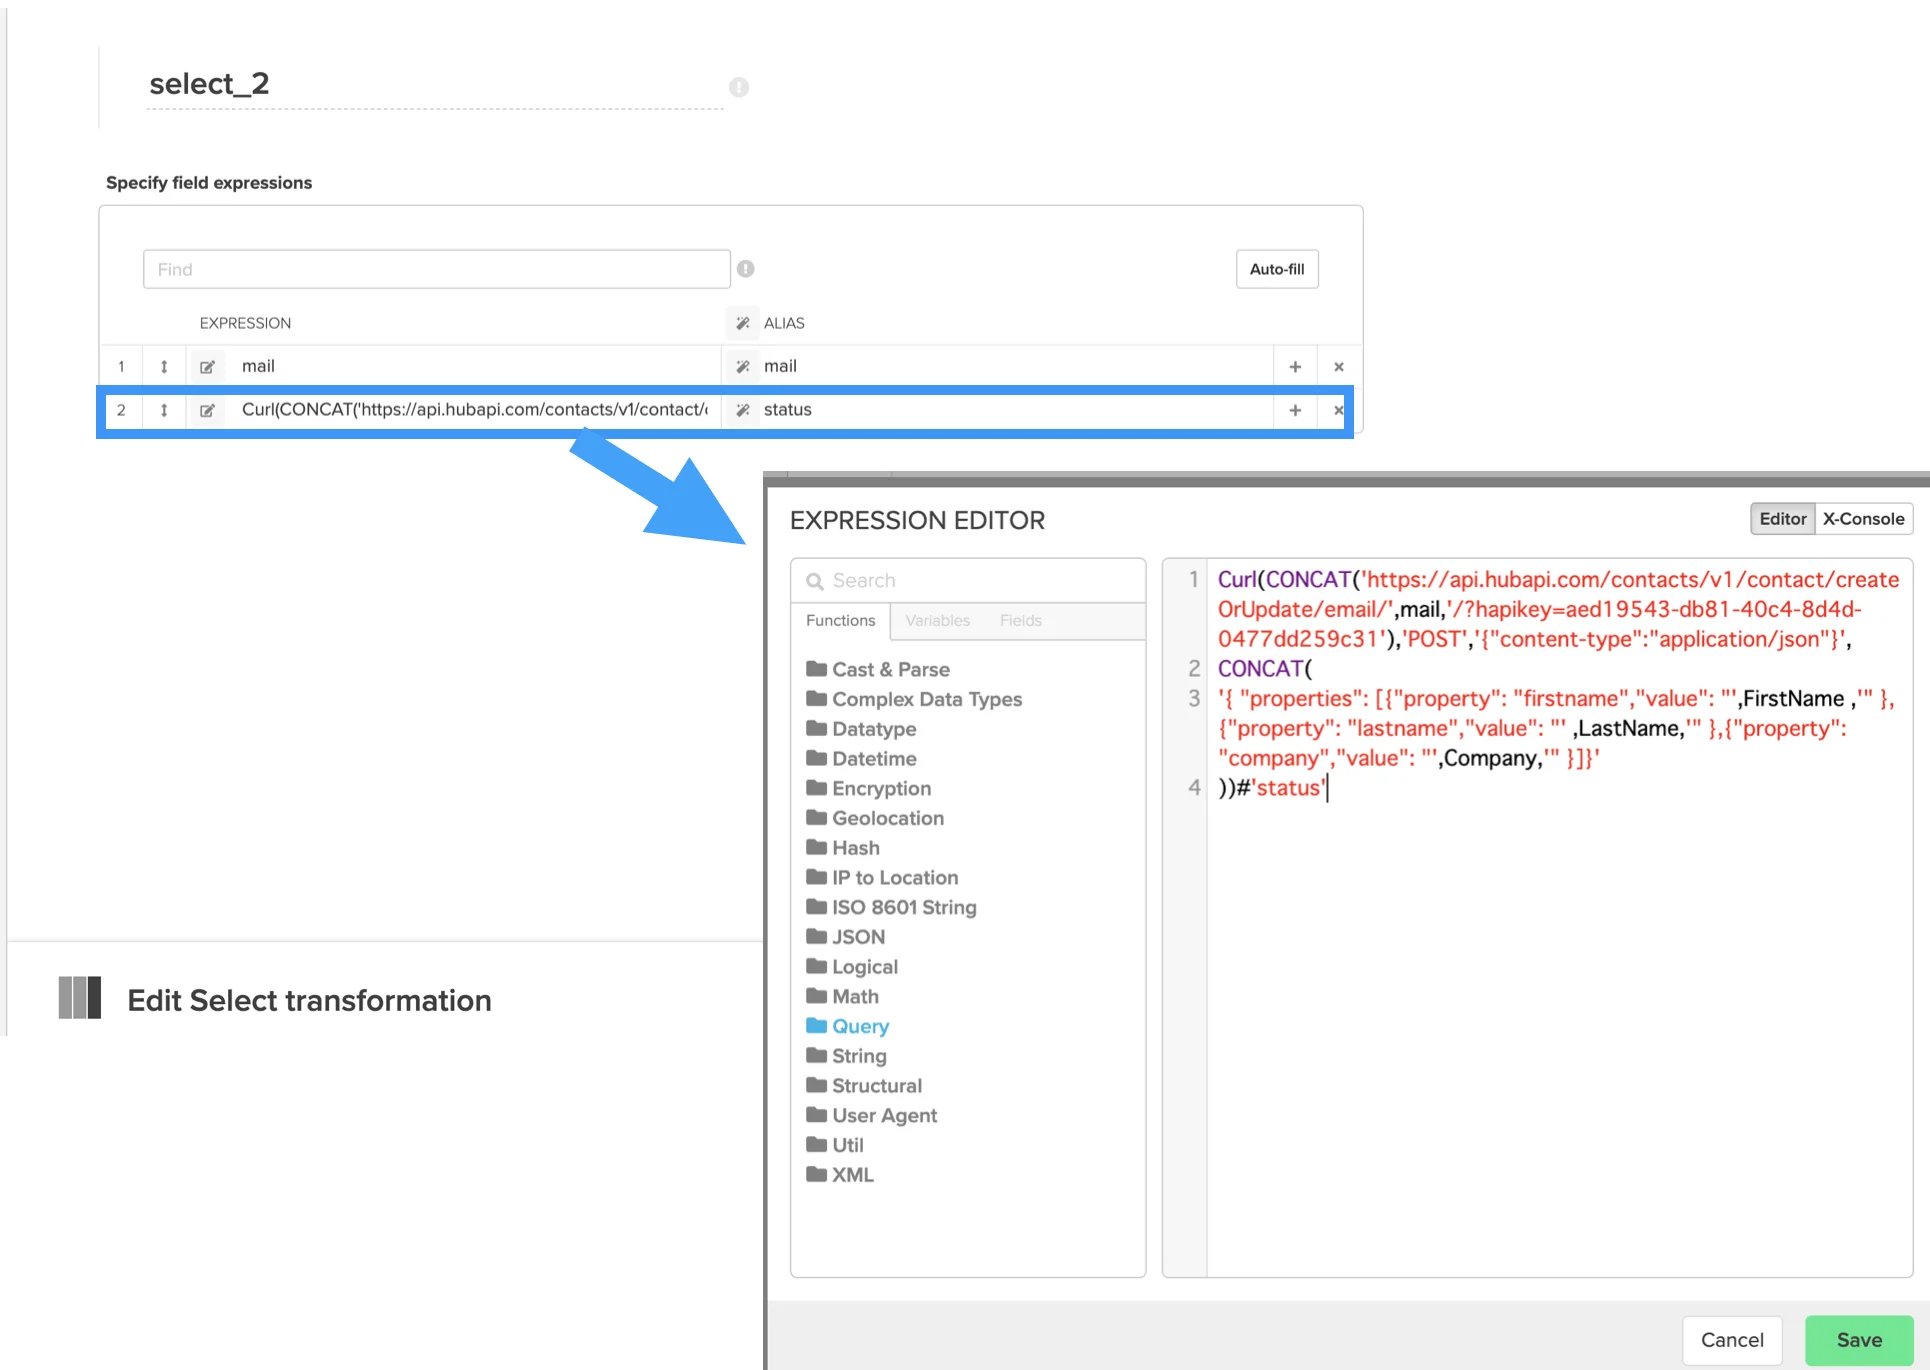 **リクエスト例:**`https://api.hubapi.com/contacts/v1/contact/createOrUpdate/email/メールアドレスの列名/?hapikey=APIキー`
**リクエストBody例:**
```
{ "properties": [ { "property": "firstname", "value": "firstnameの列名" }, { "property": "lastname", "value": "lastnameの列名" }, { "property": "company", "value": "企業名の列名" } ] }
```
**上記を参考にXplentyでのCurlファンクションを使用し、関数式にする**
```
Curl(CONCAT('https://api.hubapi.com/contacts/v1/contact/createOrUpdate/email/',mail,'/?hapikey=APIキー'),'POST','{"content-type":"application/json"}', CONCAT( '{ "properties": [{"property": "firstname","value": "',FirstName ,'" }, {"property": "lastname","value": "' ,LastName,'" },{"property": "company","value": "',Company,'" }]}' ))#'status'
```
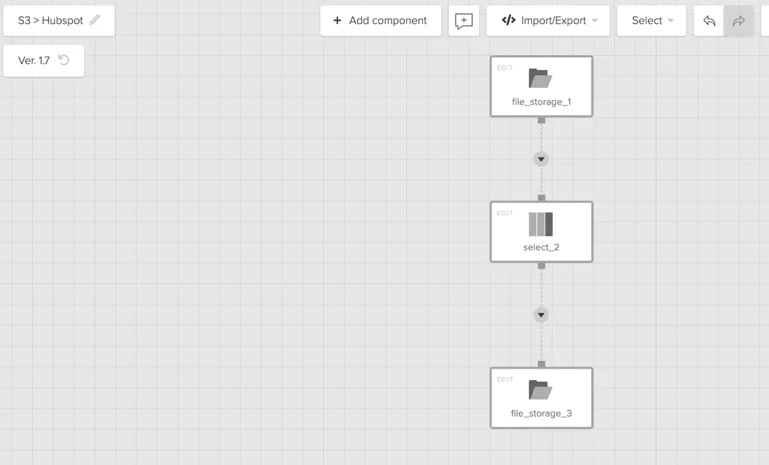
最終的なパッケージは以下のようになります。
**リクエスト例:**`https://api.hubapi.com/contacts/v1/contact/createOrUpdate/email/メールアドレスの列名/?hapikey=APIキー`
**リクエストBody例:**
```
{ "properties": [ { "property": "firstname", "value": "firstnameの列名" }, { "property": "lastname", "value": "lastnameの列名" }, { "property": "company", "value": "企業名の列名" } ] }
```
**上記を参考にXplentyでのCurlファンクションを使用し、関数式にする**
```
Curl(CONCAT('https://api.hubapi.com/contacts/v1/contact/createOrUpdate/email/',mail,'/?hapikey=APIキー'),'POST','{"content-type":"application/json"}', CONCAT( '{ "properties": [{"property": "firstname","value": "',FirstName ,'" }, {"property": "lastname","value": "' ,LastName,'" },{"property": "company","value": "',Company,'" }]}' ))#'status'
```
最終的なパッケージは以下のようになります。
 ## Xplentyでジョブ実行結果を確認する
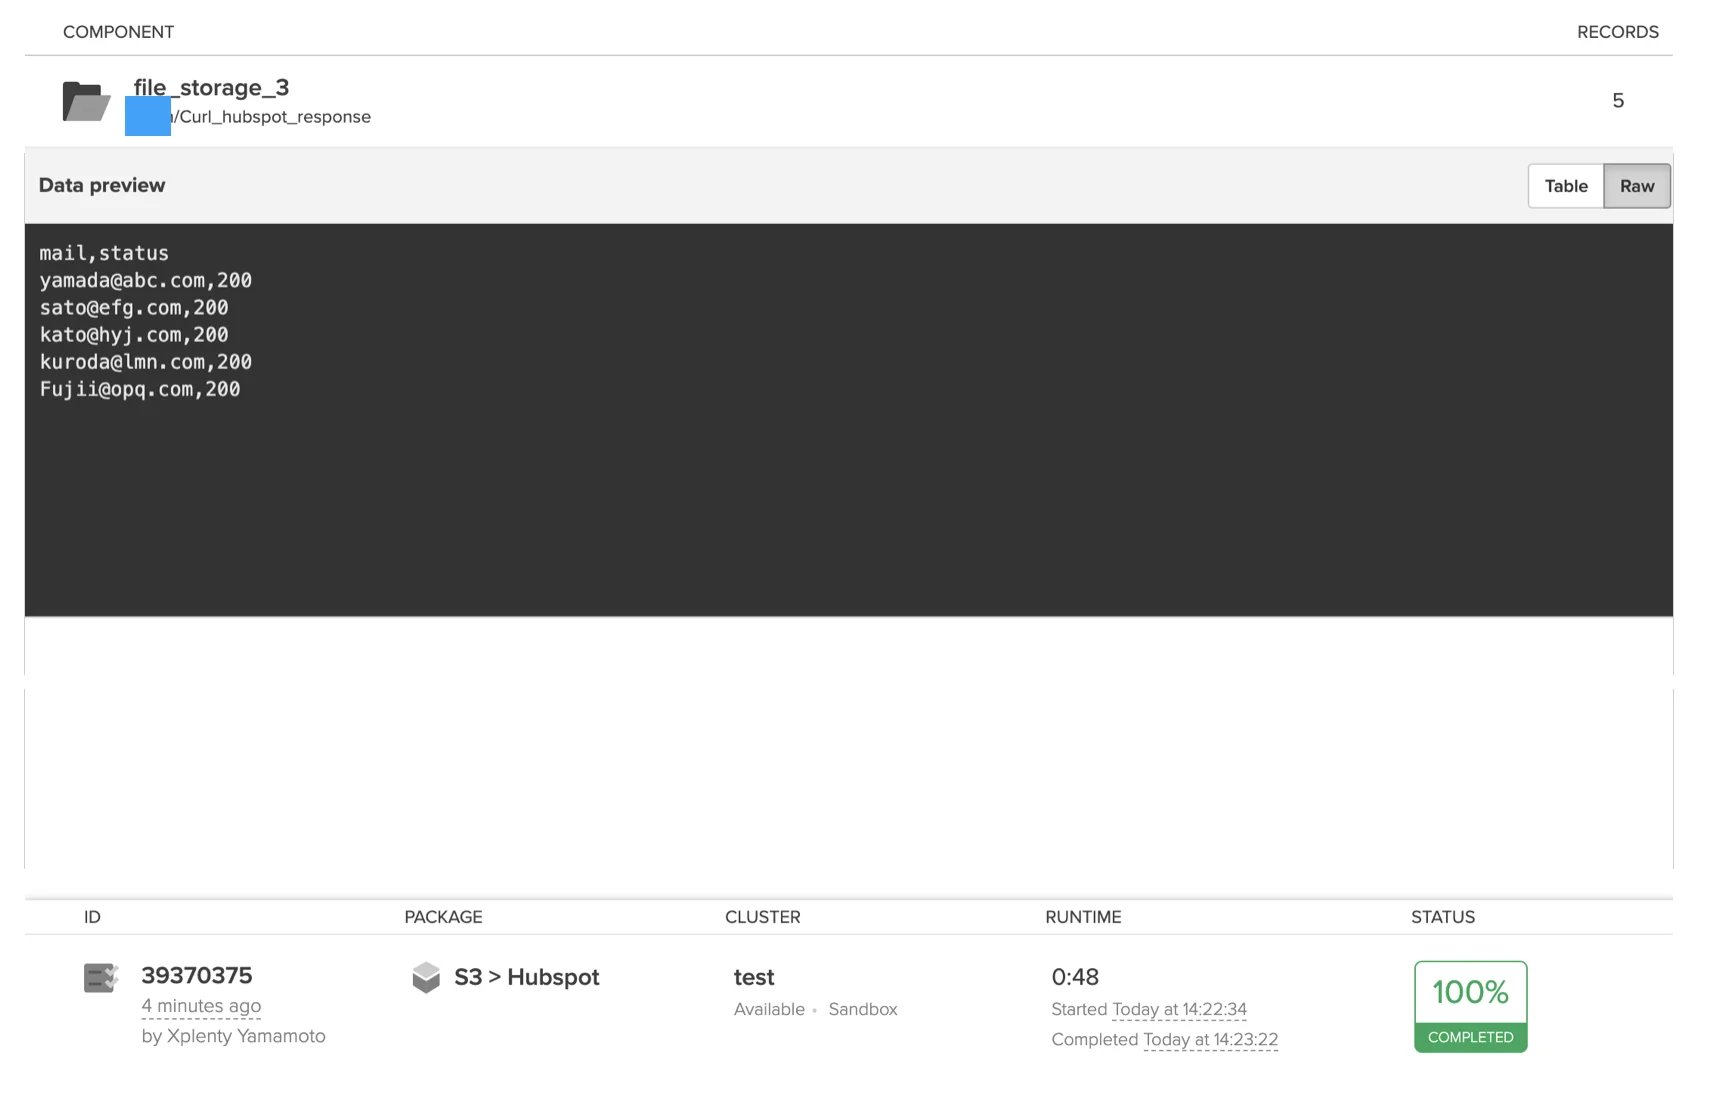
ジョブが正しく実行され、各メールアドレスに対するリクエストが成功(ステータス:200)していることが分かります。
## Xplentyでジョブ実行結果を確認する
ジョブが正しく実行され、各メールアドレスに対するリクエストが成功(ステータス:200)していることが分かります。
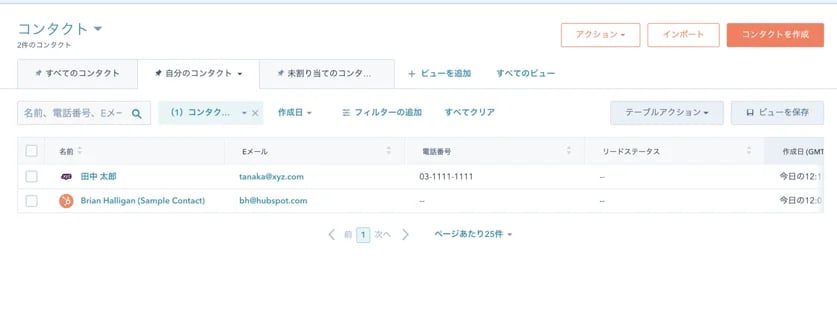
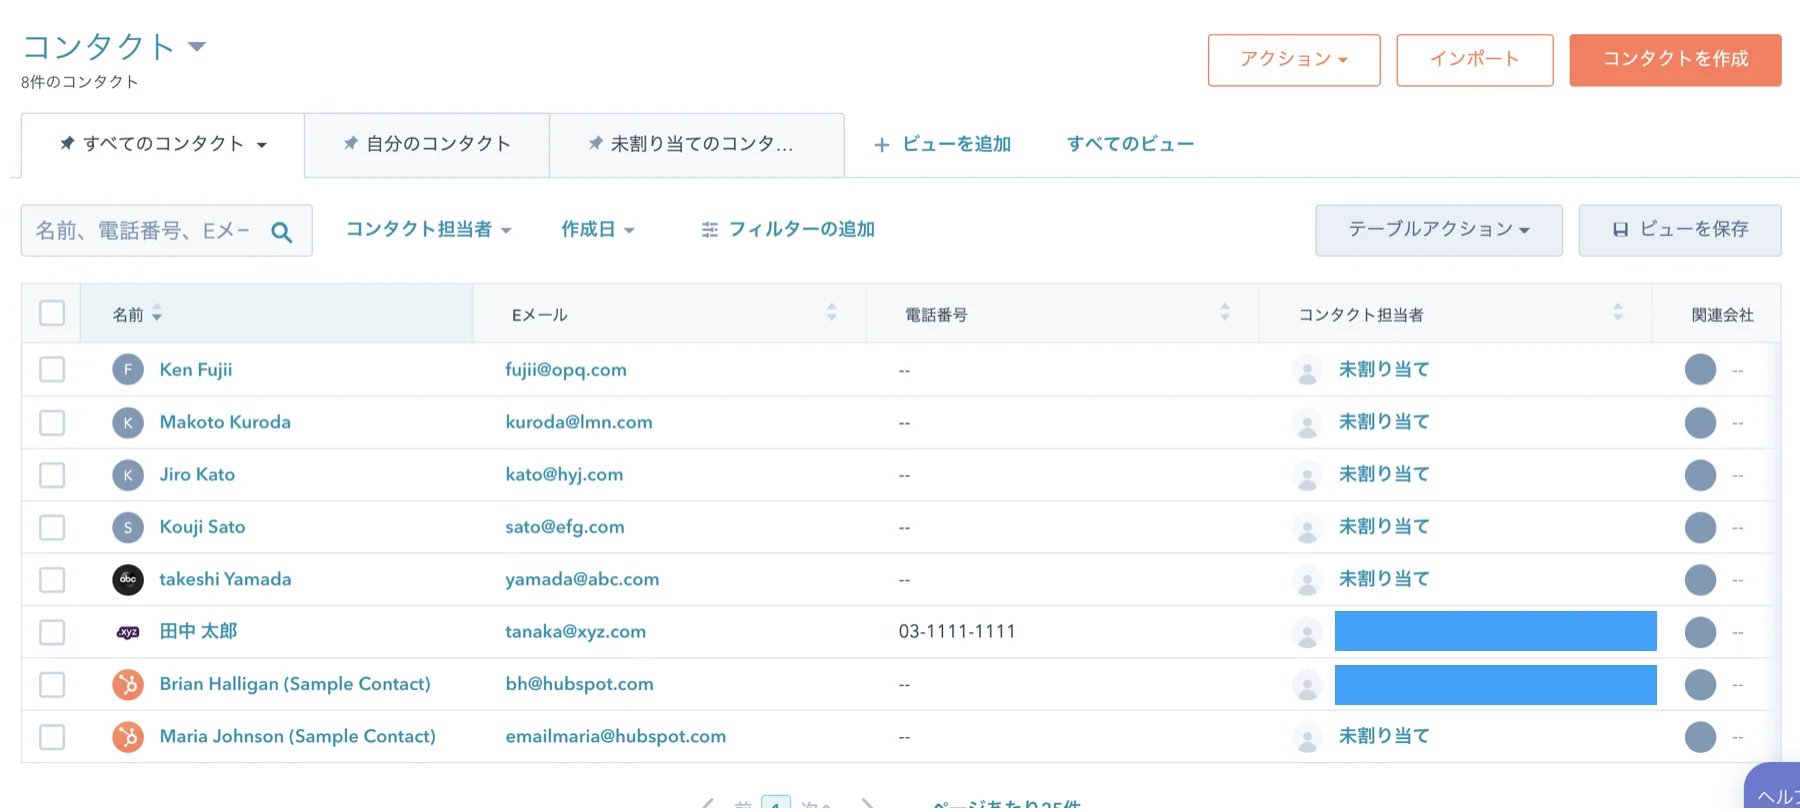
 実際のHubspot側の画面で確認すると、ジョブ実行前の画面に対して、正しく追加、更新されていることが確認できます。
**ジョブ実行前:**
実際のHubspot側の画面で確認すると、ジョブ実行前の画面に対して、正しく追加、更新されていることが確認できます。
**ジョブ実行前:**
 **ジョブ実行後:**
 **変数をうまく利用する**
今回は分かりやすいようにAPI KeyやURLについて固定値でセットする方法で紹介しましたが、変数を利用することで
**変数をうまく利用する**
今回は分かりやすいようにAPI KeyやURLについて固定値でセットする方法で紹介しましたが、変数を利用することで