

1
Generate a keypair using PuTTY Key Generator and add the public key in your user settings. The public key will be propagated to our servers in up to 5 minutes. Save the private key as well.
2
Create a Tunnel Connection in Integrate.io ETL:
- On the dashboard Connections, click New Connection and choose a connection to use.
- Choose Reverse SSH tunnel connection as Access type and supply your connection’s hostname, username and port.
- Click Create connection.
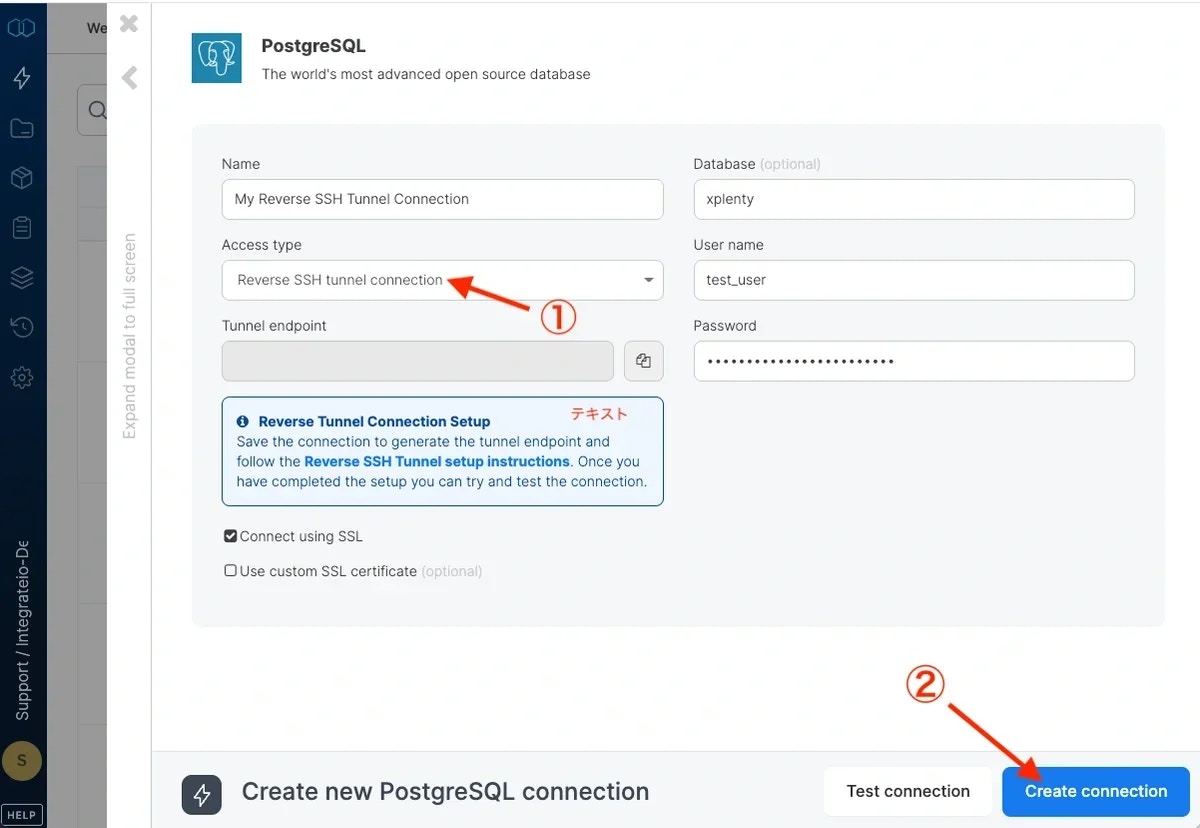
- It will fail because we haven’t created the tunnel yet, but the light blue box will appear and you will be able to retrieve Integrate.io ETL’s tunnel server (Integrate.io ETL server endpoint that includes everything before the colon) and connection port (the number after the colon).
3
Start a new PuTTY session and set the Hostname to the Integrate.io ETL server (e.g: virginia-tunnel.xplenty.com) and Port to 50683. The port is a static value, and not the port assigned to your connection. We will be using that later on.
4
Connection -> Data, enter the tunnel username: sshtunnel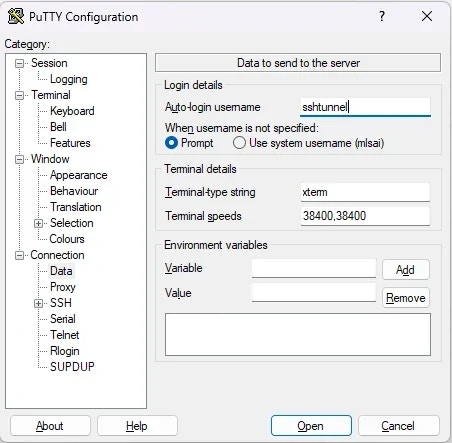
5
Connection -> SSH, check “Don’t start a shell or command at all”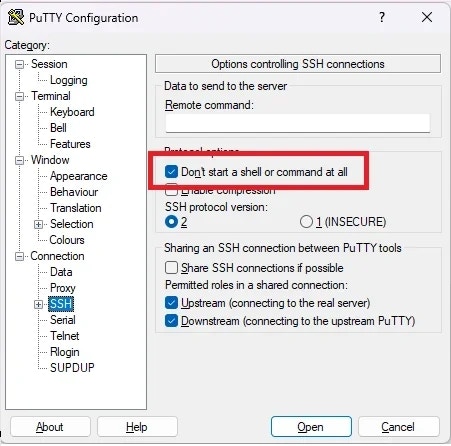
6
Connection -> SSH -> Auth -> Credentials, browse for the private key (.ppk) that matches the public key you added in Integrate.io ETL.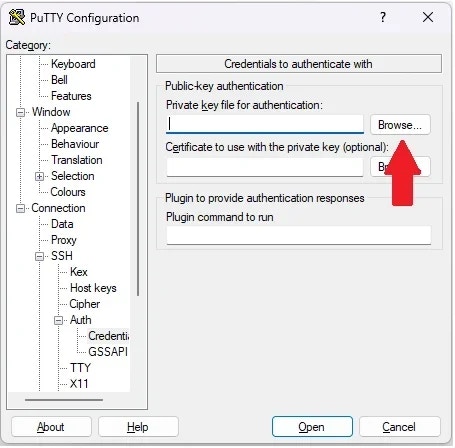
7
Connection -> SSH -> TTY, check “Don’t allocate a pseudo terminal”.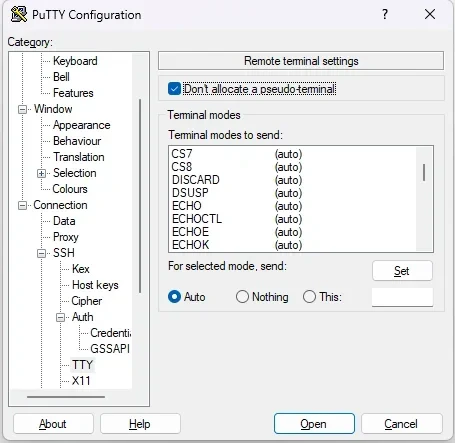
8
Connection -> SSH -> Tunnels: Specify the source port (the connection port assigned earlier on the connections page). Specify the destination database’s host and port in the destination as “hostname:port”, select the “Remote” option and click “Add”. Make sure it is added on the list above.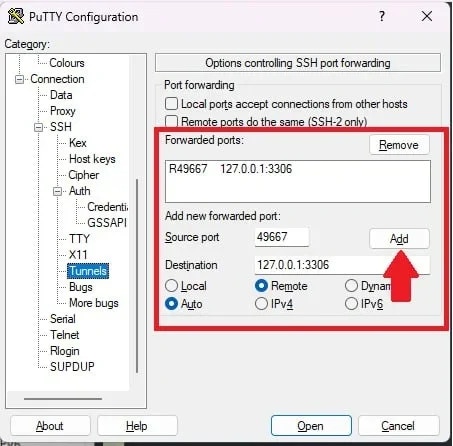
9
Save the connection - Go back to Session section in sidebar, name the connection and click the Save button.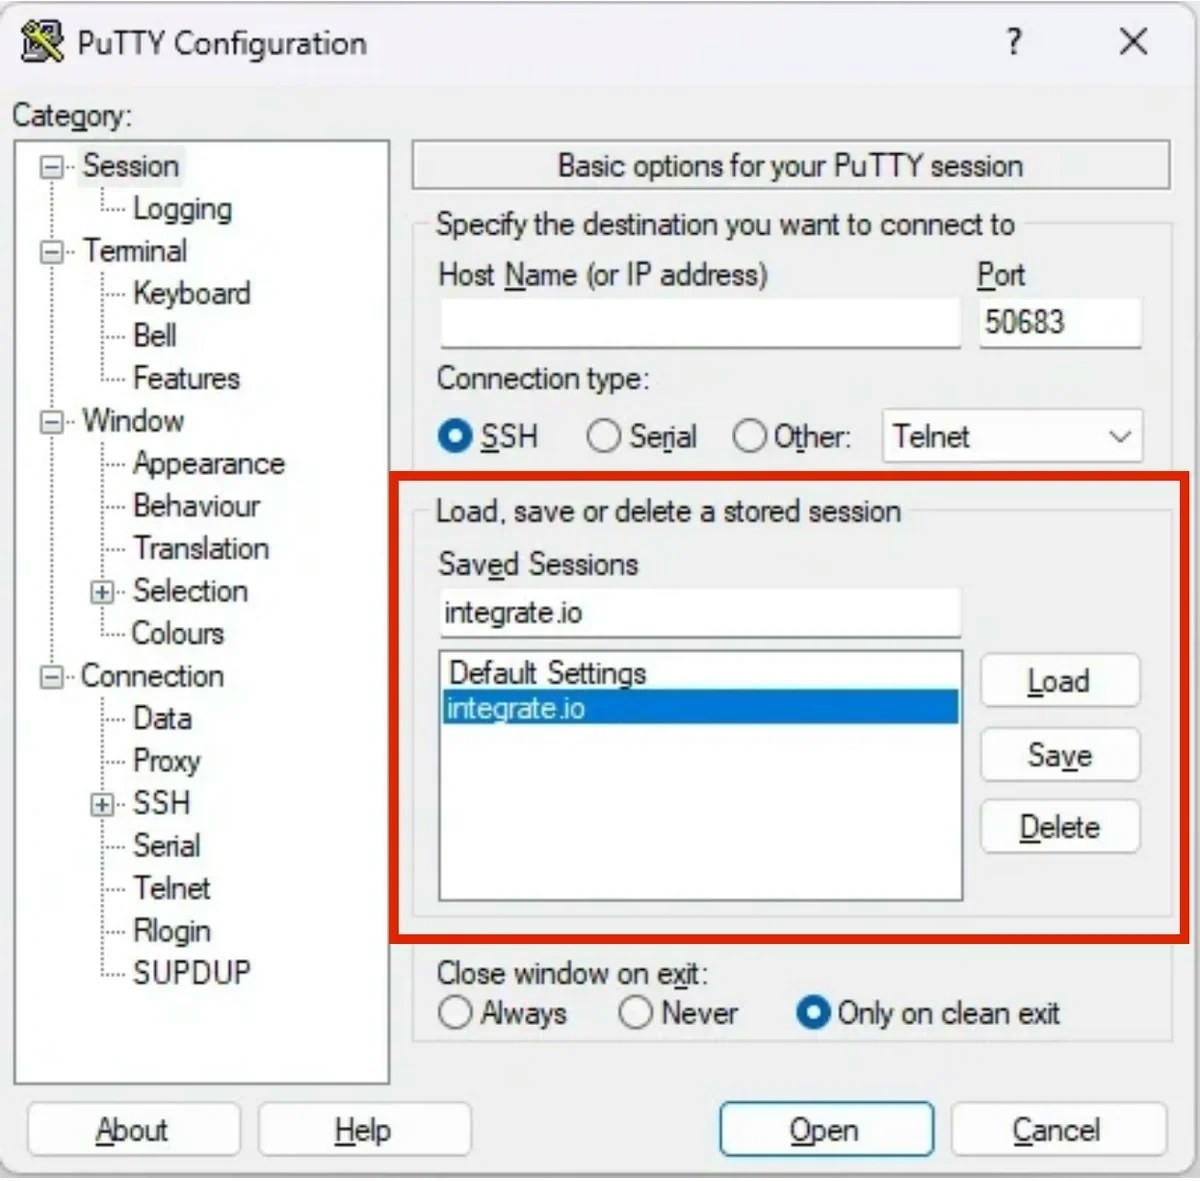
10
Connect - double click the Integrate.io ETL session to initiate the connection.
11
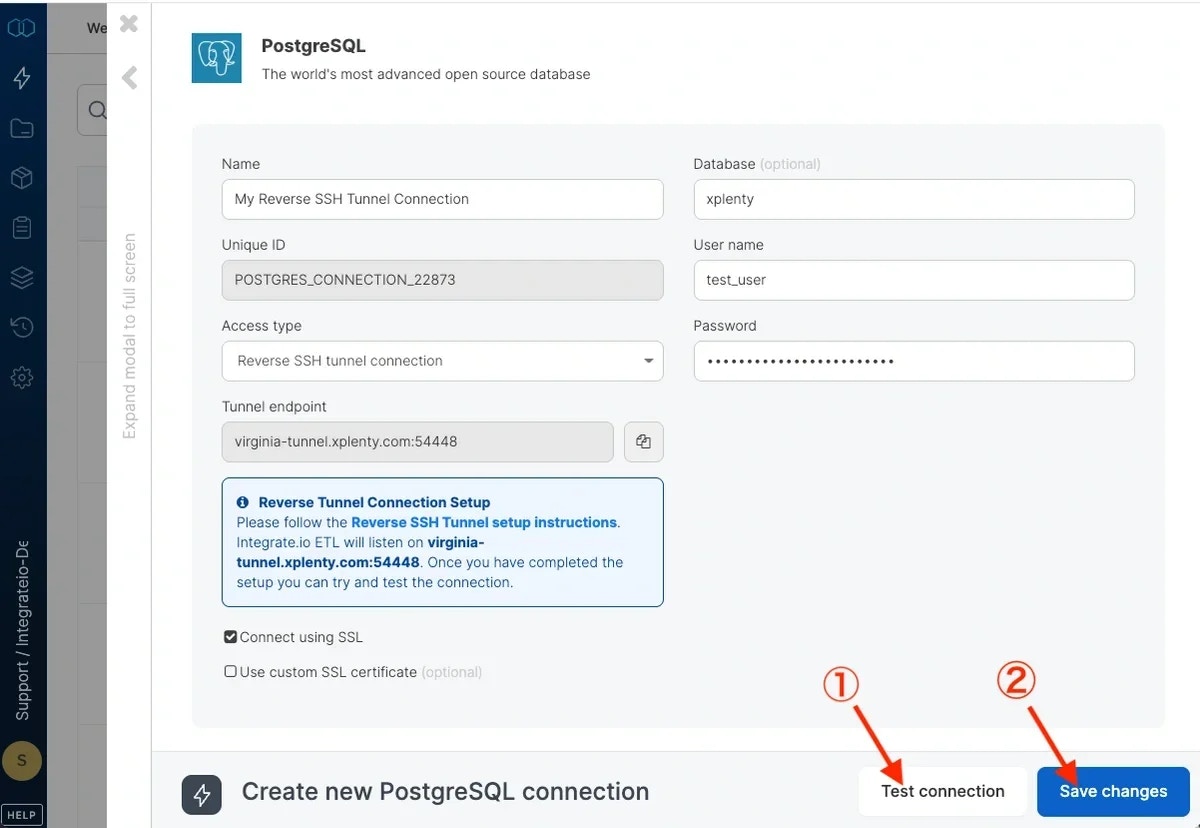
Return to the Integrate.io ETL dashboard. After entering the database name, username, and password, click Test Connection.
12
Once the connection is successful, click Create Connection.