Connection Setup
To allow Integrate.io ETL access to Snowflake
In order to allow Integrate.io ETL access to your Snowflake account, log in to your Snowflake account using your favorite SQL client and execute the following commands to create a user with proper permissions for Integrate.io ETL:Authentication Options
You can authenticate to Snowflake using either password authentication or key-pair authentication. Key-pair authentication is recommended for improved security.Option 1: Key-Pair Authentication (Recommended)
For enhanced security, follow these steps to set up key-pair authentication:-
Generate a Key Pair Use one of the following methods to generate your key pair:
- Method A - Standard Key Pair:
- Method B - Encrypted Key Pair:
This will generate two files:rsa_key.p8: Private key (keep this secure)rsa_key.pub: Public key (to be assigned to your Snowflake user)
-
Open the public key file (
rsa_key.pub) and copy ONLY the content between-----BEGIN PUBLIC KEY-----and-----END PUBLIC KEY-----lines (not including these lines). For example, if your public key file contains:You should only copy: -
Assign the Public Key to the Snowflake User
Run the following command in Snowflake:
Replace
<paste_public_key_here>with the content of your public key file. Ex:MIIBIjANB...AQAB
Option 2: Password Authentication (to be deprecated following snowflake policy)
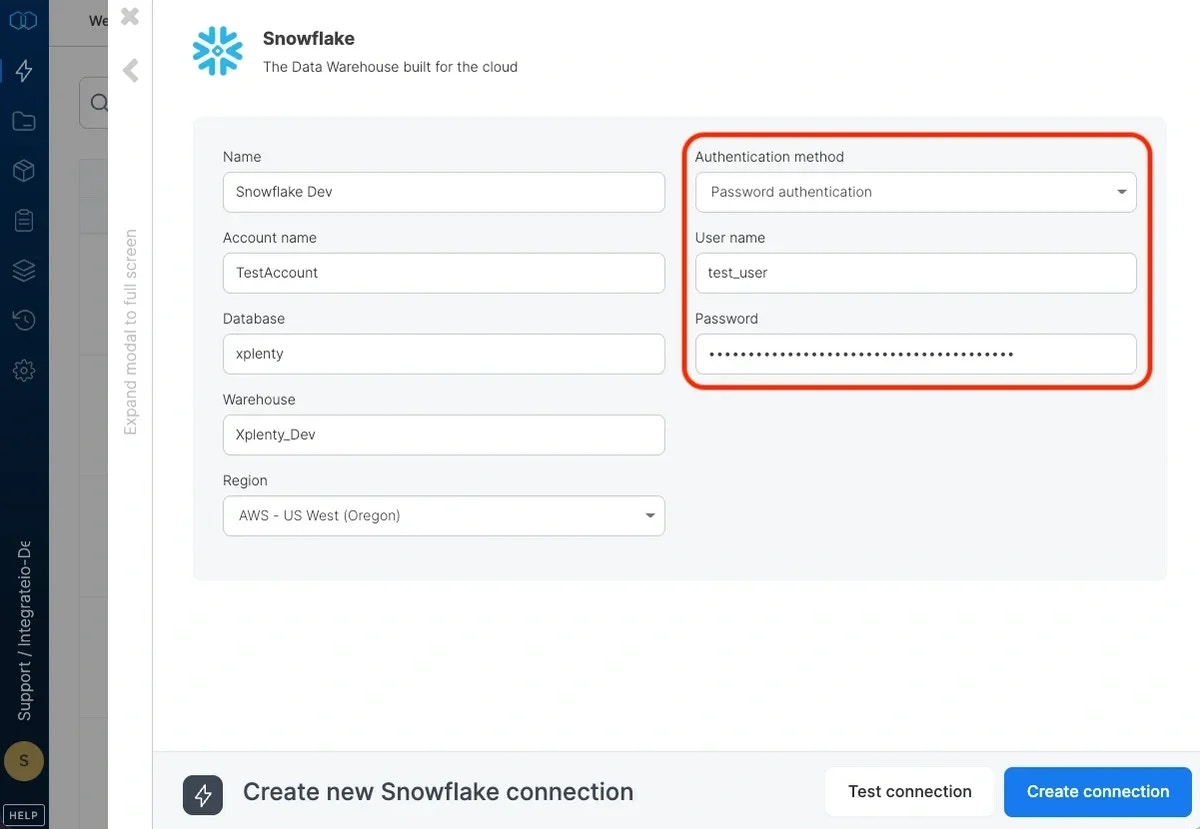
When creating the user, include a password as shown below:To create a Snowflake connection in Integrate.io ETL
1
Click the Connections icon (lightning bolt) on the top left menu.
2
Click New connection.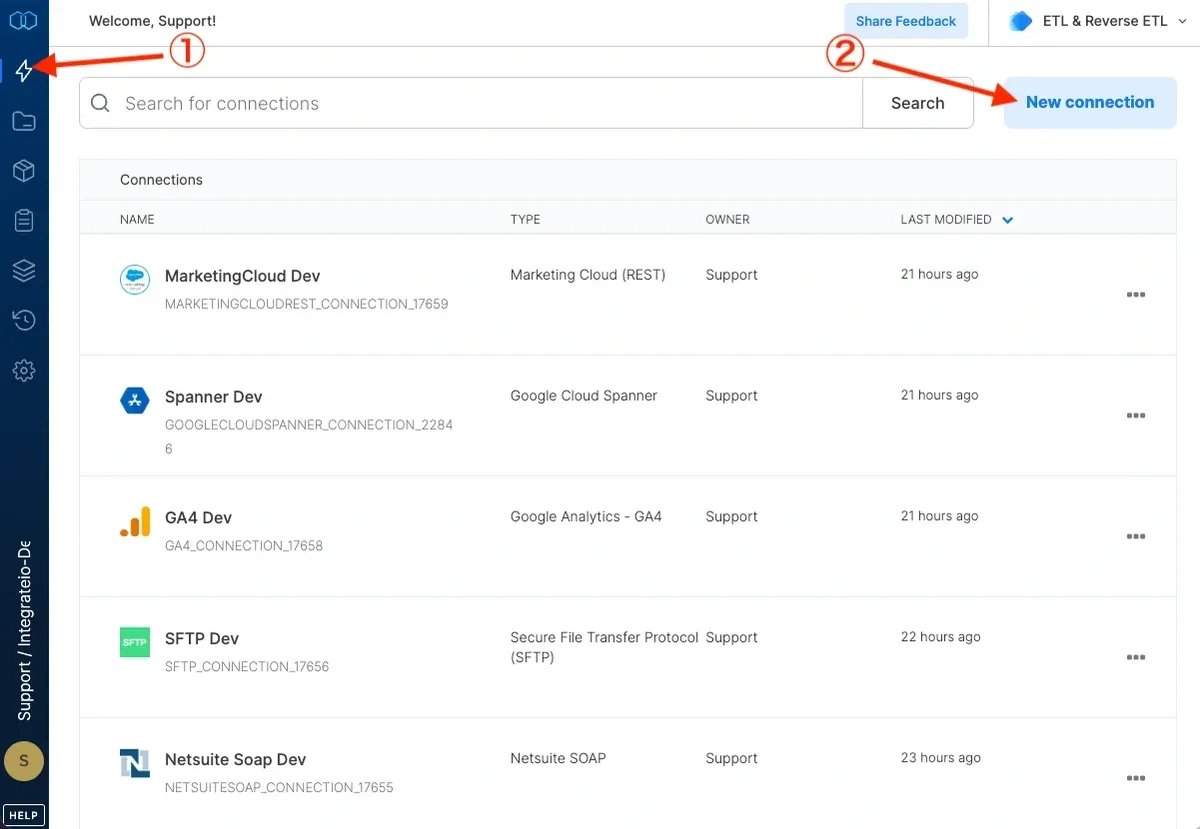
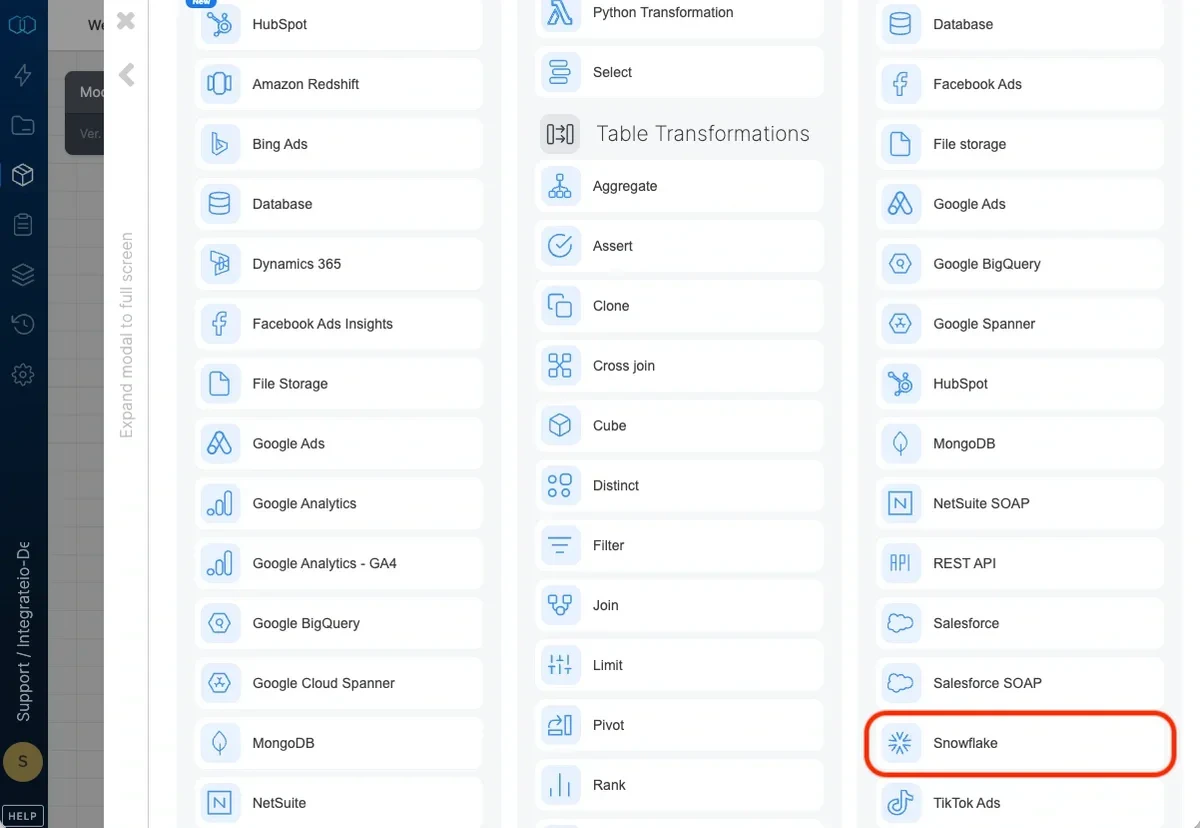
3
Select Snowflake.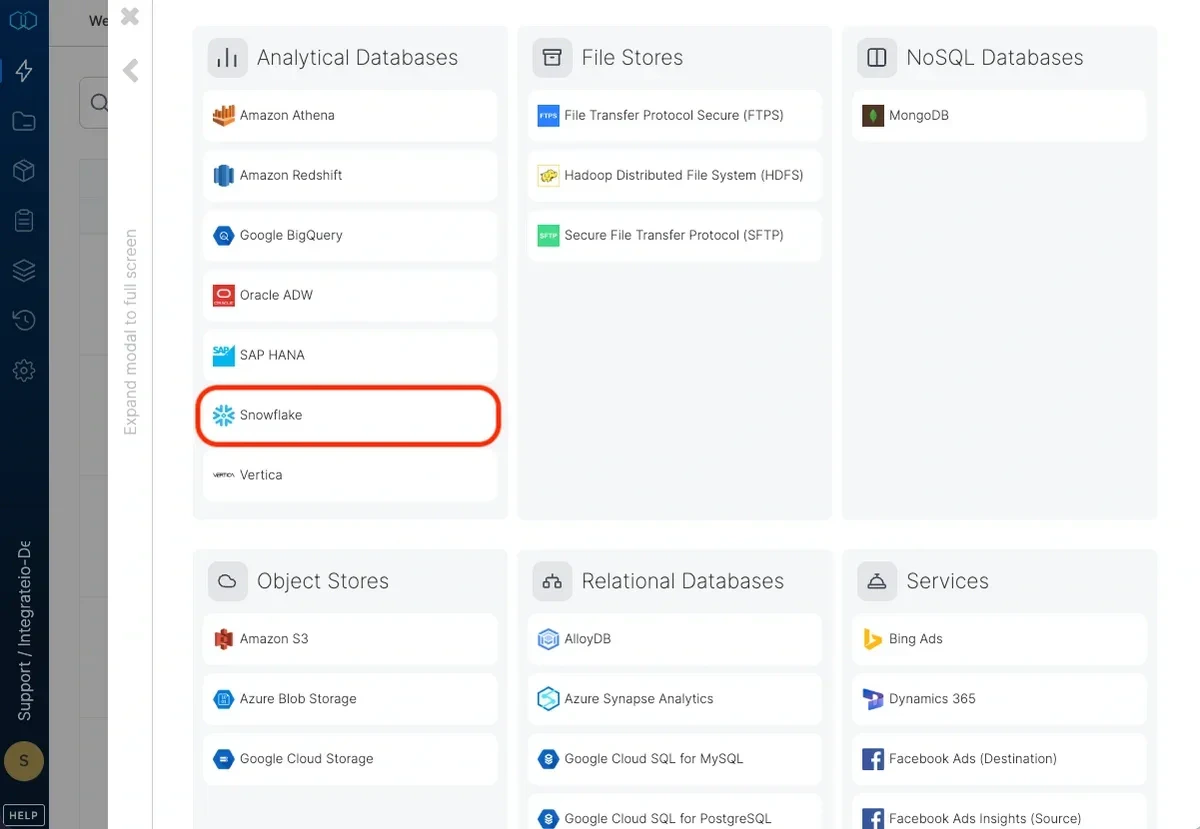
4
Type a name for the connection.
5
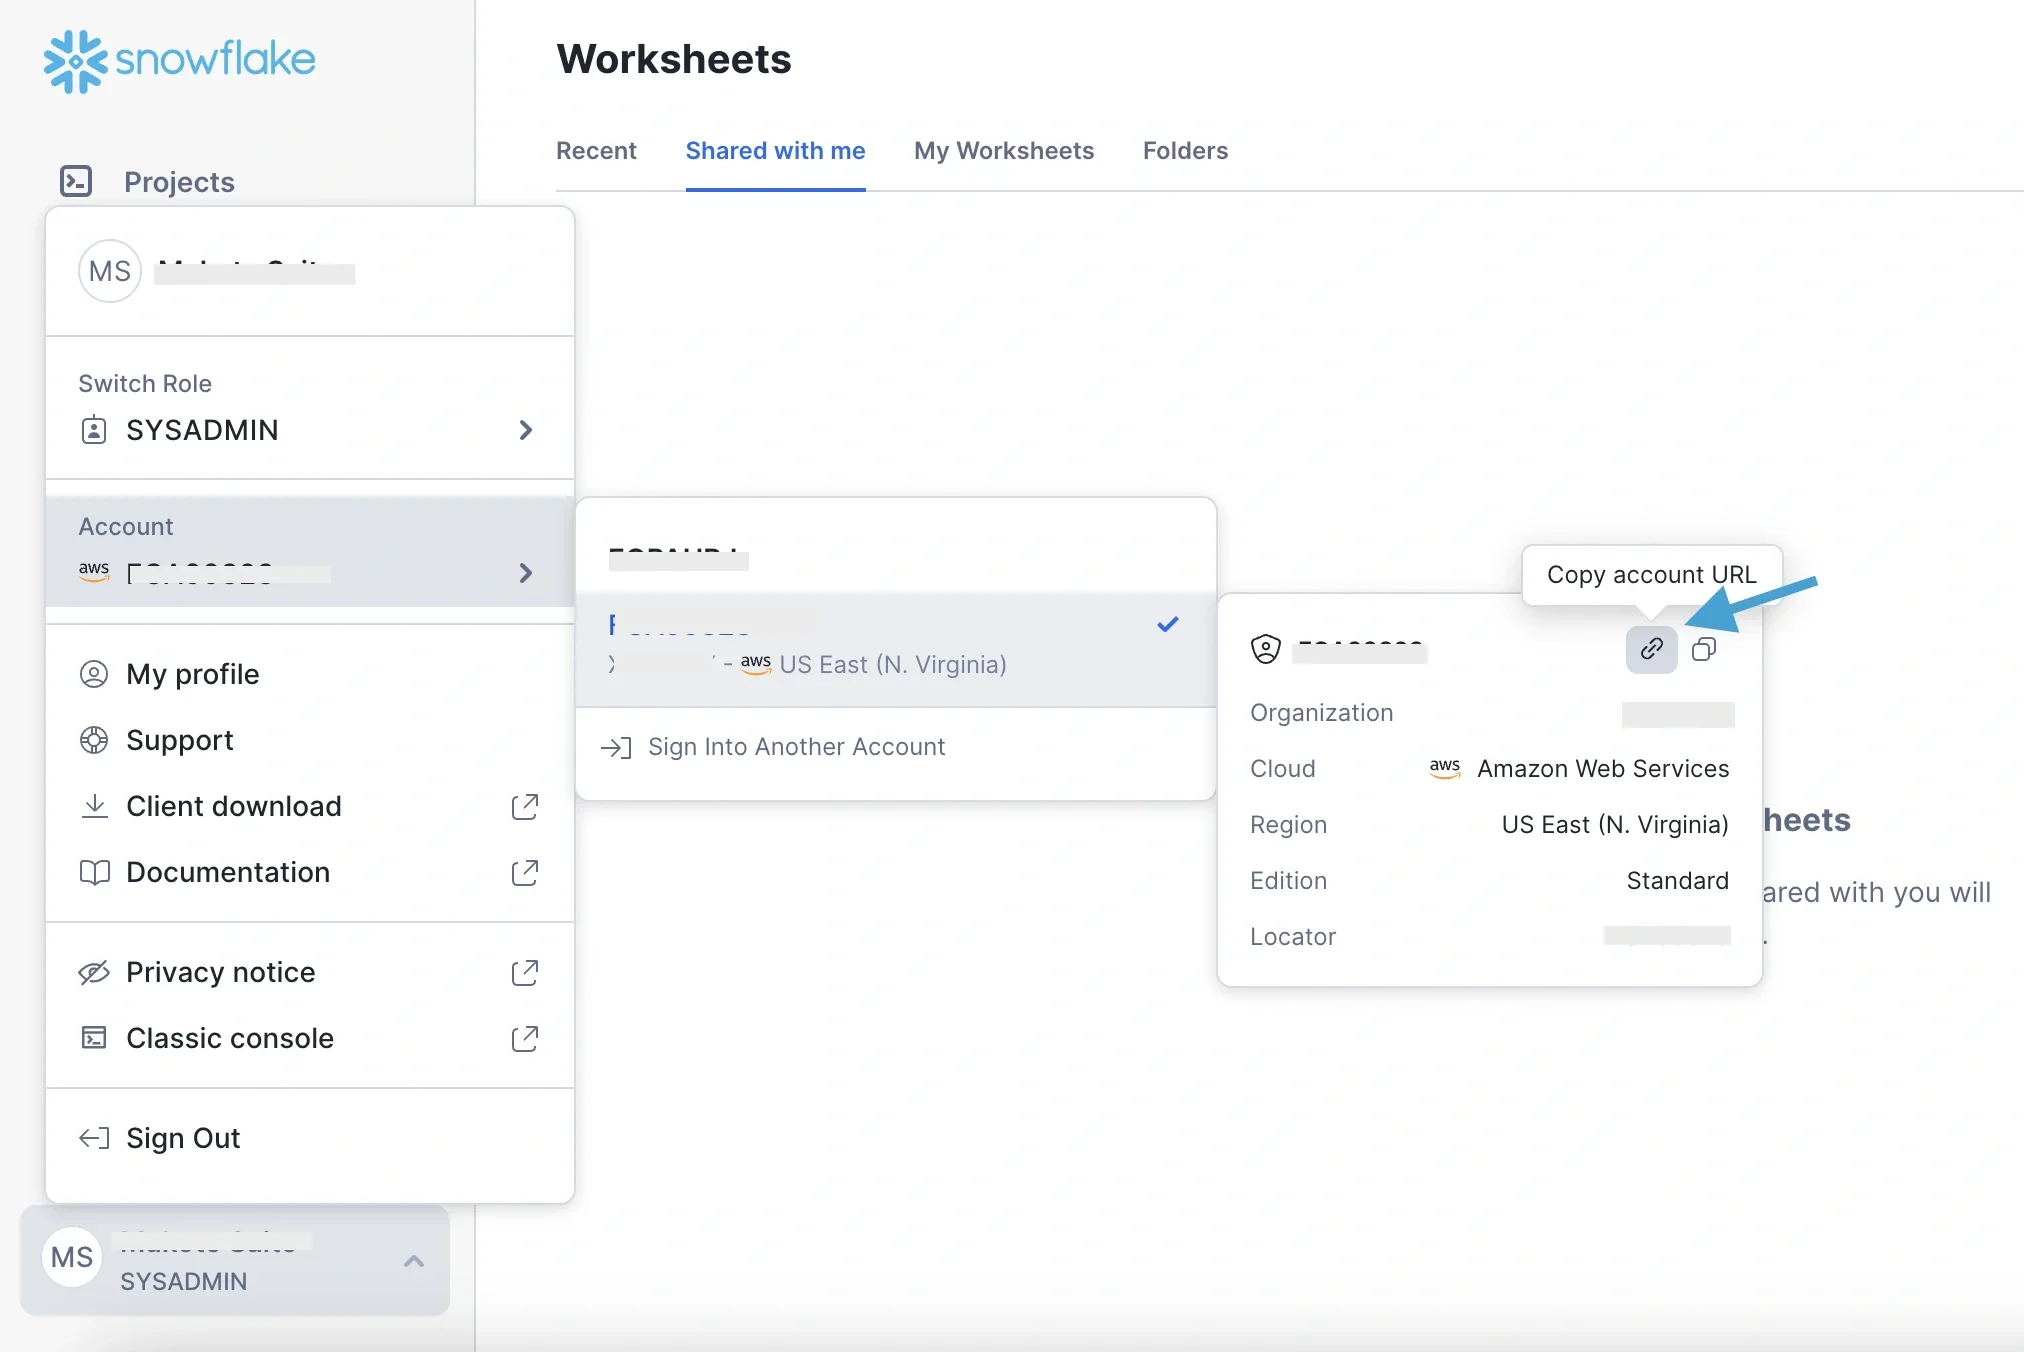
Enter your account locator.How to get your Snowflake account locator:
-
Via classic console: from the url eg: https://xxxxxxx.us-east-1.(snowflakecomputing.com). xxxxxxx is the value you need to input in the Account locator field on the dashboard.
Note:If the account URL shown on the dashboard does not contain the account’s region as above, or the account is using Azure, use the account locator value provided by Snowflake.
-
Via Snowsight web interface: go to your Account > Copy account URL
6
Enter the user name and password you created for Integrate.io ETL to use.
7
For Authentication Method, choose one of the following options:
- Option A - Password Authentication: Select “Password” and enter the password you created for the user (Note: To be deprecated following snowflake policy)
- Option B - Key-Pair Authentication (Recommended): Select “Key-Pair Authentication”, then upload your private key file (
rsa_key.p8). If you created an encrypted key, enter the passphrase in the Private key passphrase field. If your key is not encrypted, leave the passphrase field empty.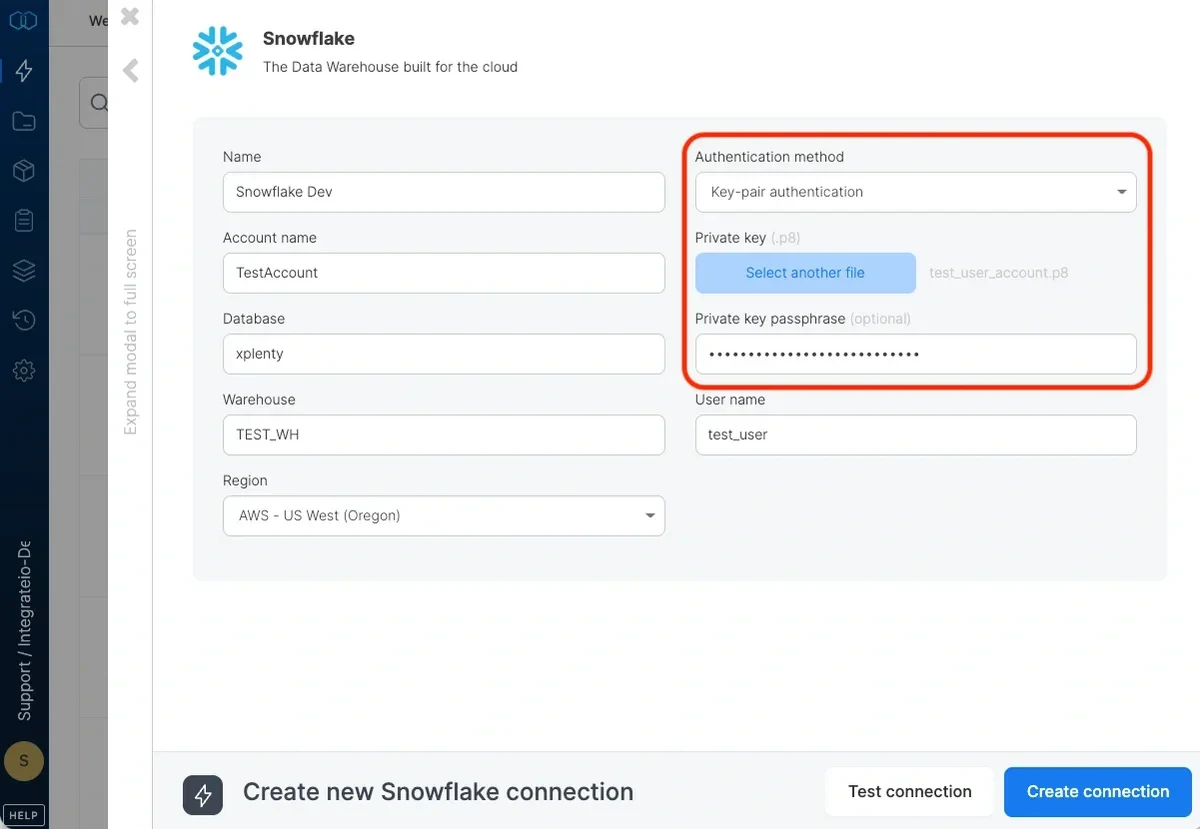
8
Enter the default database to use.
9
Enter the default warehouse to use.
10
Set the region to your Snowflake’s account’s region.
11
(Optional) Enter a Custom host if you need to route Snowflake traffic through a proxy such as Yuki Data. When set, Integrate.io ETL connects to this host instead of the default
<account>.snowflakecomputing.com host derived from your account locator and region. Account locator and region are still required: the account locator is sent for authentication, and the region is used to select the S3 staging bucket for COPY. Leave blank to use the default host.12
Click Test Connection. If the credentials are correct, a message that the connection test was successful appears.
13
Create Connection.
Identifier names
Integrate.io ETL uses quoted identifiers which means that by default, all identifiers (table and column names for instance) are case sensitive - as opposed to non-quoted identifiers which are case insensitive (and are stored in upper case). You may want to change the behavior by changing theQUOTED_IDENTIFIERS_IGNORE_CASE setting for Integrate.io ETL’s user or for your entire account. Note that tables and columns that were created with case sensitive names remain case sensitive, so it’s important to make this change before you create any tables. If you want to switch a case sensitive identifier name to a case insensitive identifier name after it’s been created use the ALTER ... RENAME clauses in Snowflake. Read more on Snowflake identifiers for more information.
Connection
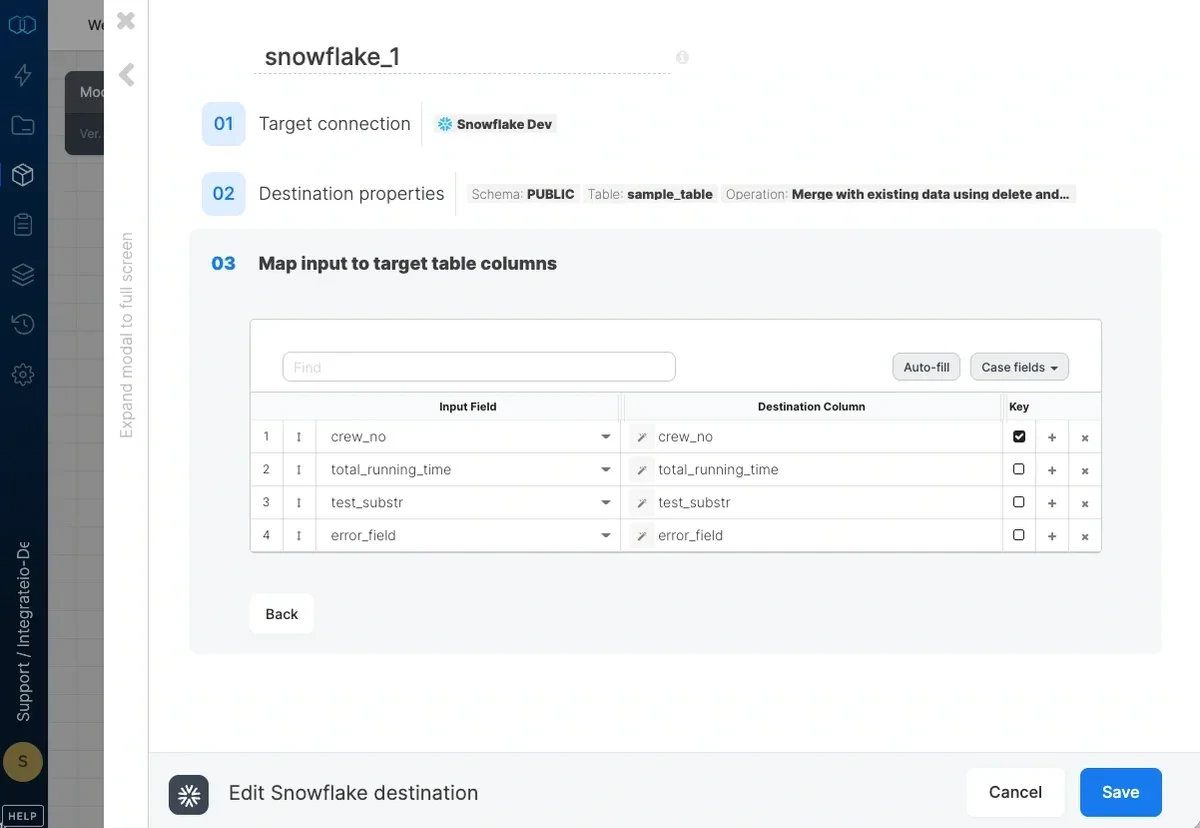
Select an existing Snowflake connection or create a new one (for more information, see Allowing Integrate.io ETL access to my Snowflake account.)Destination Properties
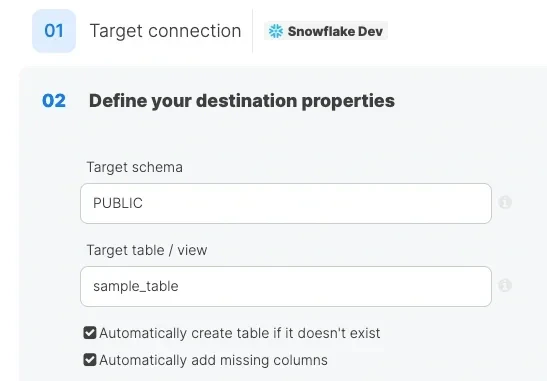
- Target schema - the target table’s schema. If empty, the default schema is used.
- Target table - the name of the target table in your Snowflake database. By default, if the table doesn’t exist, it will be created automatically.
- Automatically create table if it doesn’t exist - if unchecked and the table doesn’t exist, the job fails.
- Automatically add missing columns - when checked, the job will check if each of the specified columns exist in the table and if one does not exist, it will add it. Keep in mind that if there are a very large number of fields, this could impact job run time. Key columns can’t be automatically added to a table.
Operation type
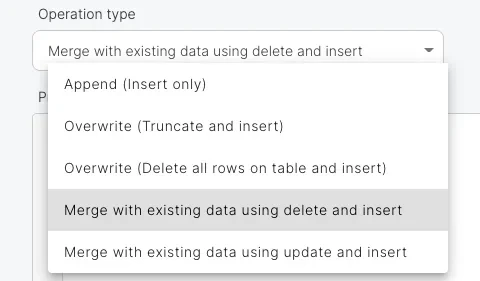
- Append (Insert only) - default behavior. Data will only be appended to the target table
- Overwrite (Truncate and insert) - truncate the target table before data is inserted into the target table.
- Overwrite (Delete all rows on table and insert) - deletes all of the target table before the data flow executes. If a truncate statement can’t be executed on the target table due to permissions or other constraints, you can use this instead. This operation does not clear the schema.
- Merge with existing data using delete and insert - incoming data is merged with existing data in the table by deleting target table data that exists in both the data sets and then inserting all the incoming data into the target table. Requires setting the merge keys correctly in field mapping. Merge is done in a single transaction:
- The dataflow’s output is copied into a temporary table with the same schema as the target table.
- Rows with keys that exist in the temporary table are deleted from the target table.
- All rows in the temporary table are inserted into the target table.
- Temporary table is dropped.
- Merge with existing data using update and insert - incoming data is merged with existing data in the table by updating existing data and inserting new data. Requires setting the merge keys correctly in field mapping. Merge is done in the following manner:
- The dataflow’s output is copied into a temporary table with the same schema as the target table.
- Existing records (by key) in the target table are updated and new records are inserted using the MERGE statement.
- Temporary table is dropped.
Pre and post action SQL
- Pre-action SQL - SQL code to execute before inserting the data into the target table. If a merge operation is selected, the sql code is executed before the staging table is created.
- Post-action SQL - SQL code to execute after inserting the data into the target table. If a merge operation is selected, the sql code is executed after the staging table is merged into the target table.
Advanced options
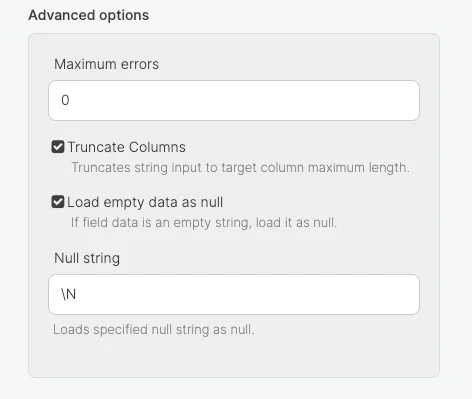
- Maximum errors - If this number of errors occurs in Snowflake while loading data into the table, the job fails.
- Truncate columns - Truncates string values in order for them to fit in the target column specification.
- Load empty as null - insert empty string as null values
- Null string - String fields that match this value will be replaced with NULL.
Schema Mapping