Connection Setup
In Redshift console
1
Start by navigating to the Redshift console —> Clusters screen and clicking on the Properties tab.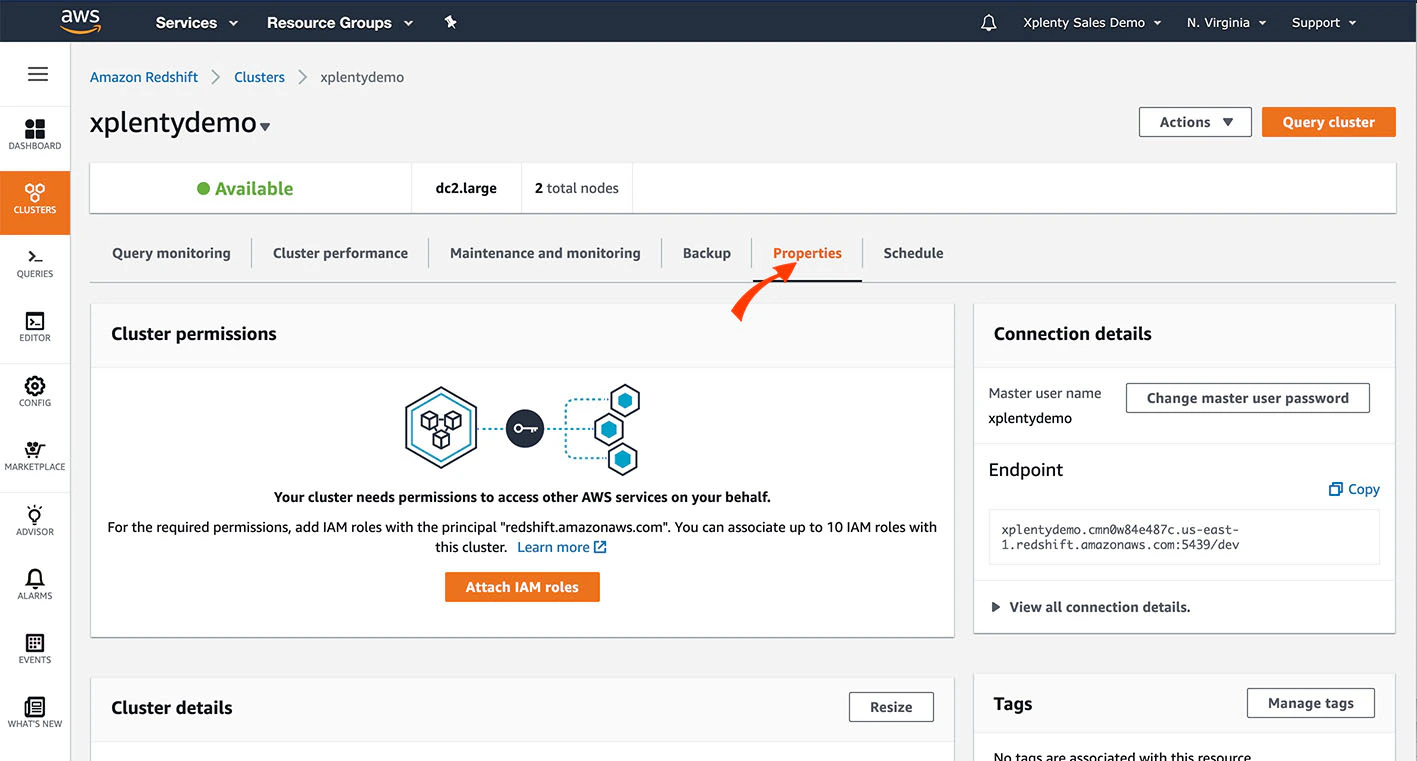
2
Scroll down to the Network and Security section. Make sure that the cluster is set with the value for Publicly Accessible to Yes. Then, click the VPC Security Group to verify and/or modify the security rules.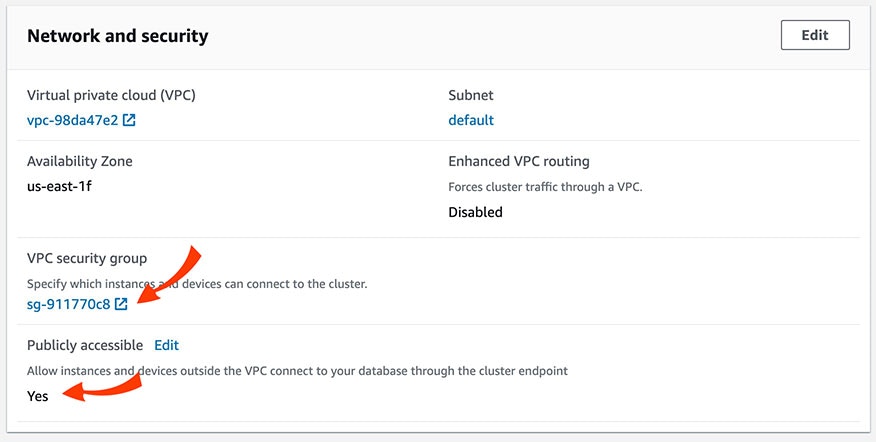
3
In the Security Group screen, select the Inbound tab.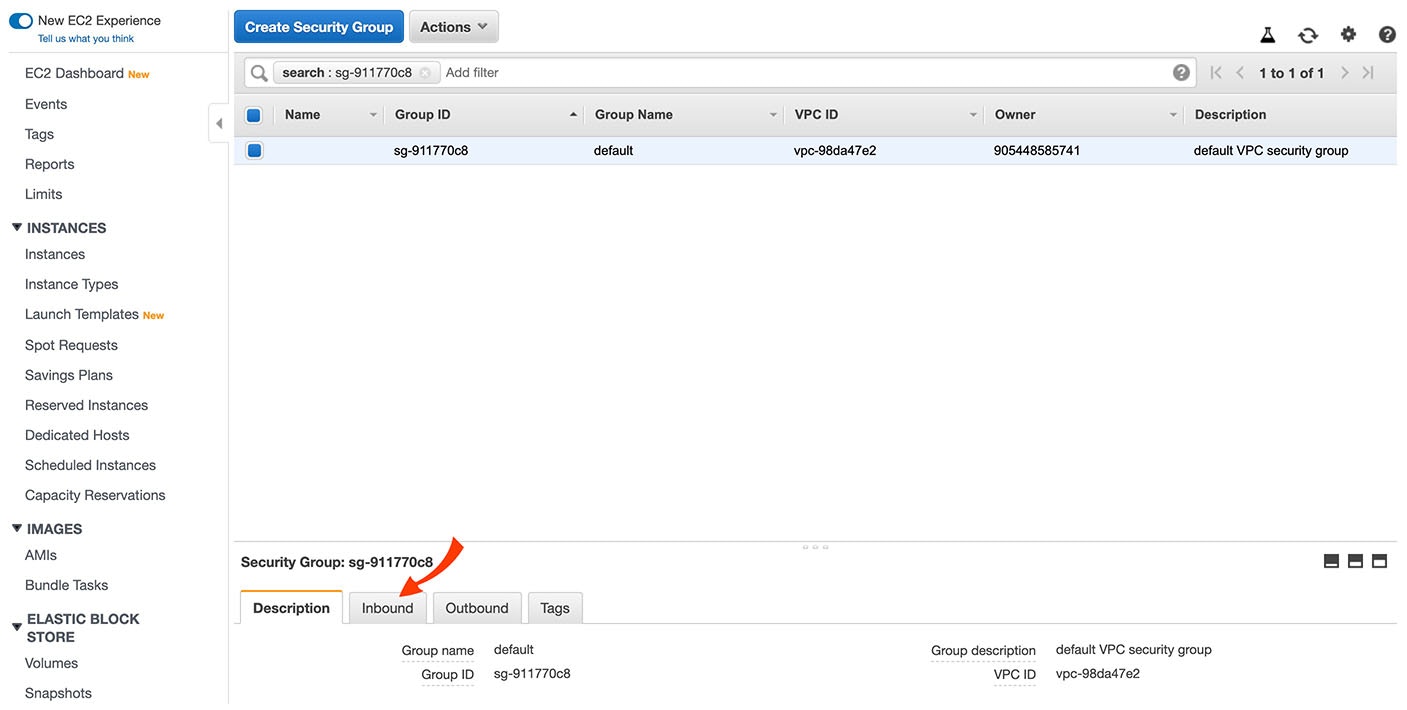
4
There should be rules for the IP addresses listed here. If those rules need to be altered or don’t exist, click Edit.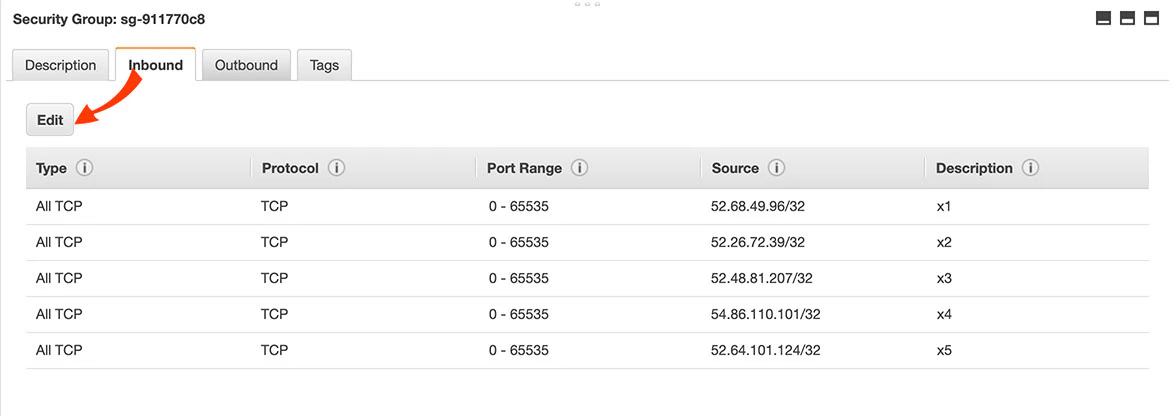
5
Edit any existing rules or click Add Rule to add a new rule. For each rule, select the type of database and enter the Redshift port. Then click Save.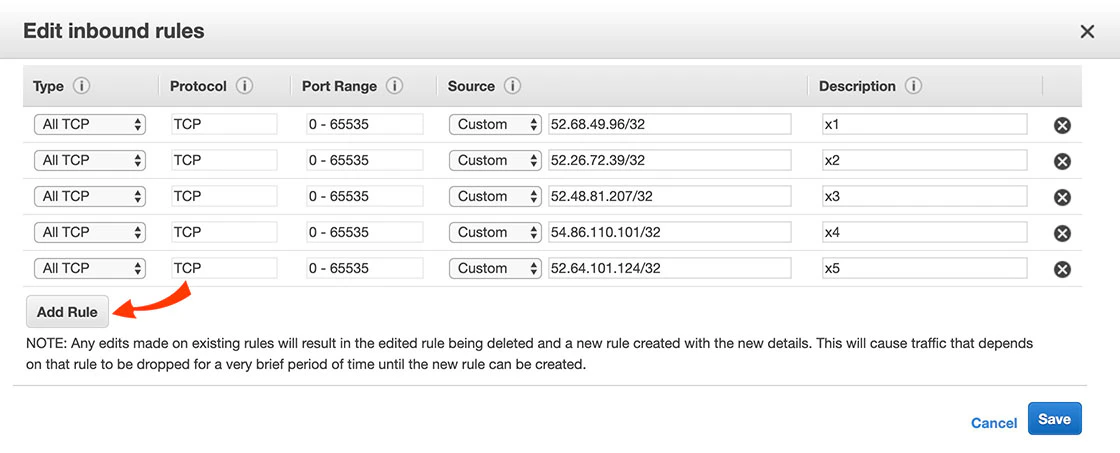
To verify or modify the security rules of an instance on EC2-Classic (without VPC)
In your Redshift Cluster Security Group, modify a rule or add a new rule for each IP address listed here:
- In the Connection Type dropbox, choose CIDR/IP.
- In the CIDR/IP to Authorize field, enter the IP addresses from this list.
Create a Redshift user
- Create a Redshift user.
- Grant it the following permissions:
- If you intend to only append data into a table, give the user minimal permissions required to execute the COPY command.
- If you intend to merge data into a table, give the user minimal permissions required to execute the COPY command, create a table, and insert and update to your target tables.
- Note that truncate requires Integrate.io ETL to either be the owner of the target table or have superuser access.
To define a connection in Integrate.io ETL to Amazon Redshift
1
Click Connections (the lightning bolt) on the left side of the dashboard.
2
Click New connection.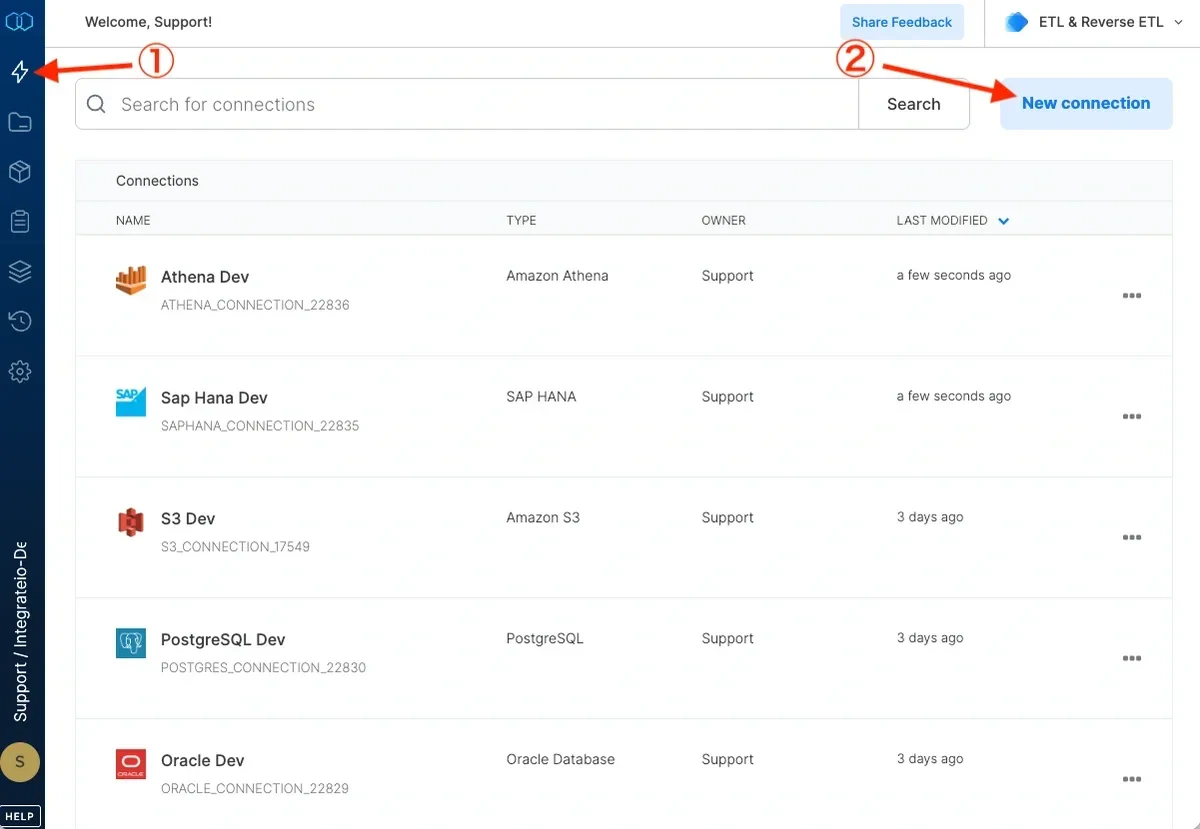
3
Select Amazon Redshift from the Analytical Database category.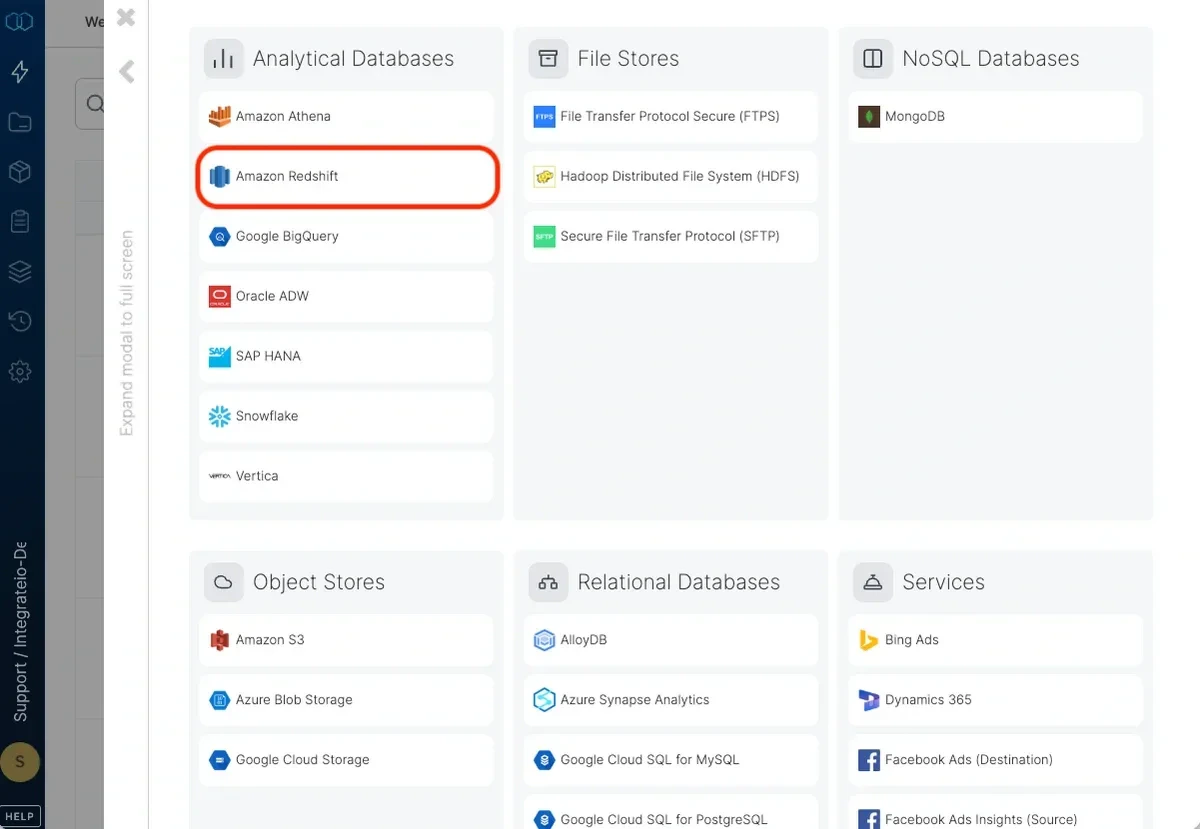
4
Type a name for the connection.
5
If you allow direct access from Integrate.io ETL’s IP addresses, enter the hostname and port. If direct access is not allowed, read more about setting a tunnel connection here.
6
Enter the user name and password you created for Integrate.io ETL to use.
7
Enter the default database to use. If you leave it empty, the user’s default database will be used.
8
Set the region to the AWS region in which the Redshift cluster was created. If the region requires AWS Signature v4 (see list here) you may need our support team’s help with allowing Integrate.io ETL access to read from this Amazon Redshift connection.
9
Click Test connection. If the credentials are correct, a message that the cloud storage connection test was successful appears.
10
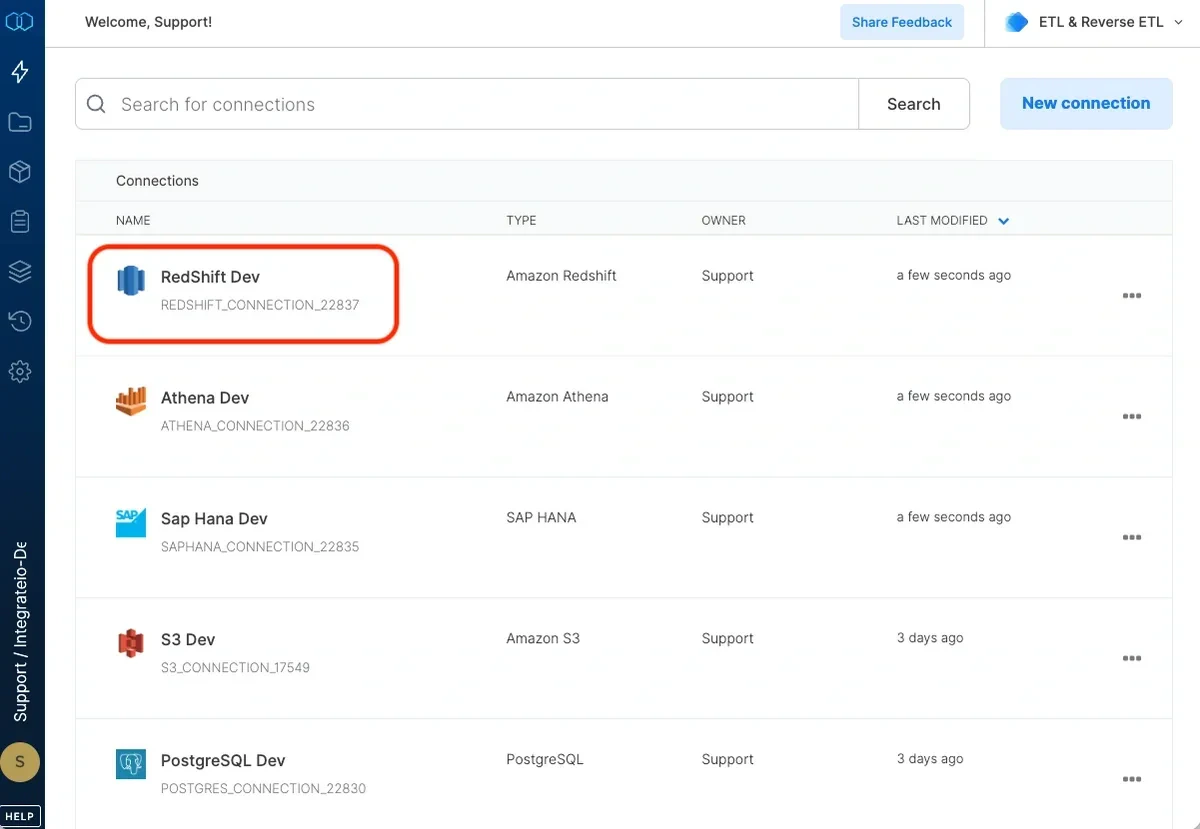
Click Create connection and the connection is created and appears in the list of connections.
 ]
]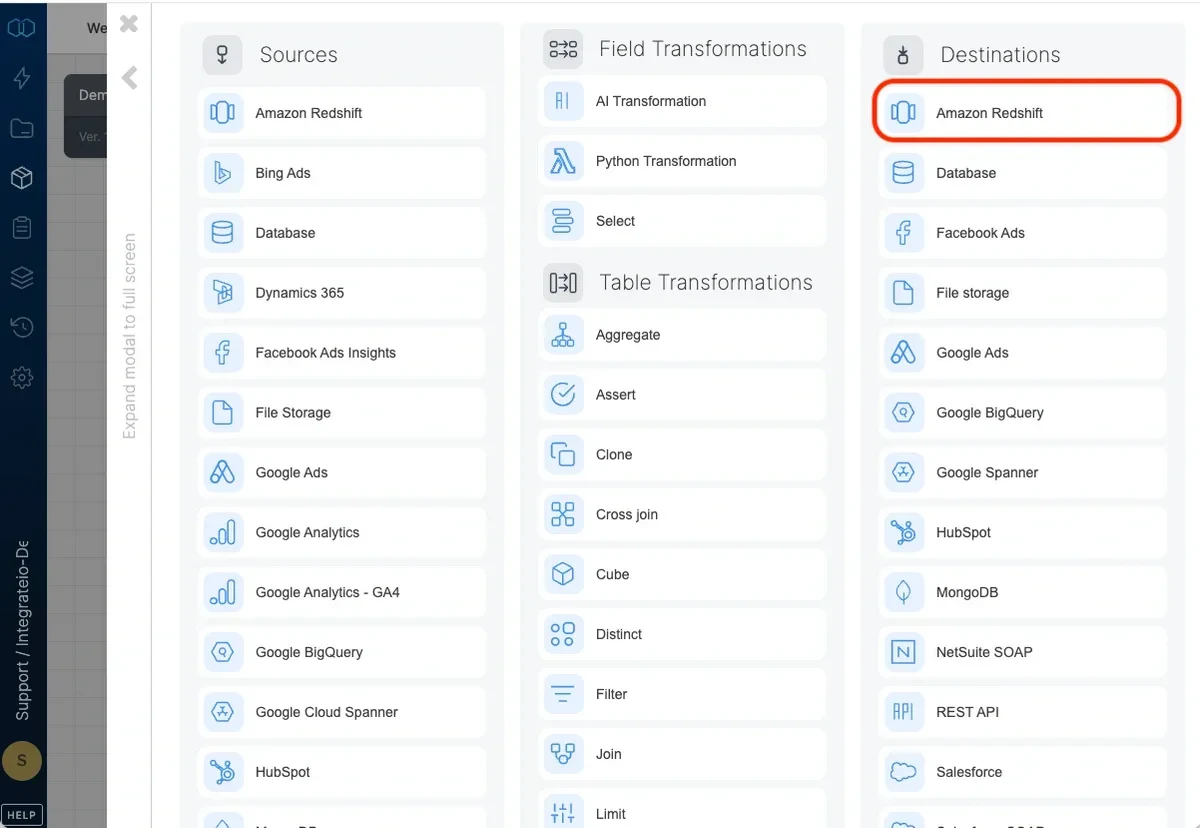
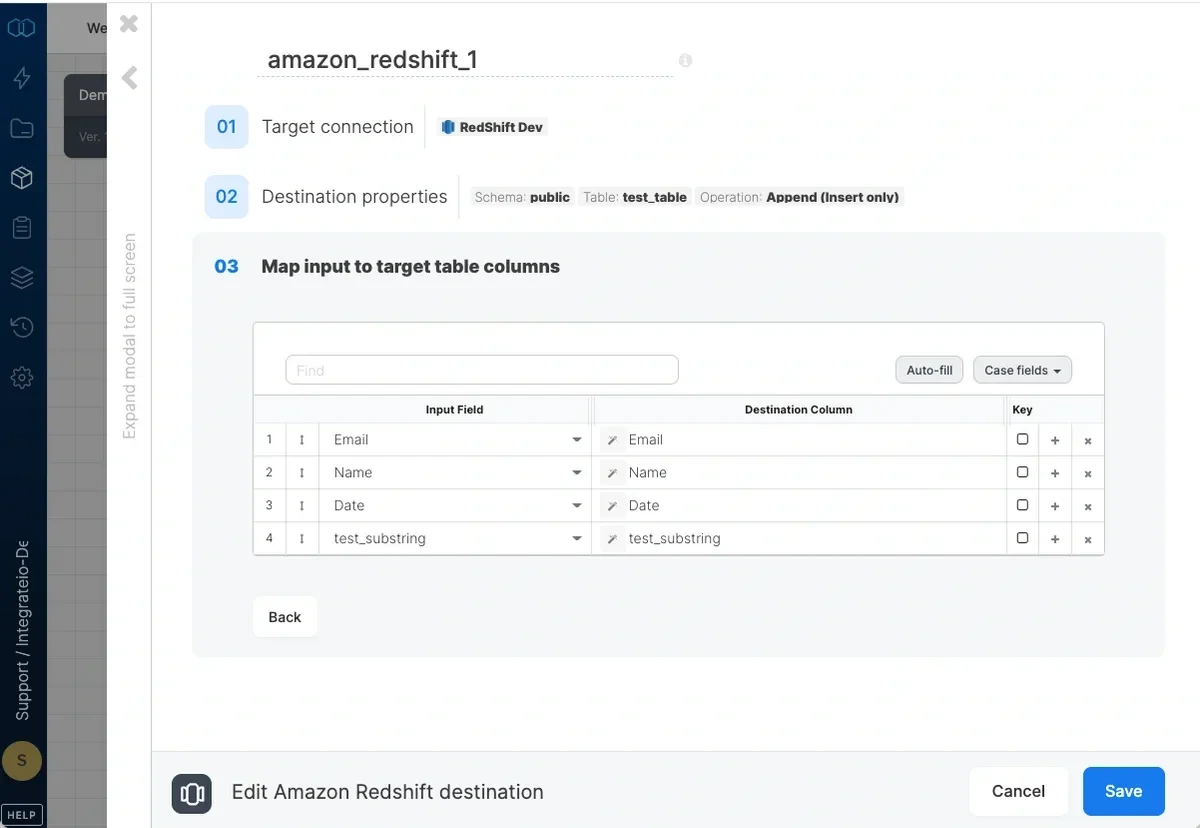
Connection
Select an existing Amazon Redshift connection or create a new one (for more information, see Allowing Integrate.io ETL access to my Redshift cluster.)Destination Properties
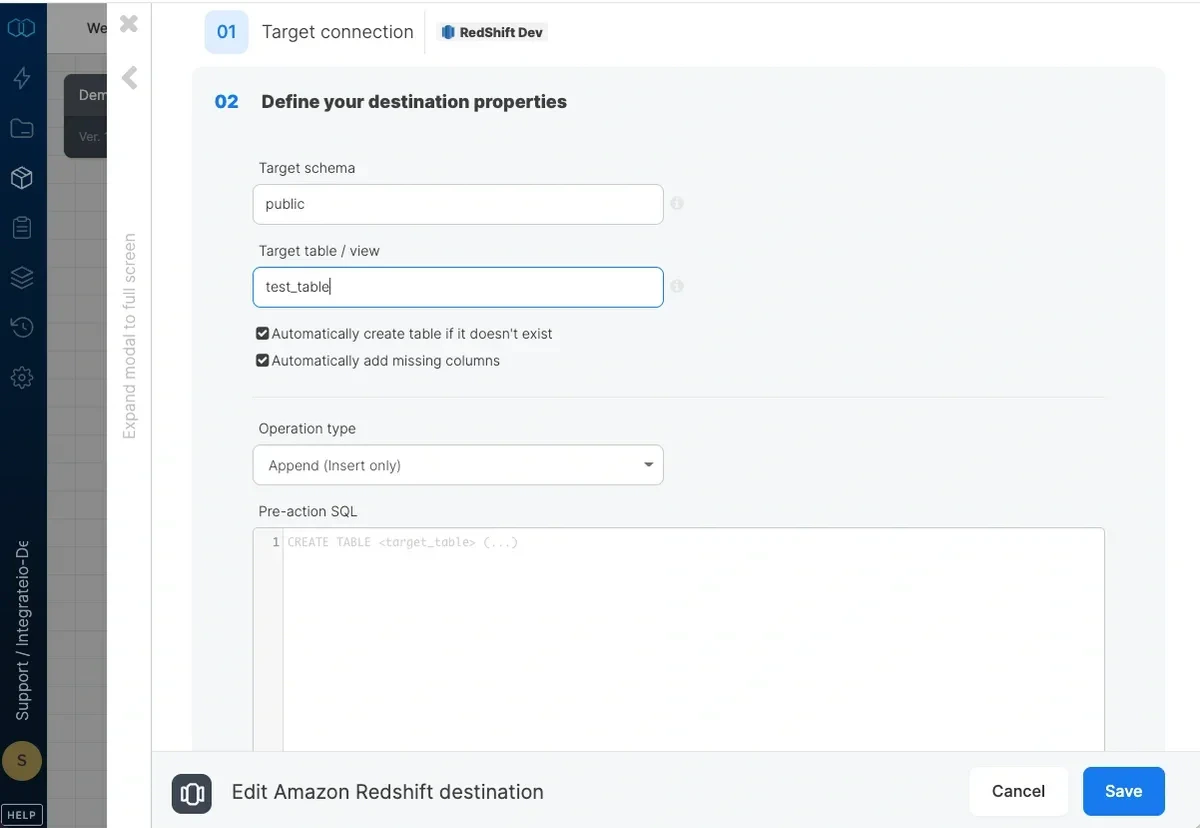
- Target schema - the target table’s schema. If empty, the default schema is used.
- Target table - the name of the target table in your Redshift cluster. By default, if the table doesn’t exist, it will be created automatically.
- Automatically create table if it doesn’t exist - if unchecked and the table doesn’t exist, the job fails.
- Automatically add missing columns - when checked, the job will check if each of the specified columns exist in the table and if one does not exist, it will add it. Key columns can’t be automatically added to a table.
Operation type
Append (Insert only) - default behaviour. Data will only be appended to the target table Overwrite (Truncate and insert) - truncate the target table before data is inserted into the target table. The connection’s user must be the owner of the table or a superuser. Overwrite (Delete all rows on table and insert) - deletes all of the target table before the data flow executes. If a truncate statement can’t be executed on the target table due to permissions or other constraints, you can use this instead. This operation does not clear the schema. Merge with existing data using delete and insert - incoming data is merged with existing data in the table by deleting target table data that exists in both the data sets and then inserting all the incoming data into the target table. Requires setting the merge keys correctly in field mapping. Merge is done in a single transaction:- The dataflow’s output is copied into a temporary table with the same schema as the target table.
- Rows with keys that exist in the temporary table are deleted from the target table.
- All rows in the temporary table are inserted into the target table.
- temporary table is dropped.
- The dataflow’s output is copied into a temporary table with the same schema as the target table.
- Target table rows that exist in temporary table are updated (according to the keys defined in the destination component).
- Rows with keys that exist in the target table are deleted from the temporary table.
- All rows in the temporary table are inserted into the target table.
- temporary table is dropped.
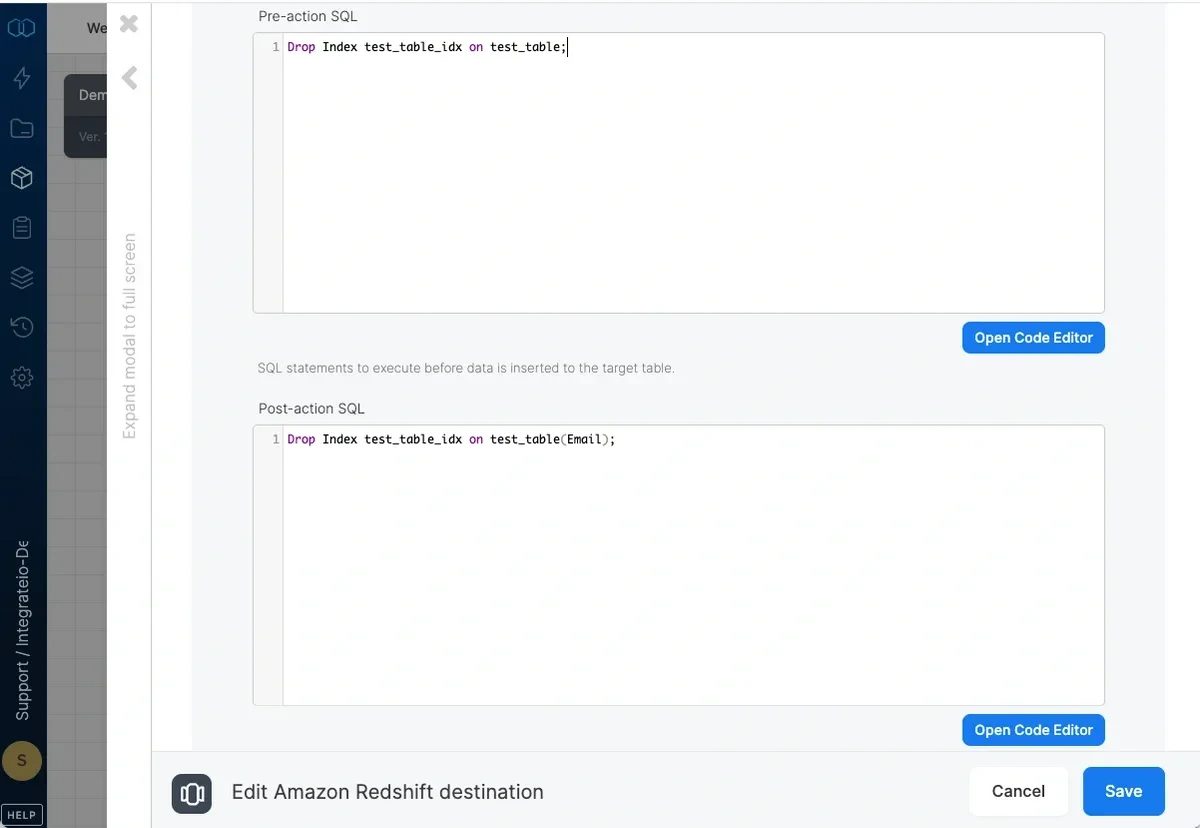
Pre and post action SQL
Advanced options
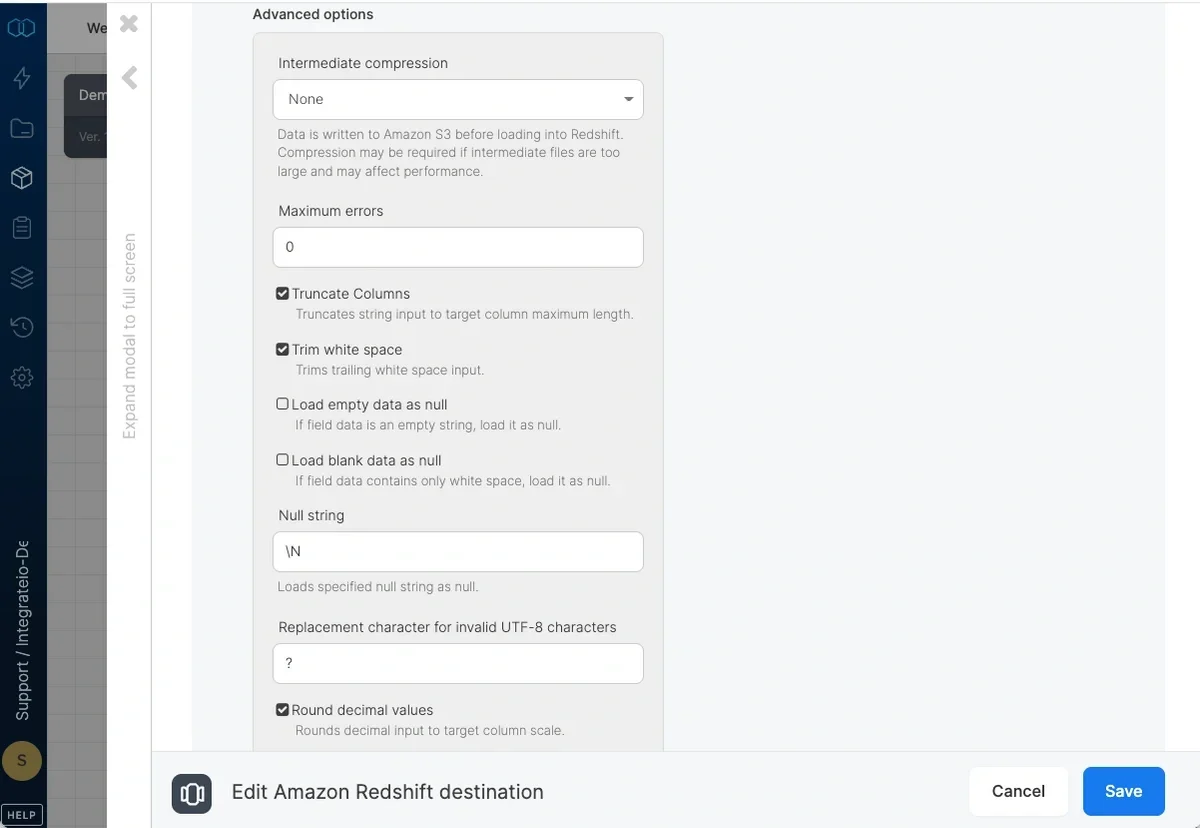
- Intermediate compression - Data is stored in Amazon S3 prior to loading it into Redshift. Select whether to compress the data before storing it to Amazon S3 or not. You may gain performance by compressing the data if it’s relatively large and your process is not CPU intensive, or otherwise.
- Maximum errors - If this number of errors occurs in Redshift while loading data into the table, the job fails.
- Truncate columns - Truncates string values in order for them to fit in the target column specification.
- Trim white space - Trims trailing white space inserted into *CHAR columns.
- Load empty data as null - Loads empty string values as null into *CHAR columns.
- Load blank data as null - Loads fields consisting only of white space as null into *CHAR columns.
- Null string - String fields that match this value will be replaced with NULL.
- Replacement character for invalid UTF-8 characters - By default, invalid UTF-8 characters in input will be replaced by
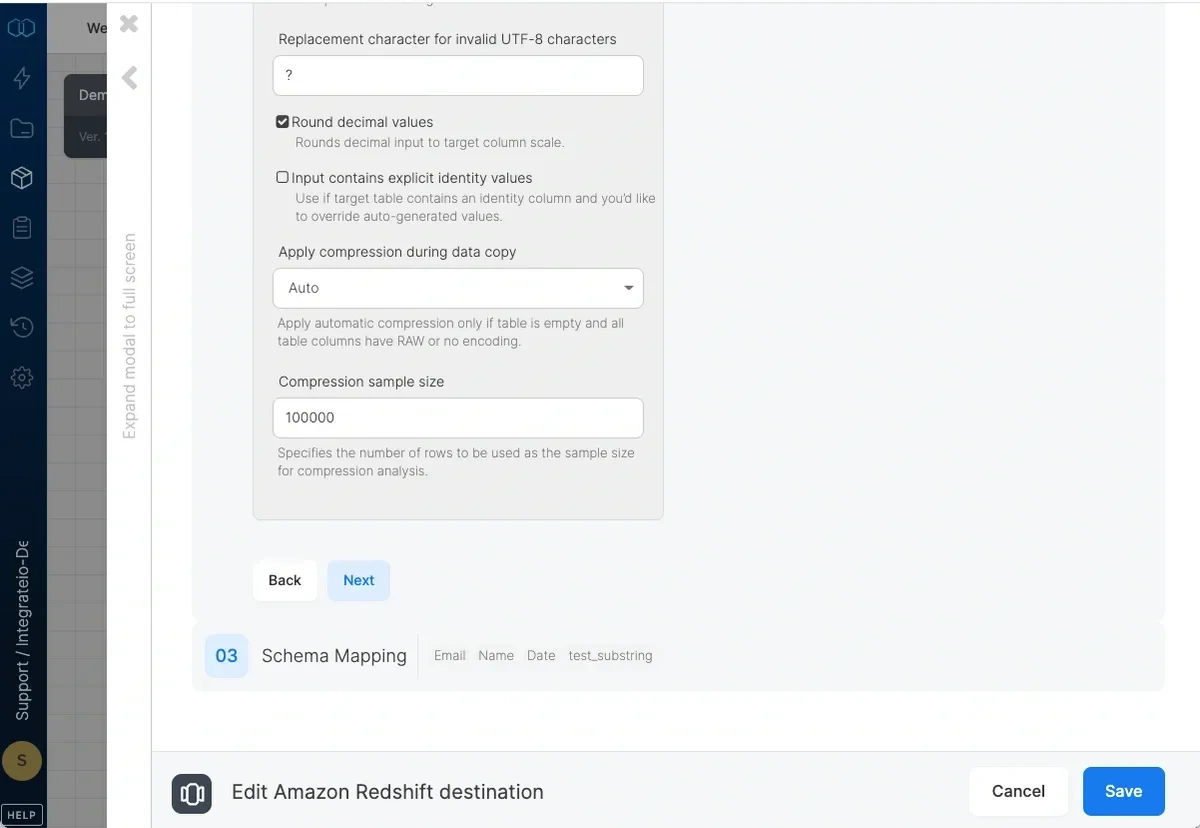
?. You can select any other single ASCII character. Note that 0x00(NUL) characters are automatically removed by Integrate.io ETL. - Round decimal values - Rounds up numeric values whose scale exceeds the scale of the target column.
- Input contains explicit identity values - Check if target table contains an identity column and you’d like to override auto-generated values. Only works with append or overwrite operations.
- Apply compression during data copy - By default (automatic), data inserted into an empty target table will be compressed only if the table columns have RAW encoding or not encoding. If you select On, data inserted into an empty target table will be compressed regardless of existing column encoding. If you select Off, automatic compression is disabled. Refer here for more information.
- Compression sample size - Specifies the number of rows to be used as the sample size for compression analysis.
Schema Mapping