

Connection Setup
Integrate.io ETL can access your Google Analytics data in both free and premium accounts. This article details creating the Google Analytics connection in Integrate.io ETL.To create a Google Analytics connection in Integrate.io ETL
1
Click the Connections icon (lightning bolt) on the top left menu.
2
To create a connection, click New connection.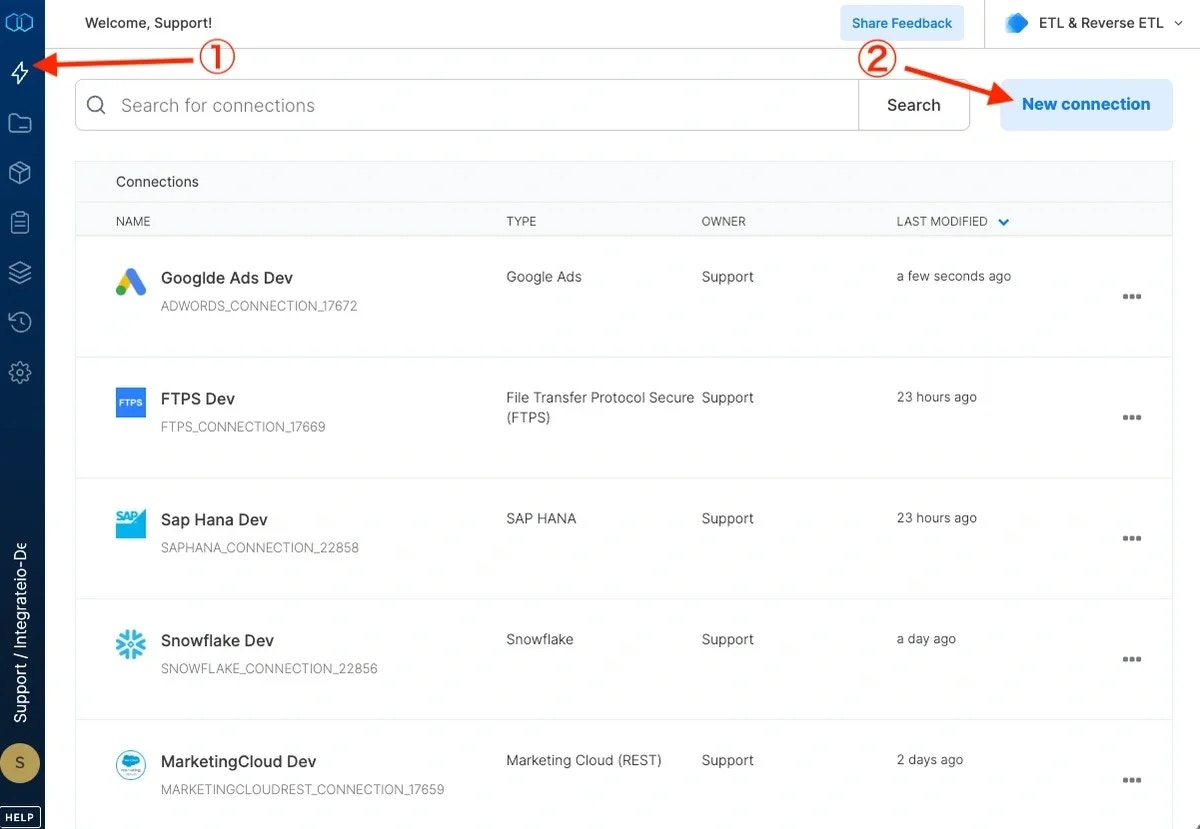
3
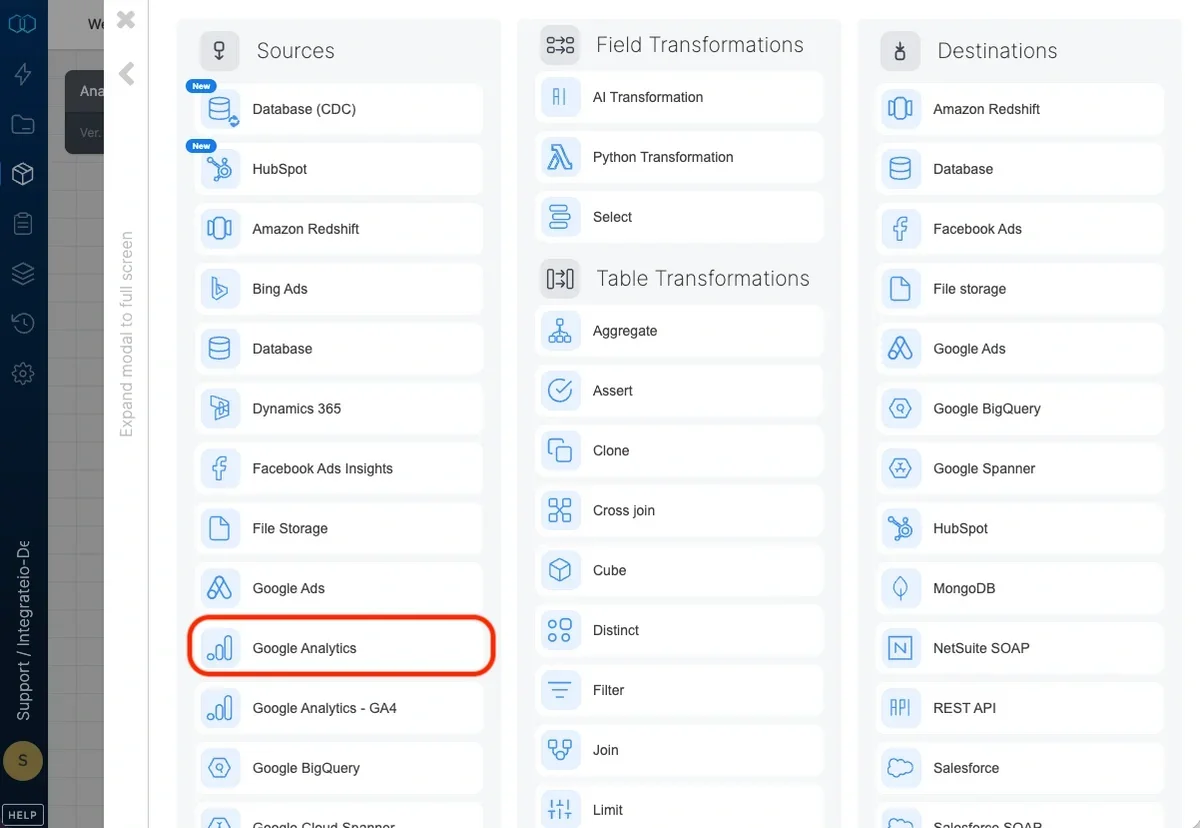
Select Google Analytics.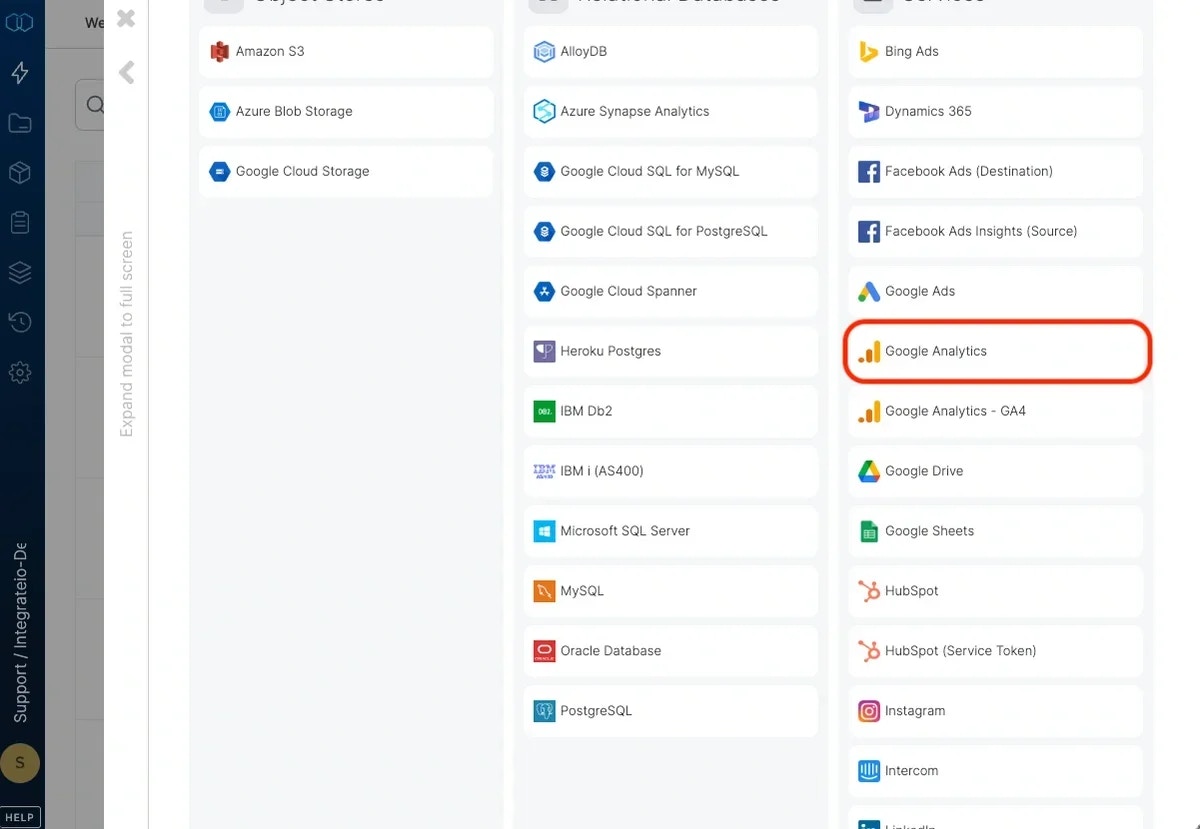
4
Click Authenticate.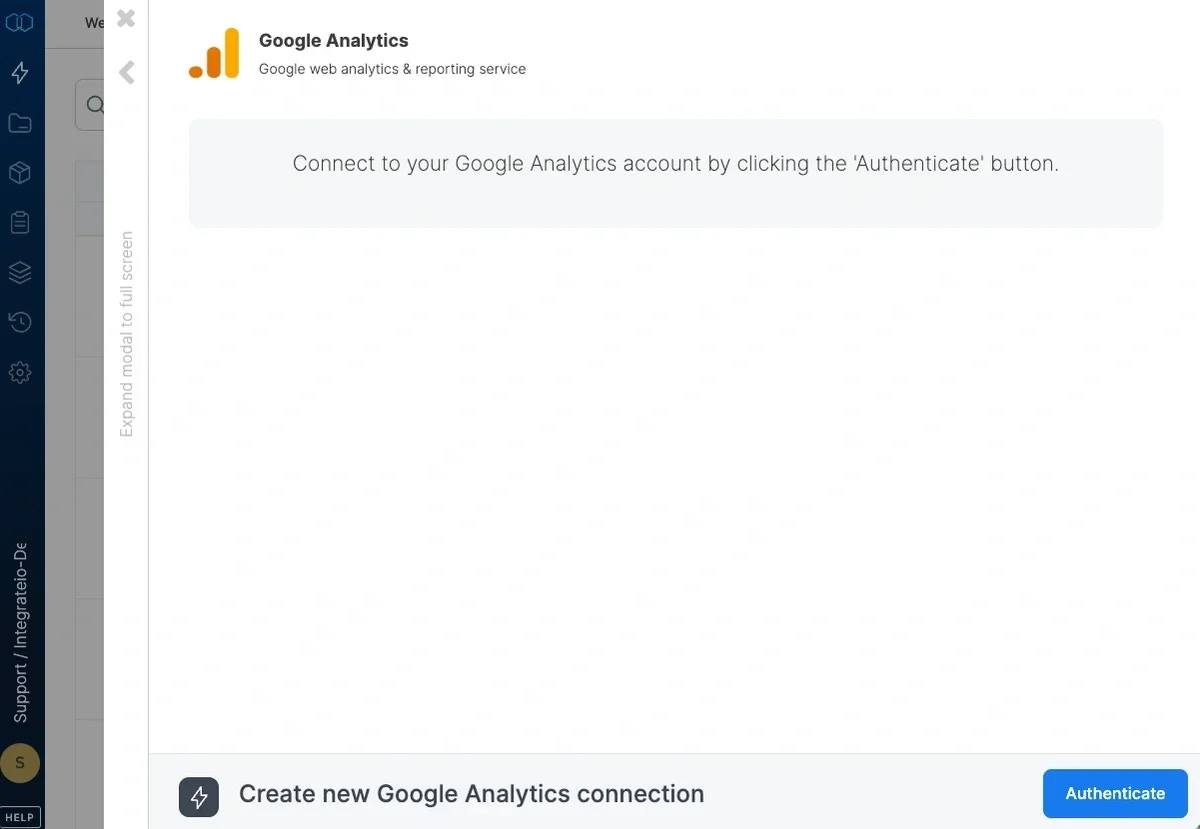
5
In the Google account window, choose an existing Google account or click Add account to create a new Google account.
6
In the next Google window click Accept to authorize Integrate.io ETL access.
7
In the new Google Analytics connection window, name the connection and click Create connection.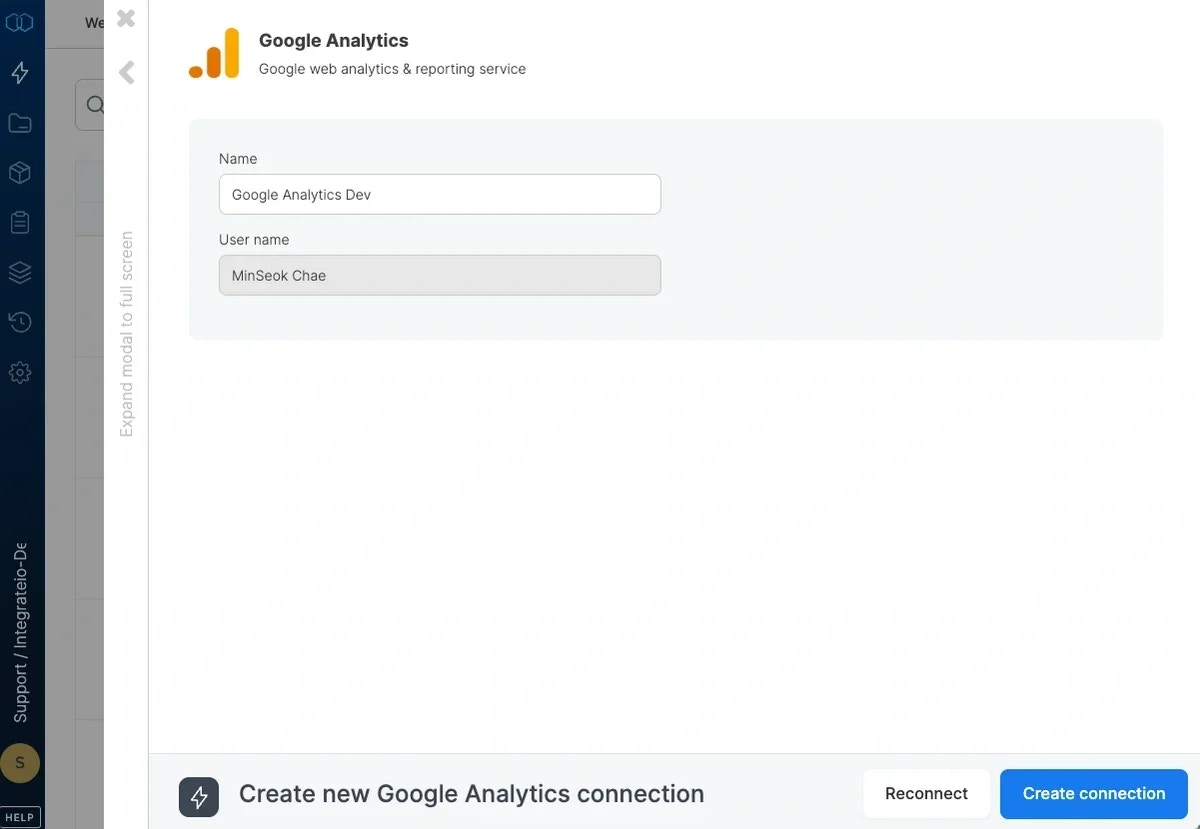
To modify a Google Analytics connection in Integrate.io ETL
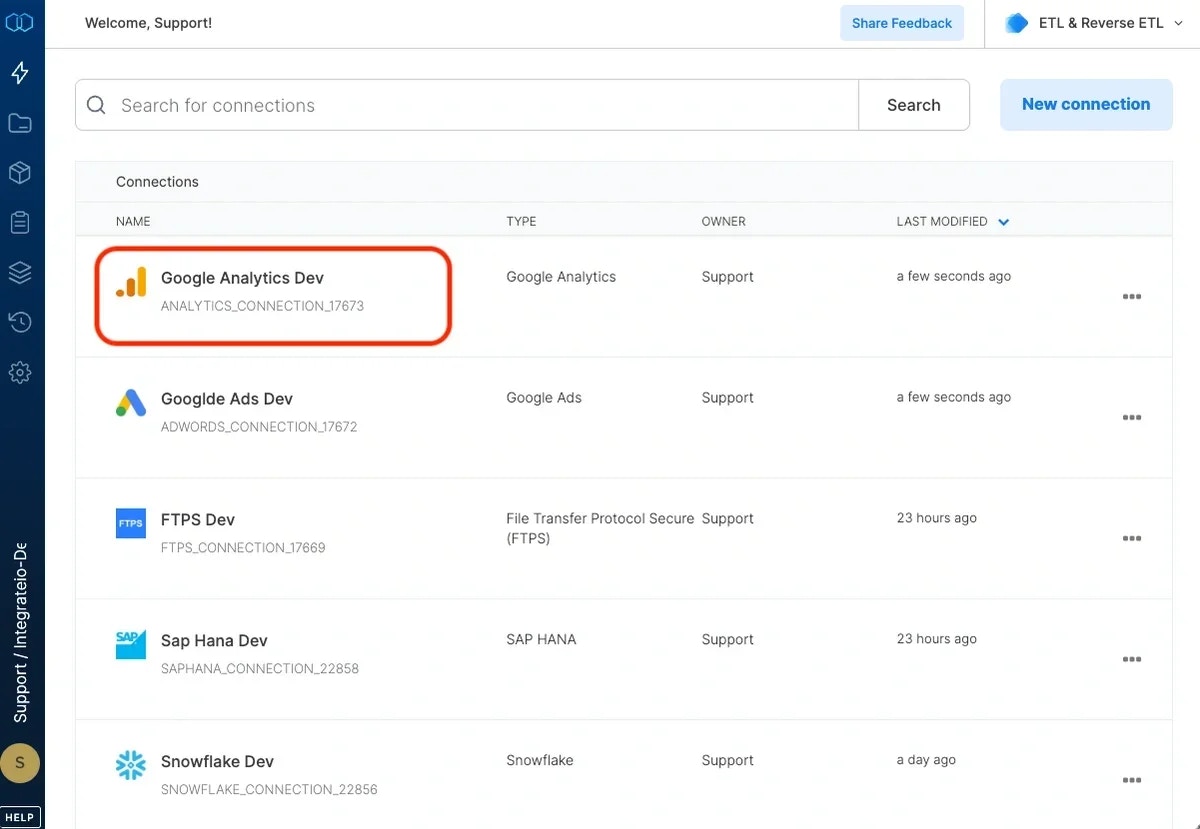
1
Click the Connections icon (lightning bolt) on the top left menu.
2
Click a connection to open and modify it. Make any necessary changes, then click Reconnect, and Save changes. To exit the Google Analytics connection window without changes, click Back to connections (grey tab on the left side) on the Google Analytics connection window.
3
To delete a Google Analytics connection, click the three vertical dots on the far right of the connection listing and select the Delete connection option.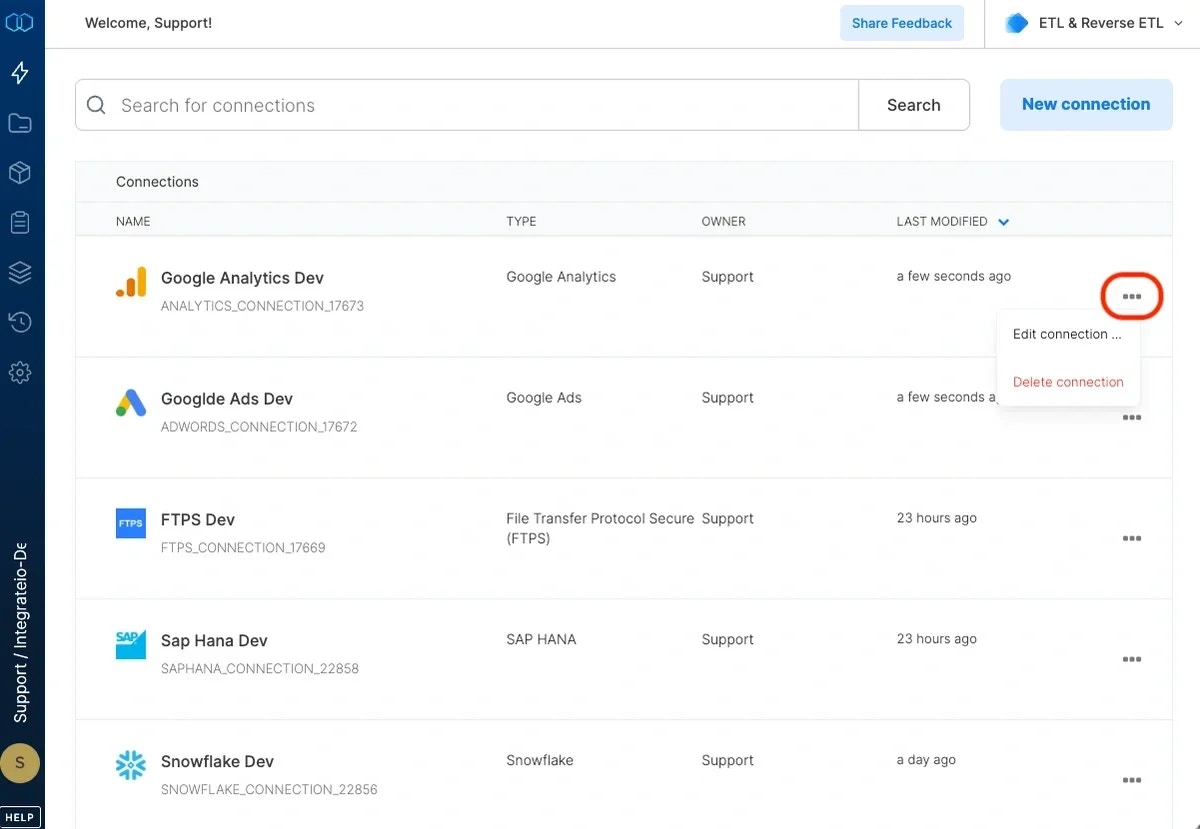
Connection
Select an existing Google Analytics connection or create a new one.Source Properties
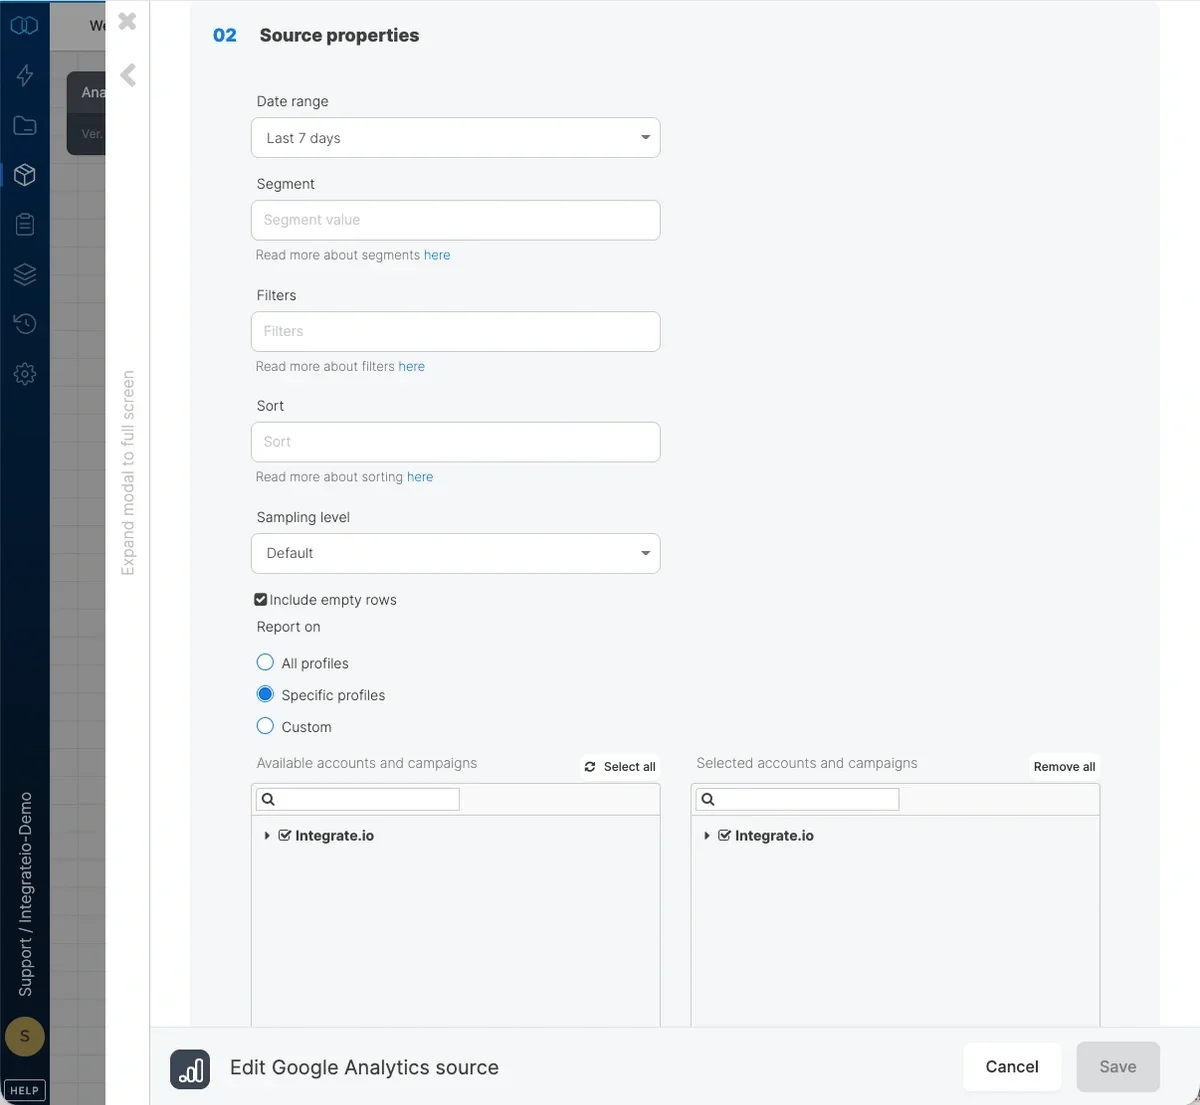
- Date range - Select a date range from the dropdown list of ranges. If you select
custom date range..., you will be prompted to enter From date and To date. Click either inputs and select the dates from the calendar. You can also use variables as values for the custom date range in the formatyyyy-MM-dd.- If custom date range option was selected,
Run report day by daycheckbox will be displayed. When the checkbox is checked, the report will be executed for each day in the selected date range, in order to minimize data sampling. Make sure to include `ga:date` dimension if checkbox is checked
- If custom date range option was selected,
- Segment (optional) - Select a segment from the dropdown list of segments or write your own.
- Filters (optional) - Enter a filter to retrieve a subset of the data (e.g.
ga:browser=~%5EFirefox). - Sort (optional) - Enter the sort order and sort field (e.g.
ga:country,ga:browser). - Sampling Level - Set the sampling level for the query. See the Google Analytics sampling section for more details.
- Include empty rows - if unchecked, records where all metric values are zero will be omitted.
- Profile IDs - Leave empty to read data for all accessible Google Analytics profiles or type in the IDs of your Google Analytics profiles (or tables) in the form of ga:xxx. You can enter multiple ids separated by comma or use a variable too. Use the Account Explorer tool to get a list of the profiles you have access to.