

1
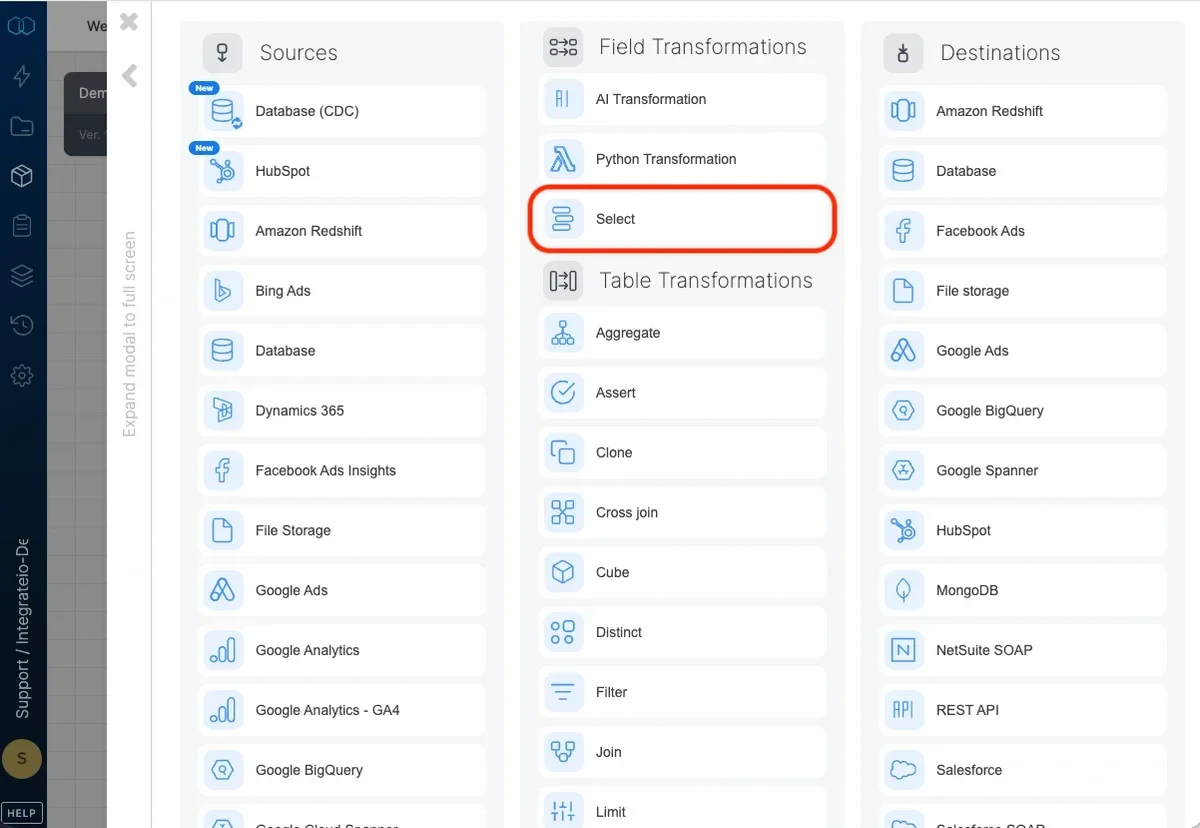
Add a Select component where required in your package.
2
Open the component and name it.
3
To automatically populate the fields section, click the Auto-fill fields
icon. Otherwise, use the field dropdown and select the field you require.
4
Use the expression editor to manipulate field data using Integrate.io ETL’s
expression language (see Using
Expressions and Integrate.io
ETL functions).
5
For each field row, assign an alias for your field in the right text box.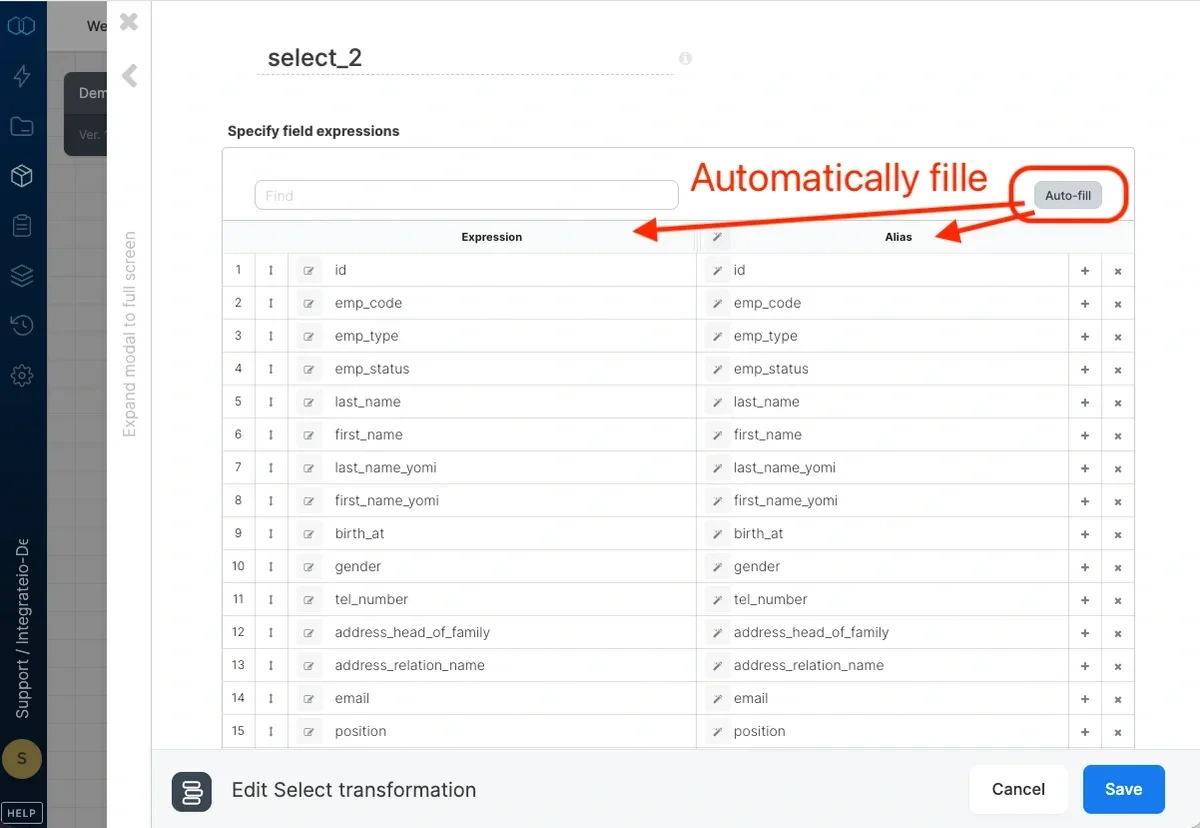
6
To change the order in which these fields will appear in remaining dataflow
components, click and drag the arrow located to the right of a field number
up or down to the new position. If required, add rows for additional fields.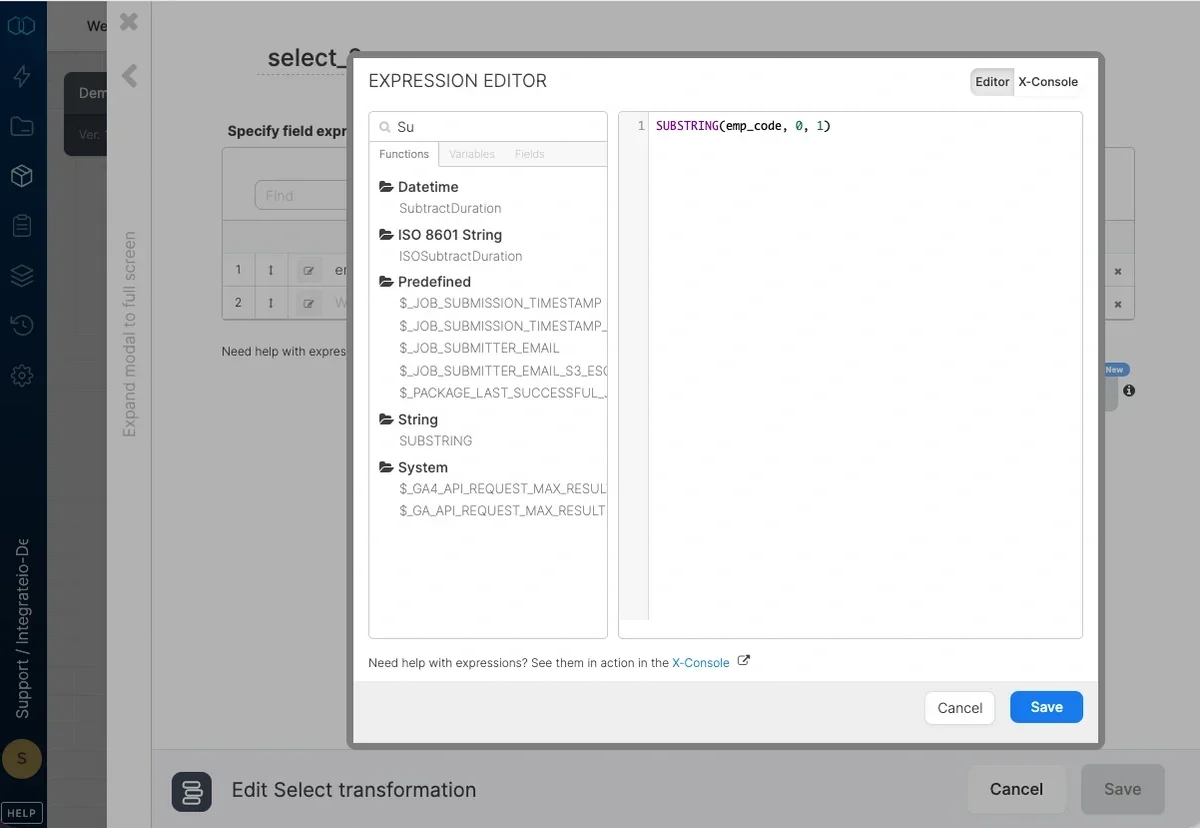
Field data types
The Fields list includes a Data type column that shows the type of each output field.- When a field passes through unchanged from a typed source (for example, a database source), the type appears as soon as you open the component.
- Field-redefining transforms upstream (Select, Aggregate, Join, and similar) do not carry types forward. In that case, run a component preview to populate the column with the executed types from the preview response.
- If no types are available, the column header shows an info hint. Run a preview to resolve the types.
Smart Transform
Smart Transform generates an Integrate.io expression for a field from worked examples or a plain-English rule. Open it from the expression editor, where it sits next to the manual Editor and X-Console tabs, when you know what the output should look like but do not want to write the expression by hand. The expressions Smart Transform writes use only Integrate.io’s built-in functions, grounded to the Integrate.io ETL function catalog, so a suggestion runs the same way every time and never calls a function that does not exist. The panel returns the expression, a one-line inferred rule, and a self-verified run over your examples plus a few values sampled from the previous component.Smart Transform tabs
Smart Transform offers several input modes as tabs. Pick the one that matches the shape of your problem:
You can combine an example set with a short description to disambiguate edge cases.
Referencing fields and variables
When a transform spans more than one input, reference other fields and variables directly in the Description. The panel lists the fields and variables you can use (fields, package variables, global variables, and their secrets); click a name to drop it into the description, and use Show more to reveal the full list. To reference a column, insert its name from the list (or type its exact name) so Smart Transform treats it as a field. To use a word as literal text instead, phrase it as a literal (for example, wrap it in quotes). This matters when a literal word happens to match an existing field name, since an unquoted match is read as a column reference. Smart Transform quotes string variables automatically so their substituted value is treated as a text literal, and leaves numeric or boolean variables unquoted. You can also open Smart Transform from a row in the Variables editor to generate the value of a variable. There is no single source field in that context, so generation relies on the description together with the available fields and variables.Using Smart Transform
1
In the Select component, open the expression editor for the field you want to transform, or open Smart Transform from a row in the Variables editor.
2
Open the Smart Transform tab and choose an input mode (Sample data, Description, Date format, Value map, or Current mapping).
3
Fill in the examples, description, or formats. Reference other fields or variables in the description when the rule spans more than one input.
4
Click Generate expression and review the inferred rule and the run against your examples.
5
Use Copy to copy the expression, or Insert into expression to commit it to the field and close the panel. If a result needs tuning, adjust the inputs and click Regenerate.
Writing expressions by hand
The Editor tab is the manual alternative to Smart Transform. It has a searchable catalog with Functions, Variables, and Fields lists (click a function to see how it works), plus a “Try Smart Transform” hint for when you are not sure which function to use. Use Run preview in the Live Preview panel to run the current expression against real sample rows from the previous component and see each sample value next to its result (limited to 5 rows). Save & confirm stays enabled even when you have not changed the expression, so you can confirm an inserted or existing expression as-is.Limits
- Up to 20 example rows per request.
- Up to 16 sampled input values.
- Up to 2,000 characters in the description.
smart_transform account feature. Contact your account owner or Integrate.io support if the tab is not visible in the expression editor.
Smart Map
Smart Map maps and transforms many fields at once so the Select output matches a target schema. Use it when some columns need reshaping (type conversions, renames with formatting, splits, or normalization) rather than a straight passthrough. It appears as a bar above the Fields grid: “Instantly map and transform your data to the destination schema.” Mappings whose source and target share a name and a compatible type are resolved as passthroughs without an LLM call. Everything else is sent to the model in one batch and returned as expressions that the review grid merges onto the mapped rows. For date reformatting, Smart Map inspects the sampled values and produces one expression that covers every input format present.Choosing a target (“Conform to”)
The Conform to picker in the Smart Map bar sets the schema Smart Map maps to:- Downstream destination component. Use the columns of a destination already wired after the Select.
- Existing database table. Opens the “Conform to an existing database table” dialog. Pick a Connection, then a Schema and Table / view; the table’s real columns become the target Smart Map conforms to. You can re-open this picker later to change the selection.
Running Smart Map
1
Add a Select component and open it.
2
Set Conform to to a downstream destination or an existing database table.
3
Use Auto-fill for the instant name and type matches.
4
Click Smart Map fields to run the AI pass over the rows that are not straight passthroughs.
5
Review the results in the grid. Each row shows its Expression, Alias, and Data type; use Find to filter, and edit any row before saving.
6
Click Preview (set the row Limit as needed) to run the mapped output against sample data.
ai_select_mapping account feature, separate from the smart_transform gate for per-field Smart Transform. Contact your account owner or Integrate.io support if the option is not visible.