Allowing access to my file data on SFTPToGo
SFTPToGo is a quick and easy way to spin up an SFTP server. It allows you to store files and then ingest them on our platform for processing purposes. The SFTP server can also be used as a destination on our platform so you can send processed files to the server and access them from there. If you do not already have an SFTPToGo account, you can sign up for an account here. All accounts include a 7-day free trial. Once you have your SFTPToGo account you can then follow the steps below to connect your SFTP server to our platform in less than 3 minutes.Connecting to your SFTPToGo server
1
On your Integrate.io or Prepforce account, click Connections on the lefthand navbar, next click New Connection button, and then click Secure File Transfer Protocol (SFTP).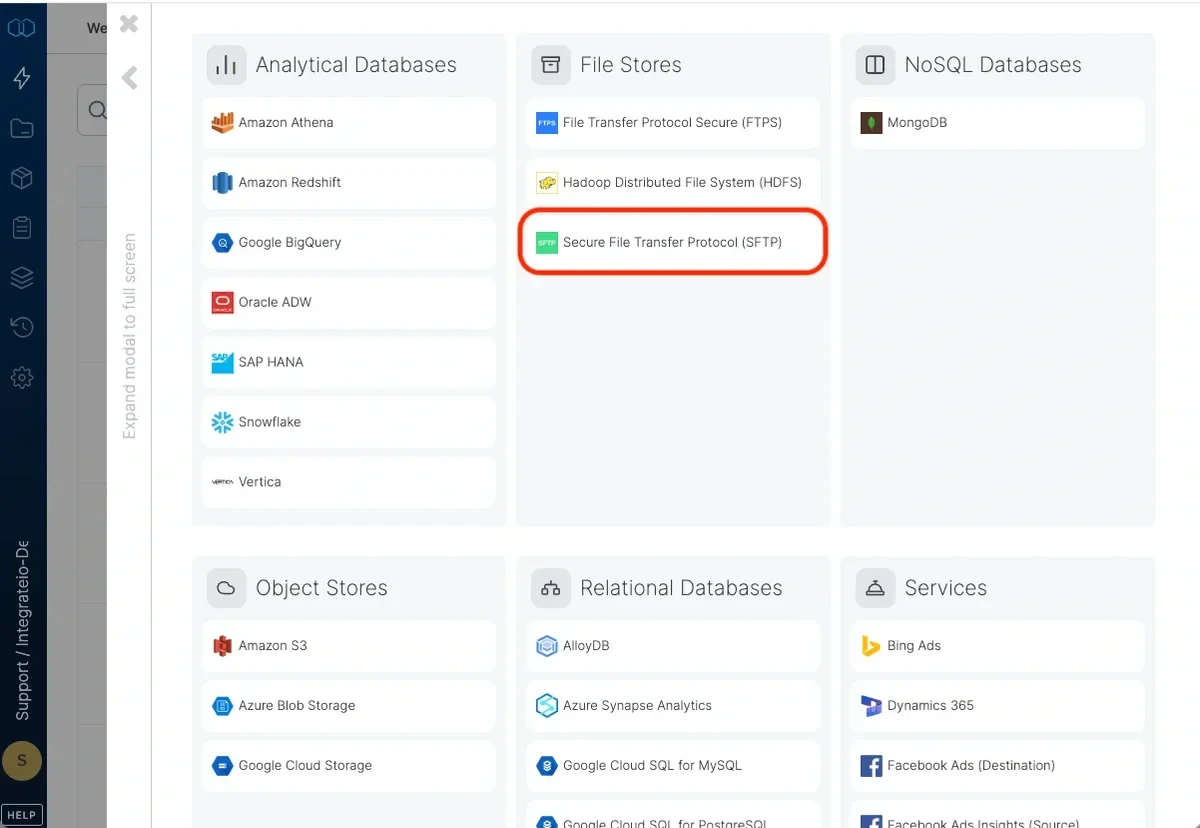
2
In this step you will need to add your SFTP account credentials. Below are the instructions for where you can find each credential.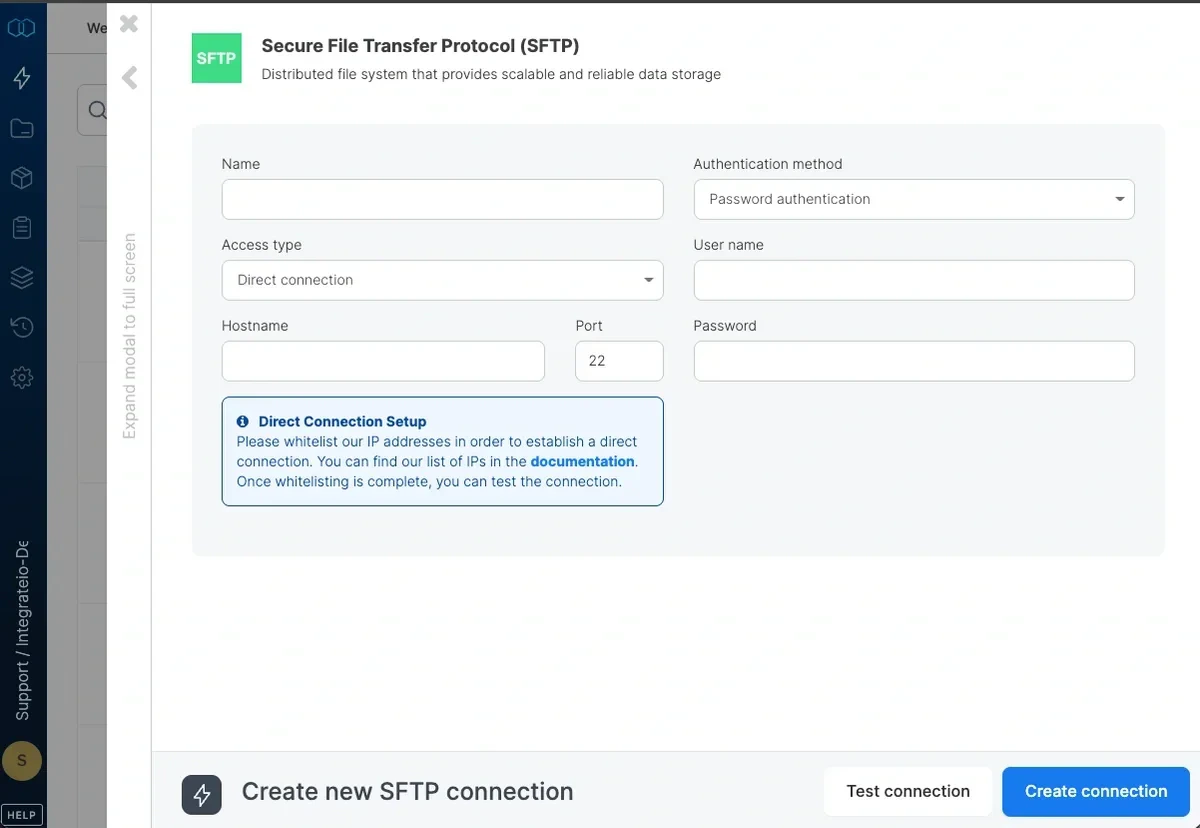
- Name: You can type in whatever you would like to name this connection. E.g. ACME SFTP Connector
- Hostname: In your SFTPToGo account, click the Credentials tab and copy the Host to this field
- User name: In your SFTPToGo account, click the Credentials tab and copy the Username to this field
- Password: In your SFTPToGo account, click the Credentials tab and copy the Password to this field
3
After adding the credentials for the 4 fields in the step above, you can now proceed to test the connection by clicking Test Connection. You should see a Yay, test successful notification like in the screenshot below.
4
Once you have successfully tested your connection, you can click Create connection button and start using your SFTPToGo server.
Using a file from SFTPToGo server in your package
Now that you have successfully created a connection to your SFTPToGo server, you can start ingesting files to use in your packages. To ingest a file from your SFTPToGo connection, first load your file to your SFTPToGo server. You can do this by clicking on the File Browser tab on your SFTPToGo home screen and then uploading the file.1
On the Integrate.io platform, click Packages on the left navbar and then click New Package. Name your package and then click Create package.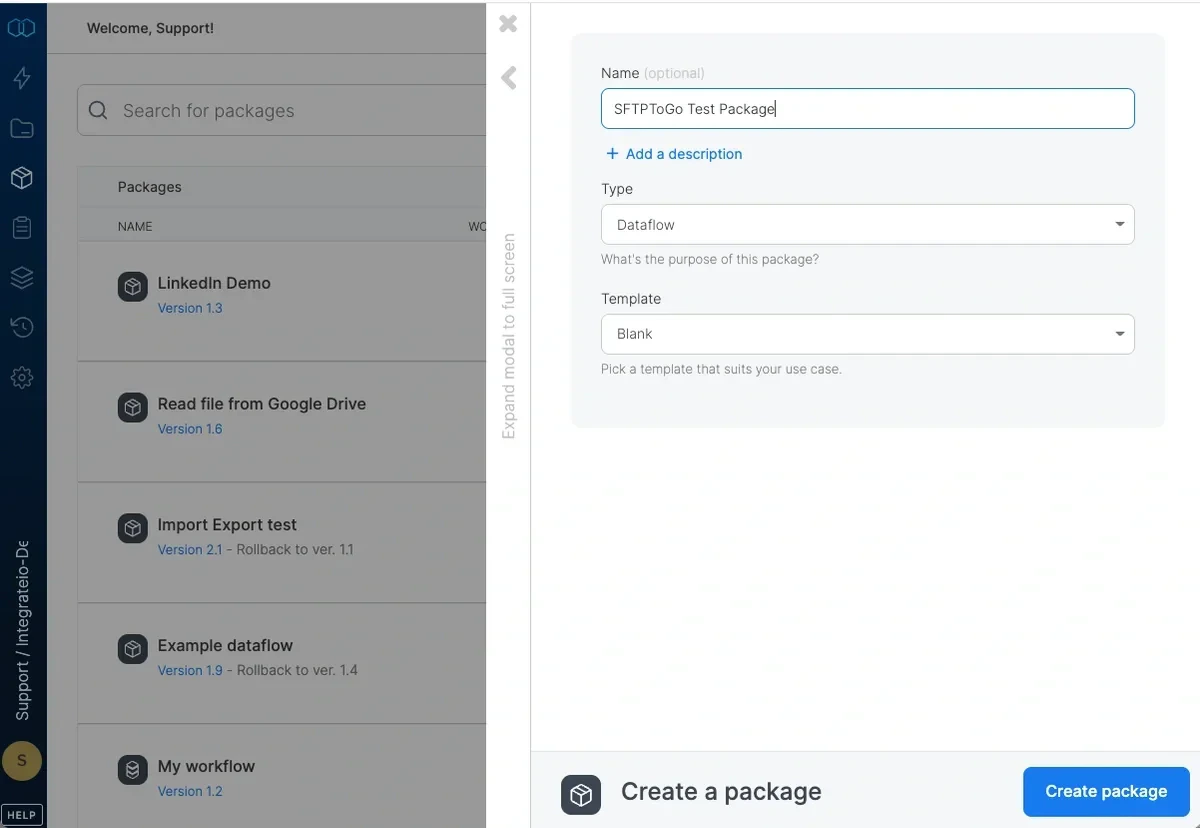
2
In the package designer, click Add Component and, under the Sources column on the left, select File Storage.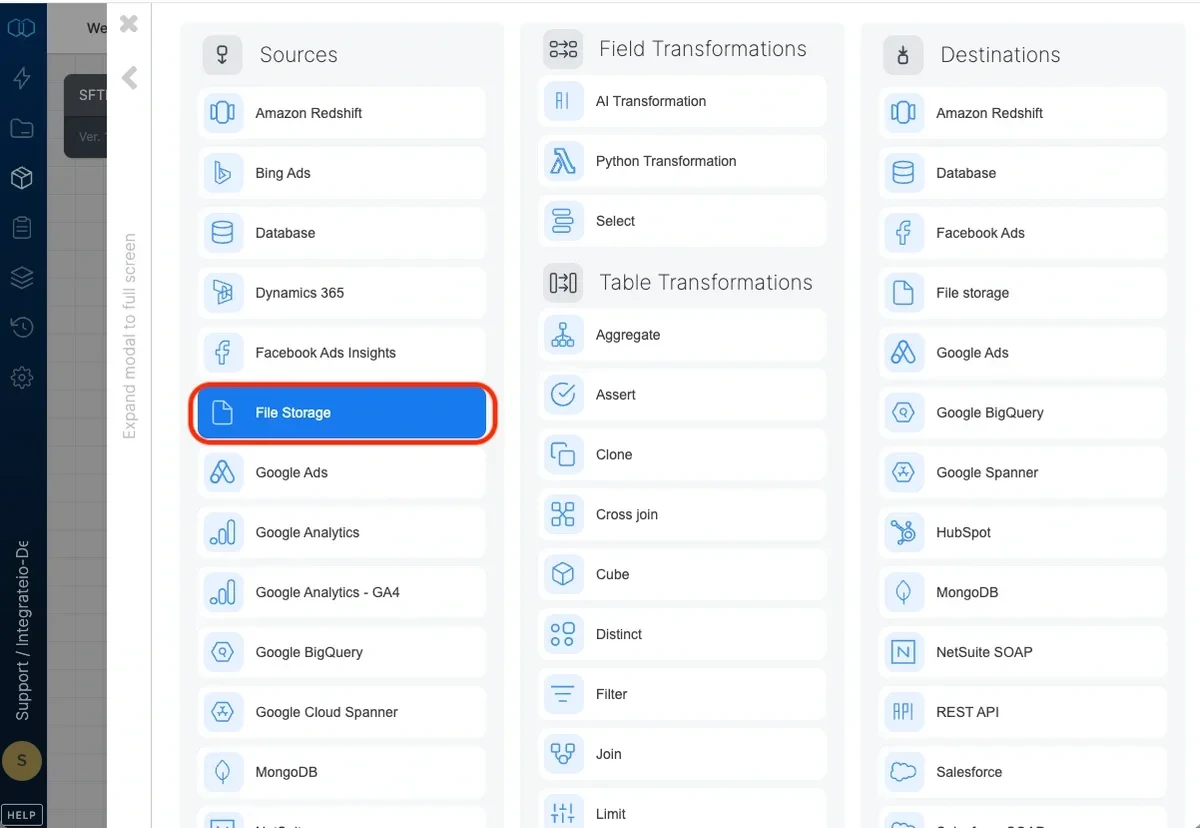
3
Click the File Storage component and then choose your input connection from the dropdown menu in Step 1. This will be the SFTP connection you just created. Then click Next.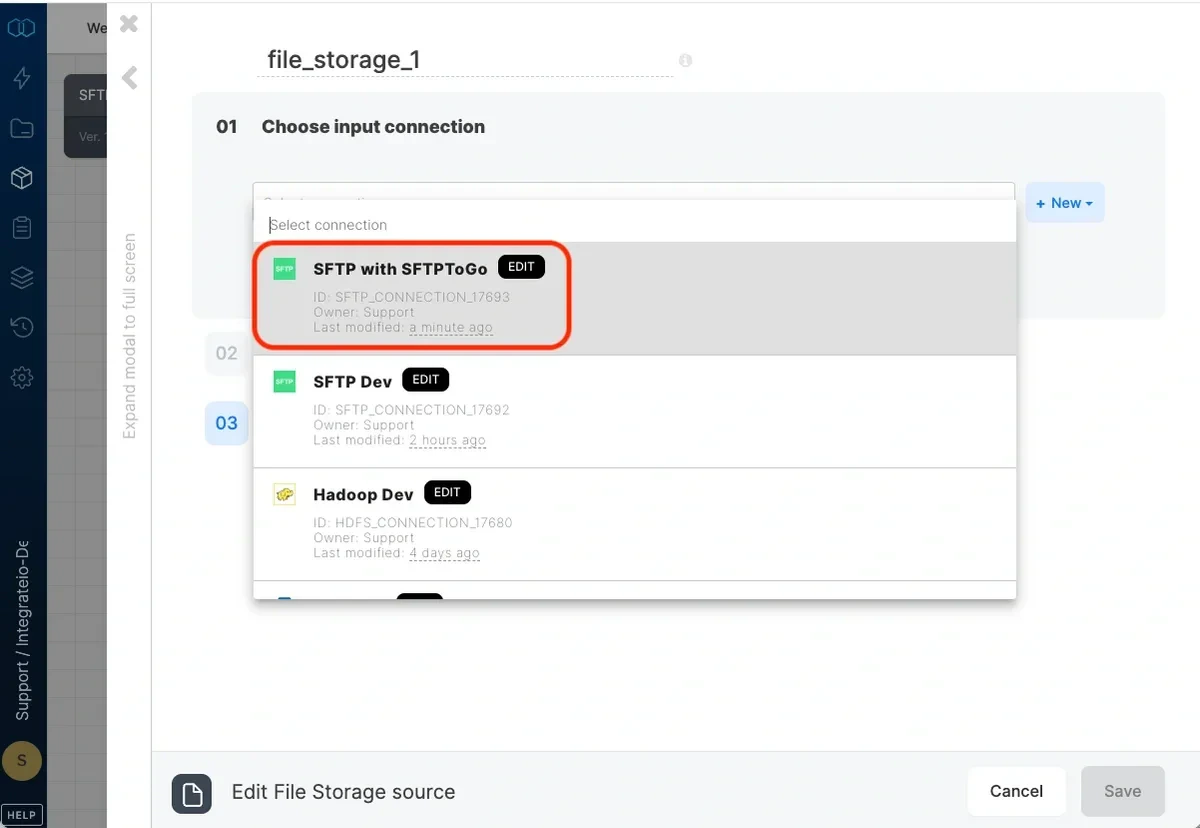
4
In your SFTPToGo dashboard, under the File Browser tab, click the 3 dots … on the file you want to ingest and then click Copy path to clipboard.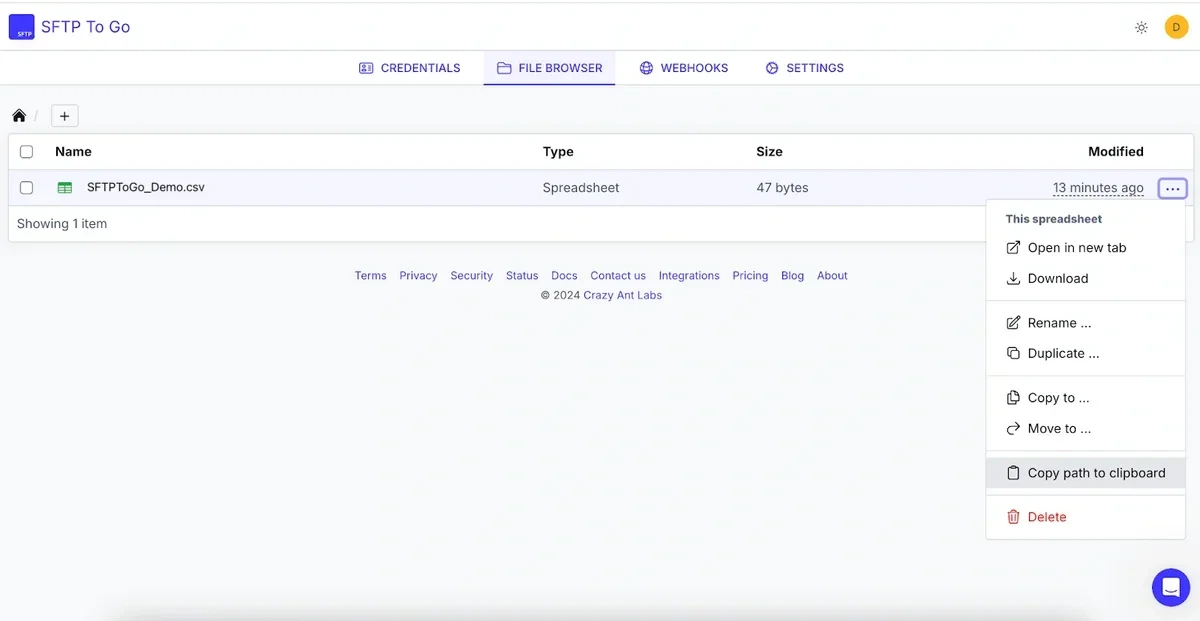
5
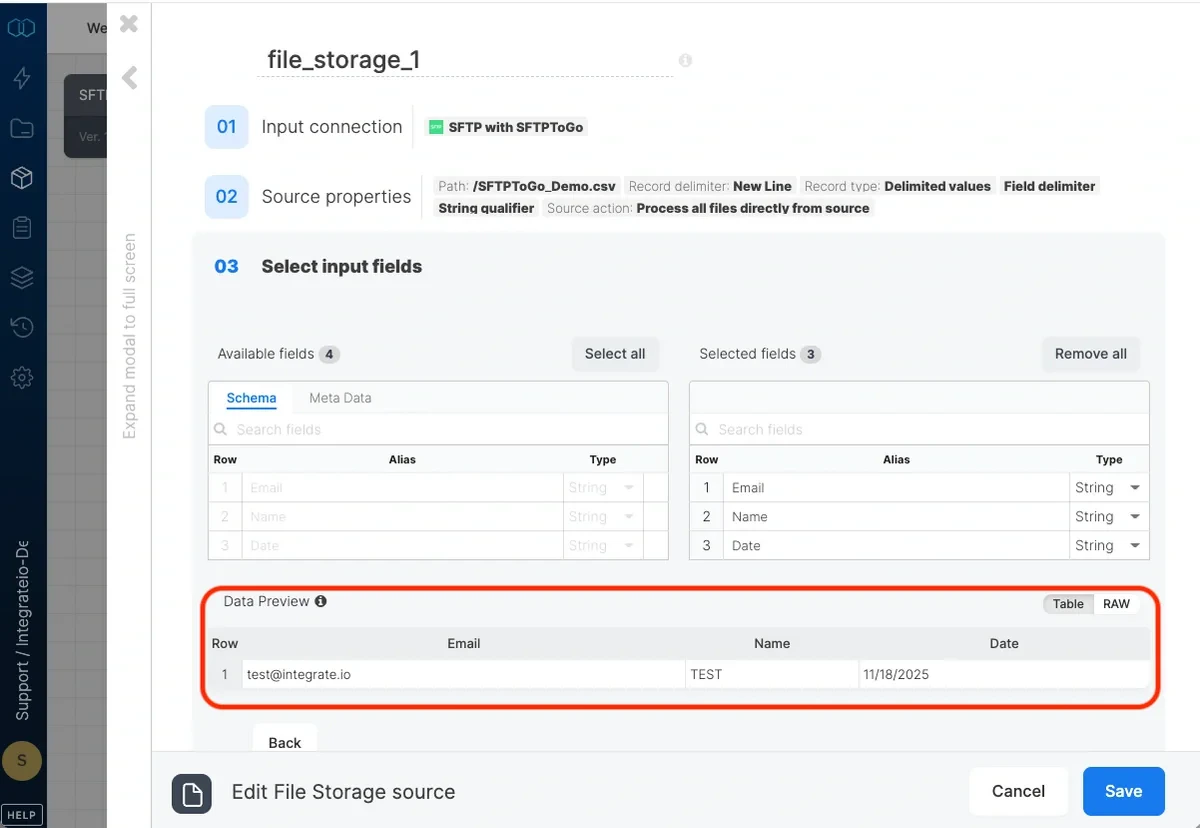
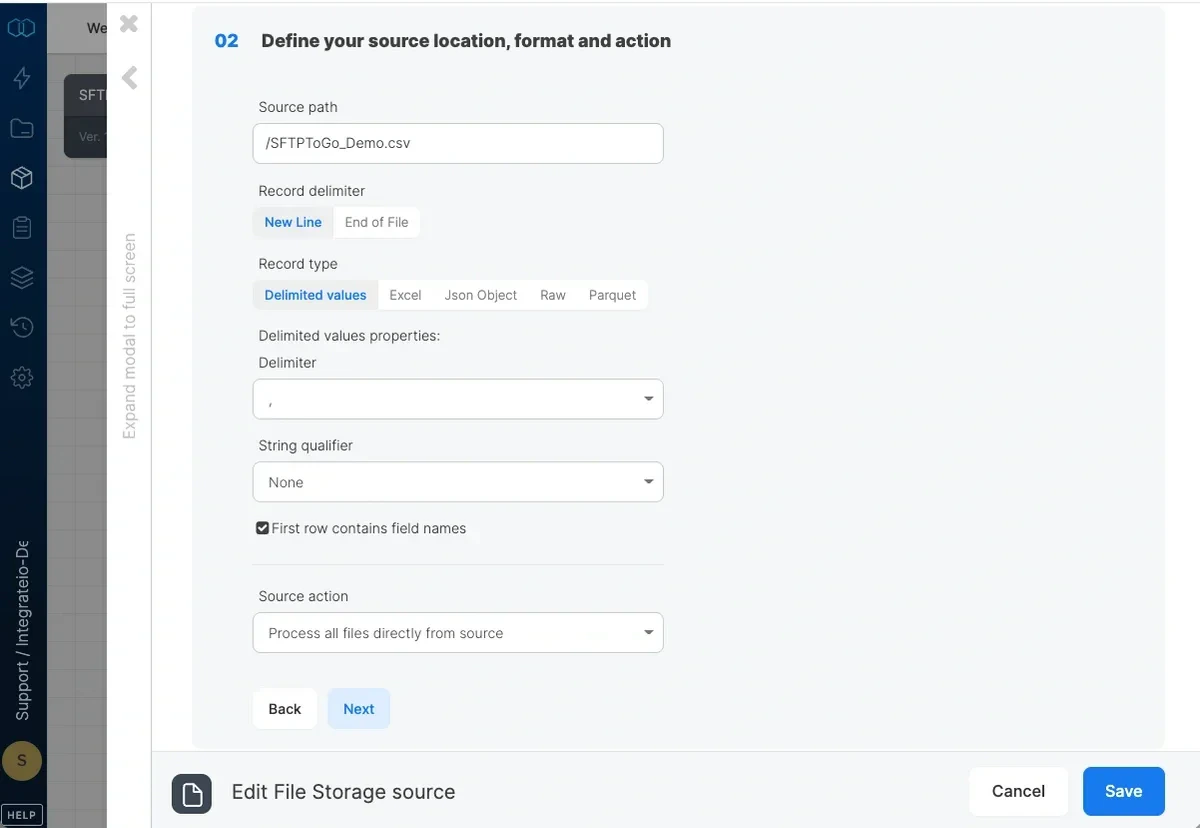
The third and final section of this source component is for selecting the fields you want to use in your package and load to Salesforce. You can filter the actual fields that get loaded to Salesforce in a later component step. This step shows you a Data Preview of the fields in your file being ingested.