

Connection Setup
Integrate.io ETL supports two authentication methods for Gmail: a Google Service Account with domain-wide delegation, or OAuth 2.0. Use OAuth when you don’t have Google Workspace Admin access or want to connect a personal Gmail account.Service Account (domain-wide delegation)
Step 1: Create a GCP Project
1
Access your Google Cloud Console.
2
Click the project dropdown at the top of the page and select existing project or create a New Project.
3
If a new project is created, enter a project name (e.g. 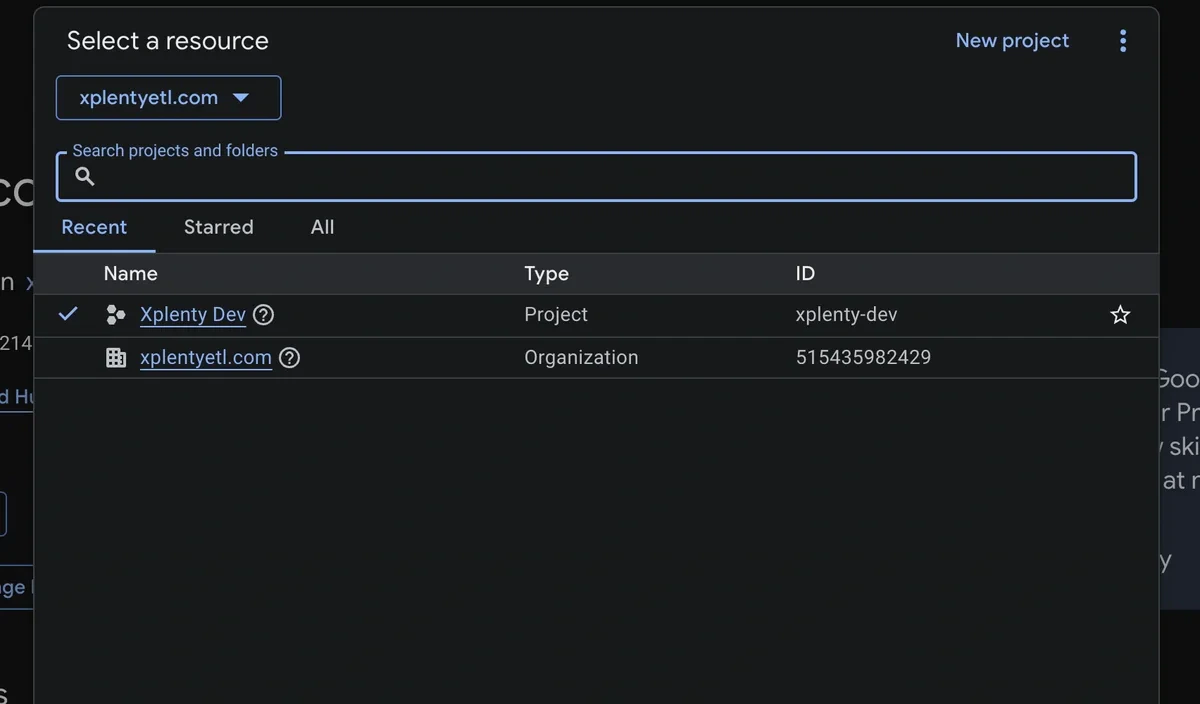
my-gmail-connector) and click Create. Make sure the newly created project is selected in the project dropdown before proceeding.Step 2: Enable the Gmail API
1
In the left sidebar, navigate to APIs & Services → Library.
2
Search for Gmail API.
3
Click the Gmail API result and click Enable.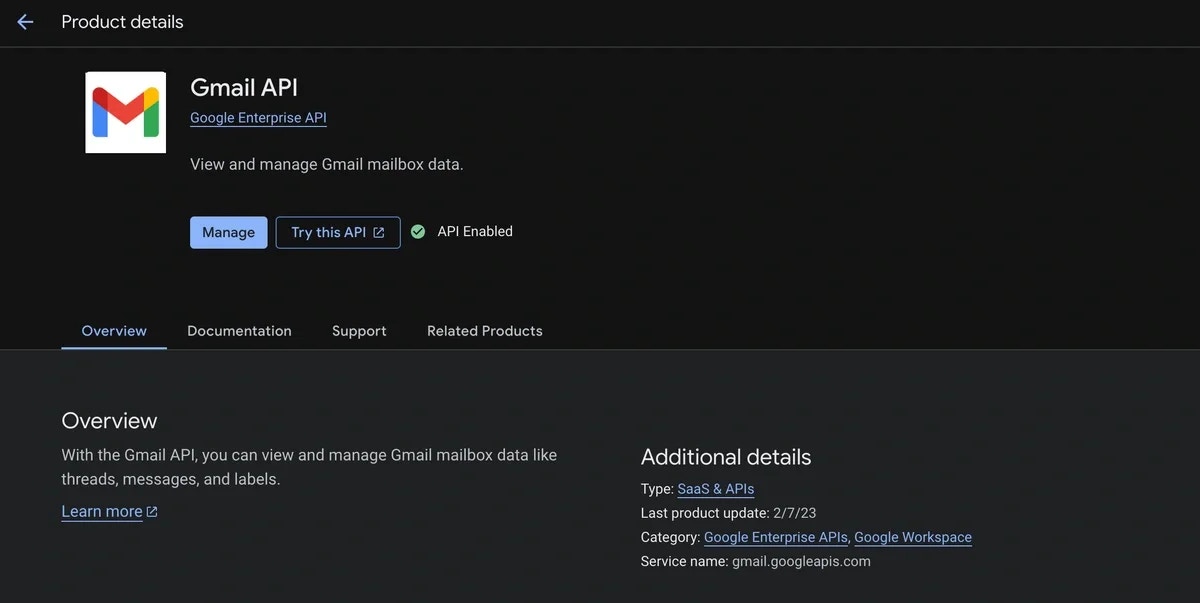
Step 3: Create a Service Account
1
In the left sidebar, navigate to IAM & Admin → Service Accounts.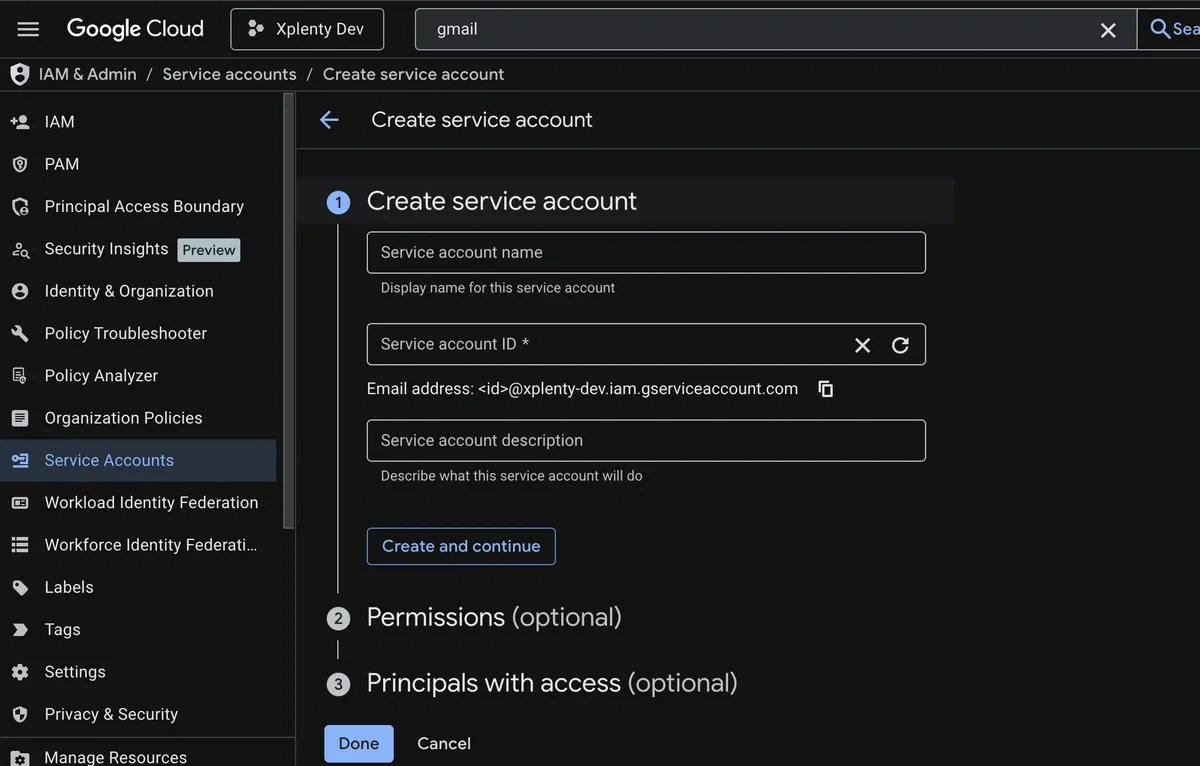
2
Click + Create Service Account.
3
Fill in the service account details:
- Name: e.g.
gmail-connector-reader - Description: e.g.
Service account for Integrate.io Gmail CSV connector
4
Click Create and Continue.
5
Skip the optional role grant steps. Gmail access is controlled via domain-wide delegation, not IAM roles.
6
Click Done.
Step 4: Enable Domain-Wide Delegation
1
From the Service Accounts list, click the service account you just created.
2
Go to the Details tab.
3
Scroll down to Advanced settings and find the Domain-wide Delegation section.
4
Click Enable Google Workspace Domain-wide Delegation.
5
Enter a product name (e.g.
Integrate.io Gmail Connector) and click Save.6
Note the Client ID displayed. This is the long numeric ID (e.g.
118304762983475829341) you will need in Step 6.Step 5: Download the JSON Key
1
Still on the service account page, go to the Keys tab.
2
Click Add Key → Create new key.
3
Select JSON and click Create.
4
A
.json key file will be automatically downloaded to your machine. Keep this file secure; it contains the private key used to authenticate the service account.Step 6: Authorize the Scope in Google Workspace Admin
1
Go to admin.google.com and sign in as a Workspace admin.
2
Navigate to Security → Access and data control → API controls.
3
Click Manage Domain-Wide Delegation.
4
Click Add new.
5
Enter the following:
- Client ID: The numeric Client ID from Step 4 (e.g.
118304762983475829341) - OAuth scopes:
https://www.googleapis.com/auth/gmail.readonly
6
Click Authorize.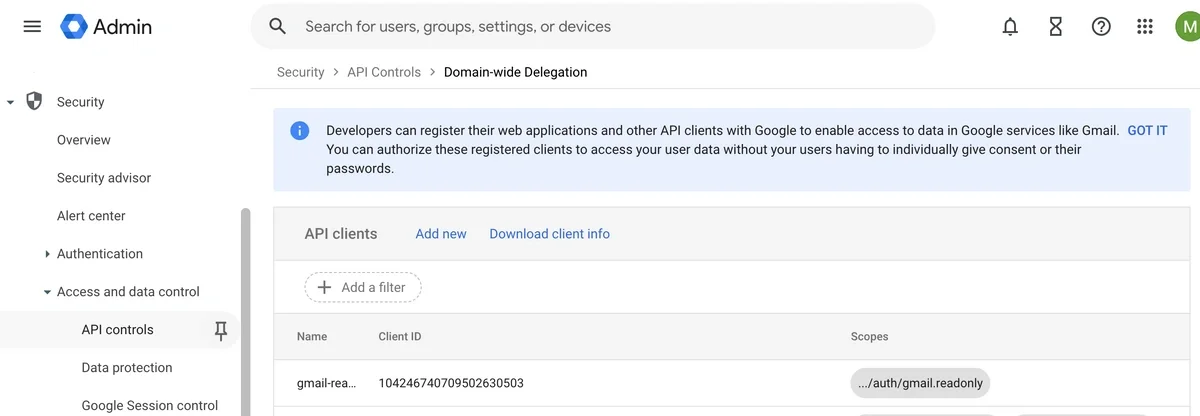
Step 7: Create the Gmail Connection in Integrate.io ETL
1
Navigate to the Connections tab and click Gmail.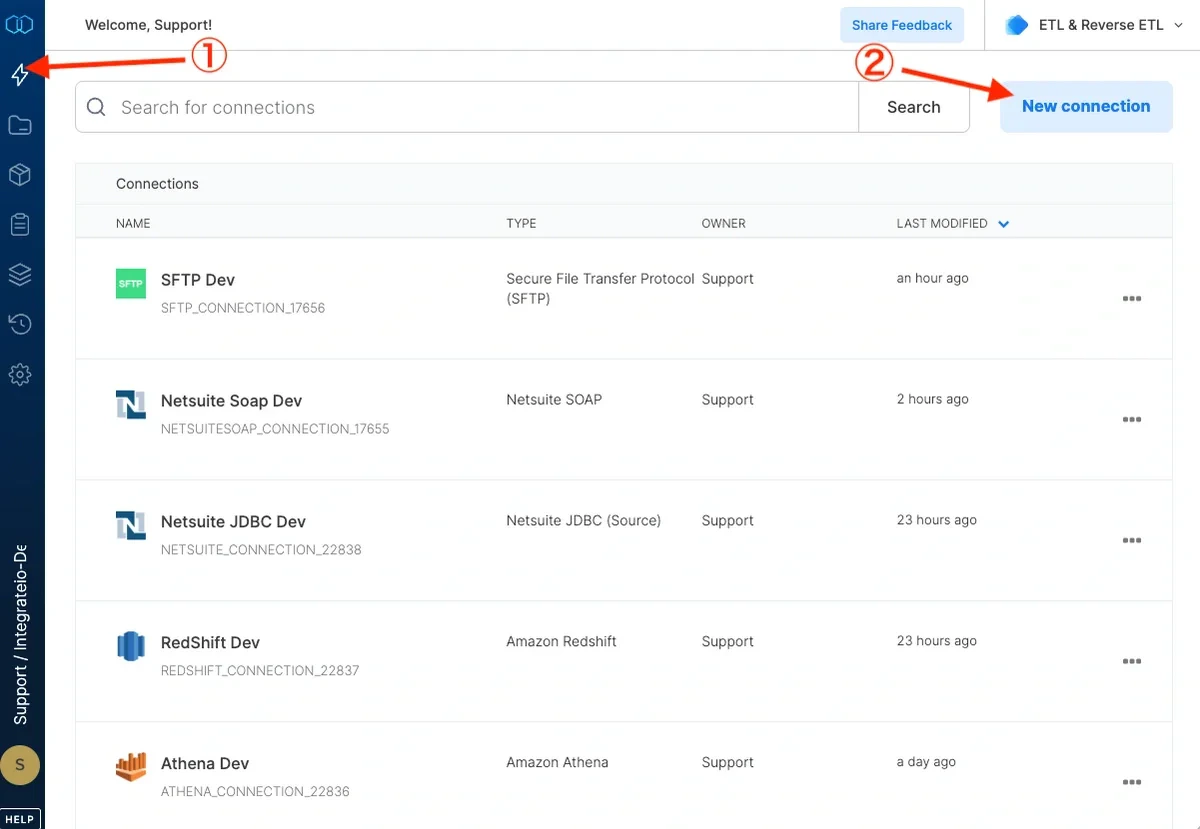
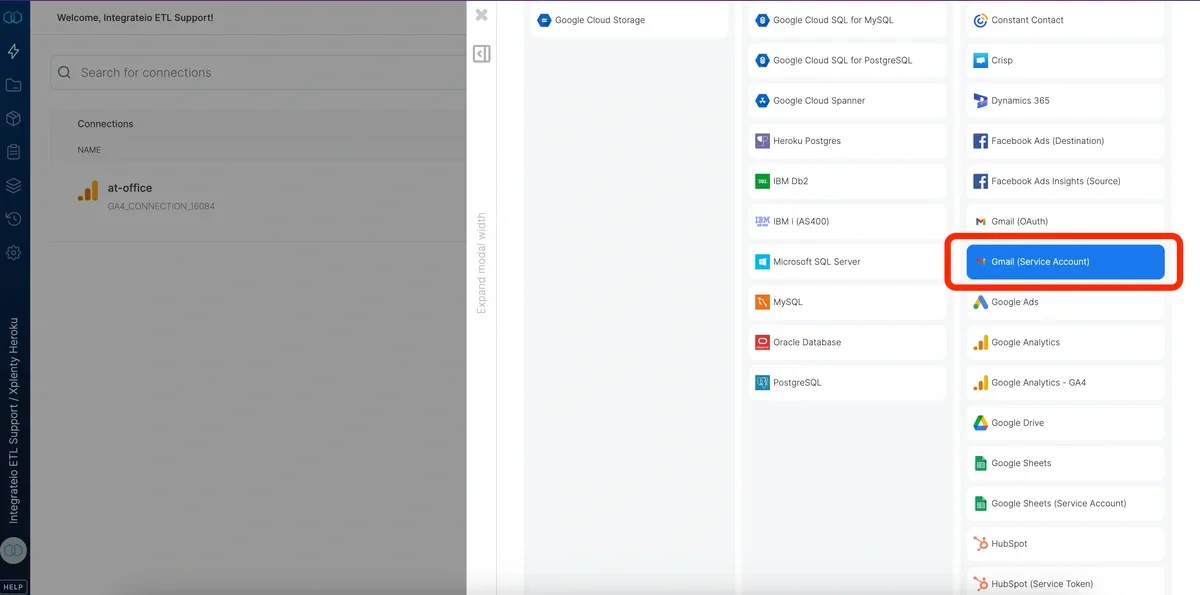
2
Fill up the Connection Name
3
Upload the JSON key you generated in Step 5.
4
Click Test Connection and Create Connection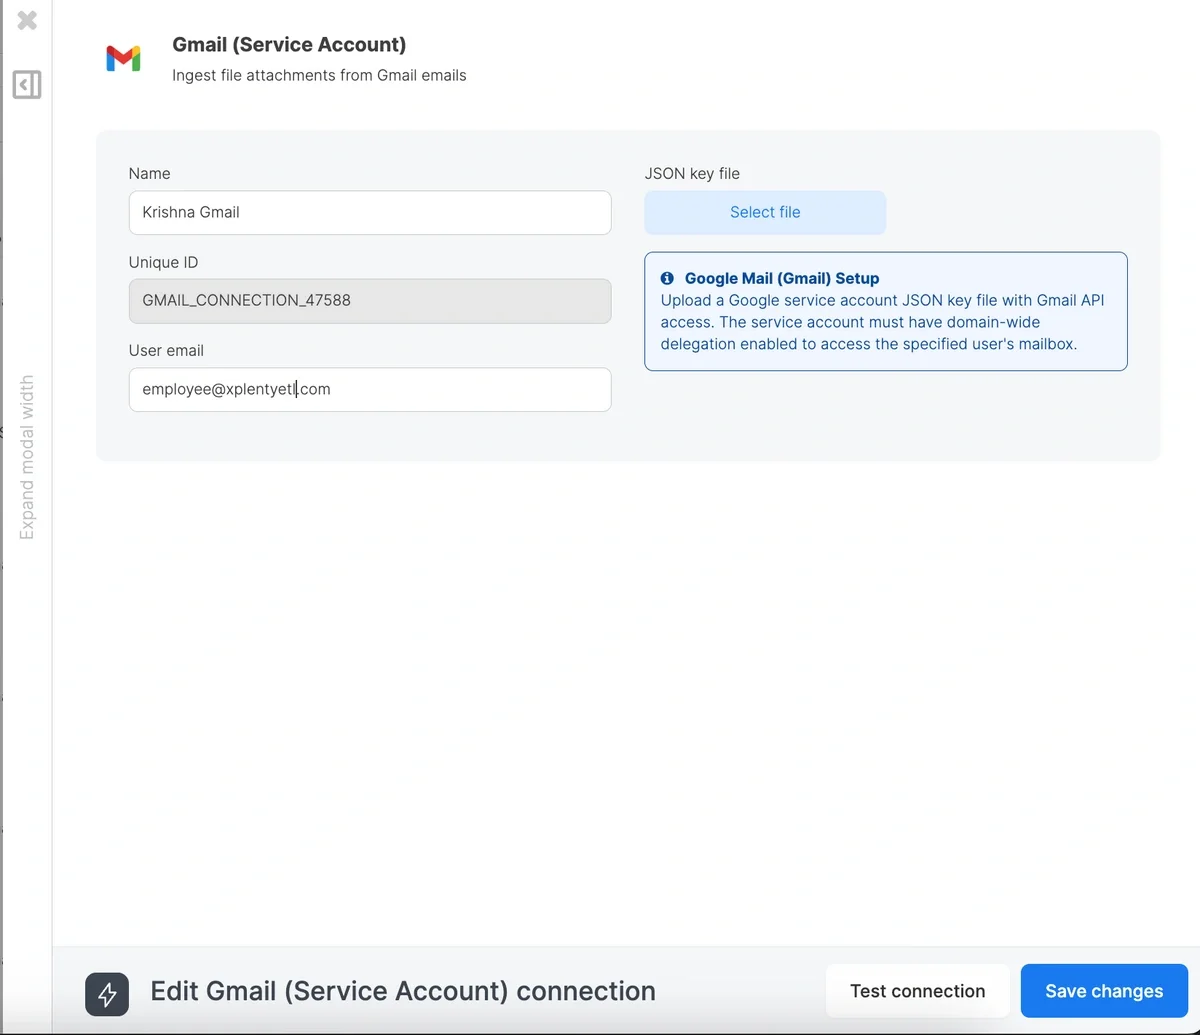
OAuth 2.0
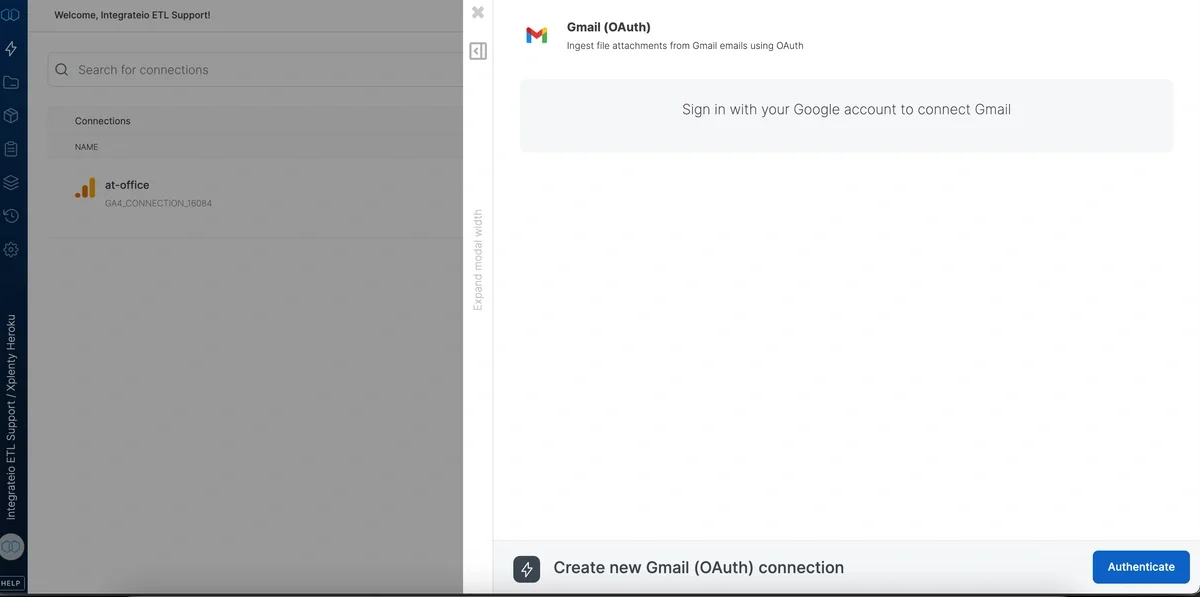
As an alternative to Service Account authentication, Integrate.io ETL also supports connecting to Gmail via OAuth 2.0. This is the recommended method when you don’t have Google Workspace Admin access or want to connect a personal Gmail account.1
Navigate to the Connections tab and click + New connection.
2
Search for and select Gmail (OAuth).
3
Click Authenticate.
4
A Google sign-in popup will appear. Select the Google account you want to connect.
5
Review the requested permissions.
6
Once authentication completes, fill in the Connection Name (e.g. My Gmail OAuth).
7
Click Test Connection to verify, then click Create Connection.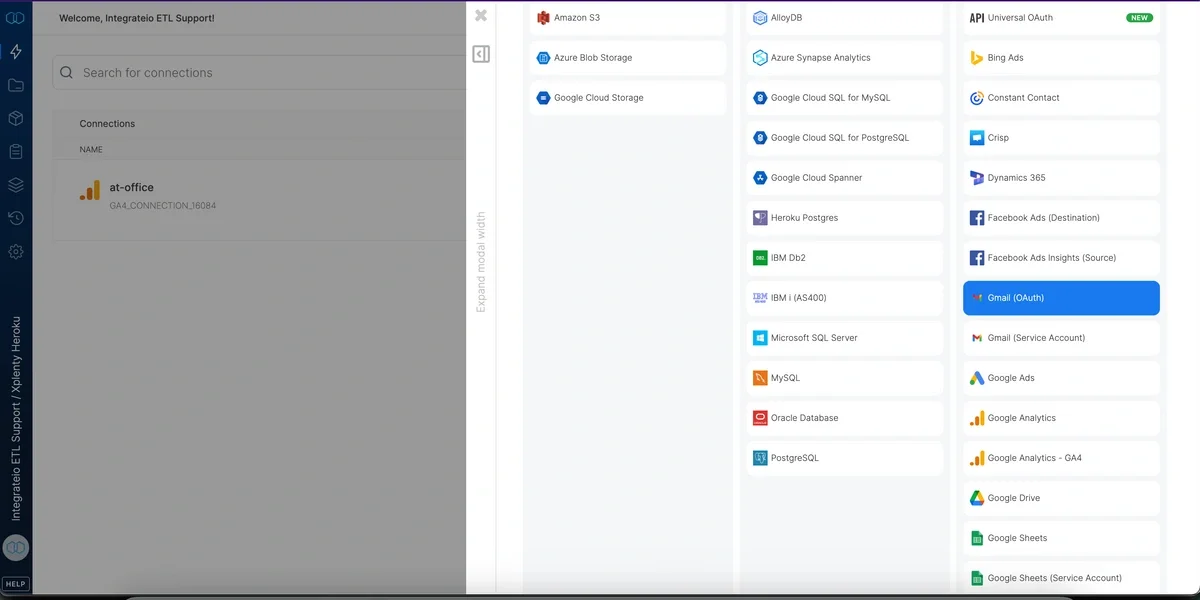
Source Properties
The source component is configured in Step 02 of the component editor.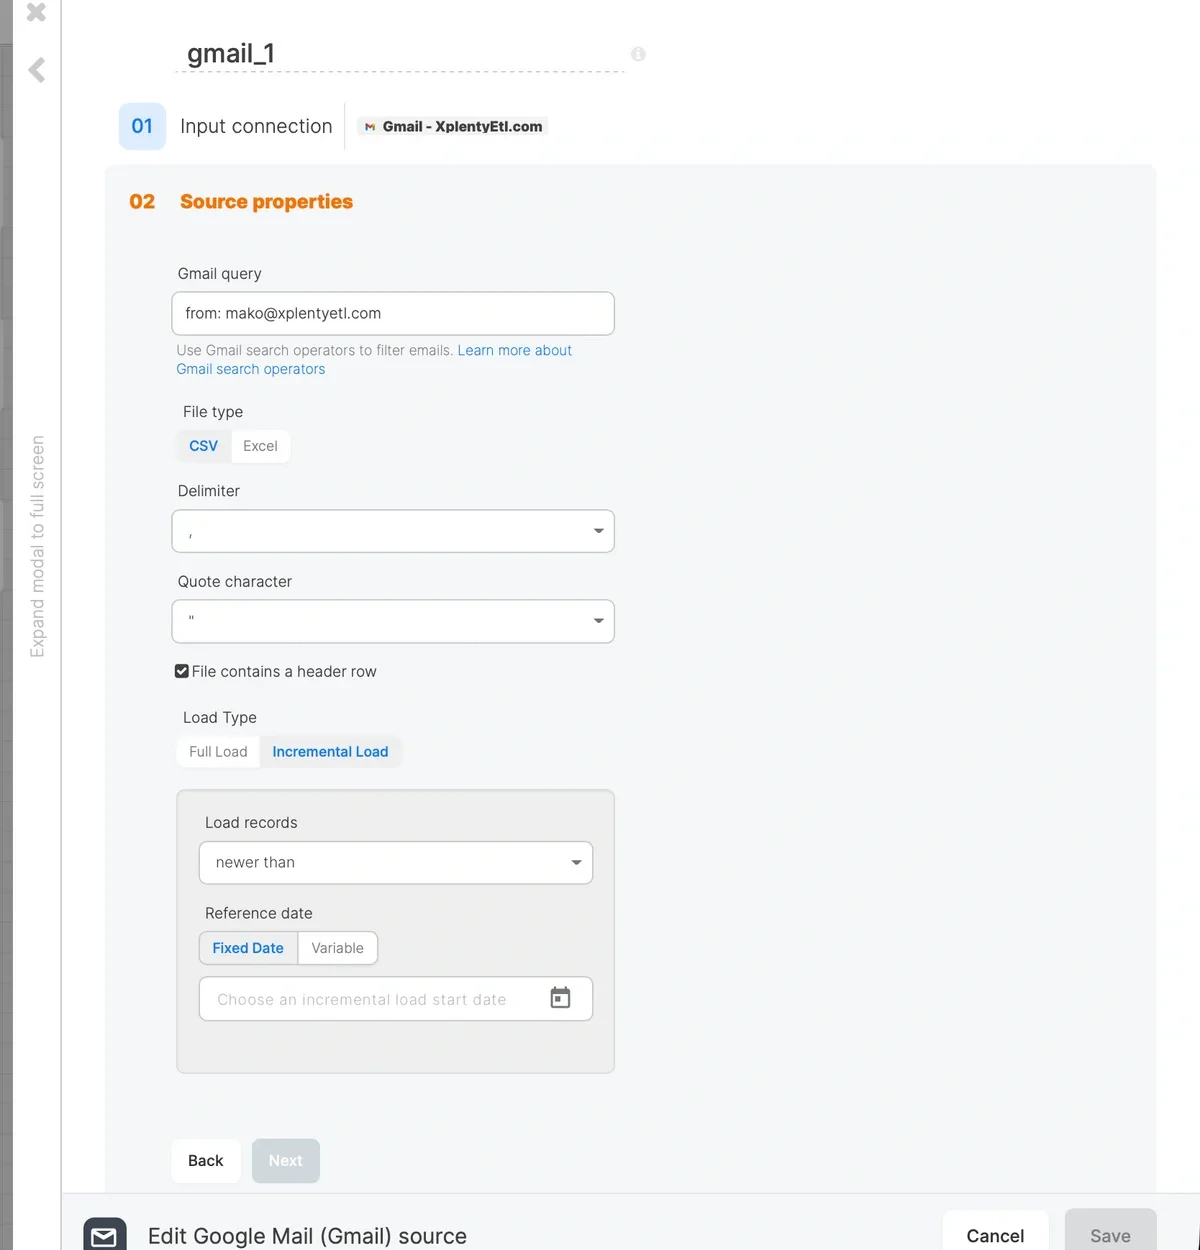
Gmail Query
Enter a Gmail search query to filter which emails are fetched. This field supports all standard Gmail search operators. Examples:from:supplier@example.com has:attachment filename:*.csv: CSV attachments from a specific senderfrom:@example.com has:attachment filename:*.csv: CSV attachments from any sender at a domainsubject:"monthly report" has:attachment filename:*.csv: Emails with a specific subject{from:alice@example.com <from:bob@example.com>} has:attachment filename:*.csv: OR logic across multiple senders
Read From
Select what to extract from each matching email:- Attachments. Read CSV or Excel attachments from matching emails. Each row in the file becomes a row in the pipeline, with email metadata appended as extra columns. This is the default.
- Email body. Read each matching email as a single row. The body, subject, sender, recipient, date, and message ID are exposed as columns. No attachment is required.
File Type
This option appears only when Read From is set to Attachments. Select the format of the attachment files to ingest:- CSV. Comma-separated values
- Excel.
.xlsx/.xlsspreadsheet files
Delimiter, Quote Character, and Header Row
These options appear only when Read From is set to Attachments and File Type is CSV.- Delimiter. Character that separates fields in the CSV file.
- Quote character. Character used to quote field values.
- File contains a header row. Check this box if the first row of the file contains column headers. When enabled, the connector uses the header row to name the schema fields. This is checked by default.
Load Type
Select how records are loaded on each pipeline run:- Full Load. Fetches all emails matching the Gmail query on every run.
- Incremental Load. Fetches only emails received after a reference date. The connector appends an
after:YYYY/MM/DDoperator to your Gmail query at runtime so that only new emails are returned by the Gmail API, keeping API usage low and execution fast.
Incremental Load Settings
When Incremental Load is selected, the following options appear: Load records. Select the filter condition:newer than ( > ): Fetch emails received after the reference date.
- Last successful run. Track emails received since the last successful run of this pipeline. Selecting this option auto-fills
incremental_load_datewith the$_PACKAGE_LAST_SUCCESSFUL_JOB_SUBMISSION_TIMESTAMPsystem variable, so each scheduled run picks up only what arrived since the previous run finished. Recommended for scheduled pipelines. - Fixed Date. Select a specific calendar date using the date picker. Use this for a one-time historical backfill.
- Variable. Use a custom package variable as the reference date. Select this when you need to drive the start date from a value other than the last successful run timestamp.
Schema
After configuring the source properties, the Schema section (Step 03) displays the fields available in the pipeline. The columns depend on the Read From mode.Attachments Mode
Schema fields are derived from the header row of the first matching email attachment. In addition to the columns from the file itself, the connector appends the following metadata columns to every row:
These metadata columns let you trace each row back to its source email and file for deduplication and auditing downstream.
Email Body Mode
Each matching email produces one row with the following columns:
Use a downstream Select or Cross Join with Function component to parse fields out of
email_body (for example, with regular expressions) when you need structured values from the email text.
Example: Extract Order IDs from Notification Emails
Configure the source with:- Gmail query:
from:notifications@example.com subject:"Order confirmed" - Read From:
Email body - Load Type:
Incremental Loadwith$package_last_successful_job_submission_timestampas the reference date